wikiHow is a “wiki,” similar to Wikipedia, which means that many of our articles are co-written by multiple authors. To create this article, 72 people, some anonymous, worked to edit and improve it over time.
The wikiHow Video Team also followed the article's instructions and verified that they work.
This article has been viewed 345,326 times.
Learn more...
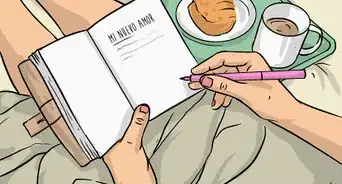
Keeping a daily journal can be therapeutic and rewarding.[1] Fill your diary with all your deepest thoughts, feelings, aspirations, dreams, nightmares, fears, hopes, and more. But, before you do that, create a diary that is inspiring and fun to write in. Selecting and decorating a diary and its pages can strengthen the desire you have to write and turn your dairy into a personal treasure that is unique and special to you.
Steps
Decorating the Outside
-
1Choose an easily customized journal. No matter what type of journal you start off with, there are several ways to decorate it and make it your own. That said, a beautiful leather notebook is a lot harder to decorate than a simple paper journal. There is no wrong journal to buy, of course. But you should think about buying a diary you won't mind decorating later on.
- Look online for customizable diary kits, which come with everything you need to make the diary yours.
- Don't limit yourself to books sold as "diaries." Visit your local bookstore or art supply store to find a variety of sketchbooks, journals, and notebooks that can be easily adapted to your whims.
-
2Decide on a theme to pull your diary together. You don't have to have a theme, but if you're struggling to think of decorations, brainstorm ideas of your favorite things, colors, patterns, and shapes. Another option is to check out sites that could give you ideas such as Pinterest. This site is great for deciding on a theme or aesthetic for your diary. Think about whether you want your diary to look professional and sophisticated or playful and silly. For example, if you really like cats, you can make that a theme of your diary and use cats as inspiration to drive your decoration.
- Pick a favorite quote or song lyric and use it as inspiration.
- Cut out pictures from magazines or old photos to make the diary yours.
- Make a personal collage. You could make your diary a collection of your favorite animals, music, movie stars, foods, etc.
Advertisement -
3Coat the outside of the diary in a new covering to totally change the look of your book. If you would like to change the front cover of your journal, you can glue a piece of fabric, wrapping paper, or any colored paper onto the front cover. You can also cut out shapes, like hearts or stars and glue them on. Pasting a paper cover over the front of the book makes it easier to decorate, and you can always remove the coating to start from scratch.
- If you are using glue, try using a glue stick rather than a bottle of wet glue. This way, you will be less likely to get it onto the pages of your diary accidentally.
- If you are starting with a leather journal, you will need to use hot glue or strong tape to stick fabric or other things onto the cover.[2]
-
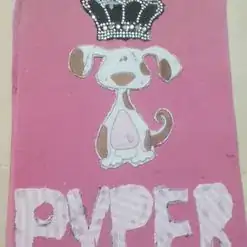
4Prepare the front cover with your name, the title of the diary, or a warning to potential snoops. Since the front cover of your diary is something you will see every time you open it, this is a great place to start decorating.
- If you want your diary to be more sophisticated, try leaving the cover original or covering it with a solid dark color like forest green, black, or brown.
- If you want your diary to be flashy and fun, use a few different pieces of colored paper and fit them over your cover like a puzzle.
-
5Decorate the back cover to go along with the front. You can use the same fabric or colored paper you used for the front to cover the back if you want a cohesive, beautiful book. Or, you can go radically different on the backside, showing off another facet or your personality to make the book unique.
- Keep in mind that the back of your diary will be touching the surface of whatever you are writing on, so it might not stay as clean as the front cover.
-
6Add some glitter for an eye-catching spark. Draw a pattern on the inside, front, or back cover with glue and sprinkle glitter onto the pattern. You can draw glitter hearts, stars, or even write words and cover them with glitter.
- If you don't have glitter, you can even use a smudge of eyeshadow to create a shimmering effect.
- Draw rainbows, music notes, clouds, puppies, or anything else you like!


Decorating the Inside
-
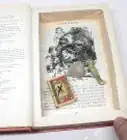
1Decorate the inside covers with paint or drawings. If you'd like, you can use the same paper you used for the outside cover to glue to the inside. You can also draw, place stickers, or even paint the inside covers, as they are usually a much easier surface to work with. Now that you are working on the inside of your diary, you can decorate it with some of your more personal interests. For example:
- Print out a favorite picture of you and your friends and write your full name and the full name of each of your friends under the picture. Draw speech bubbles and write a phrase each of your friends likes to say.
- Cut out a picture of a movie star you think is cute and glue it onto the inside cover.
-
2Write messages to yourself throughout the diary. Write some personal goals that you want to remember each time you open your diary. Like, "A day without laughter is a day wasted," or "Follow your dreams." They can be on the inside cover or along the tops of several pages. These little surprises will make it fun to write in your journal, as you'll likely forget some of them by the time you get to that page.[3]
-
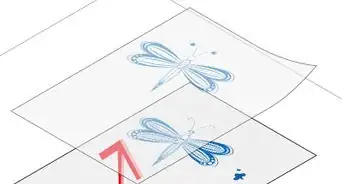
3Create a simple flip-book in the corner of the pages. Flip books are small drawings on every page. Each page, you slightly move the drawing around. When you flip through the pages quickly, the drawing seems to move, allowing you to animate it. If you're an artistic type, draw a little bit more of your drawing every day you write in the book. When you're done you'll have a full diary as well as your little cartoon.
-
4Stick on some stickers! Get some stickers from a craft store and stick them anywhere you'd like on your diary. You can even stick them on the diary pages.
- You can use puffy stickers, but these work much better on the outside covers of your diary. If you use too many puffy stickers on the inside of the diary, it might not close as well.
-
5Add a ribbon bookmark. A ribbon will make your diary look more sophisticated. Adding a ribbon to your diary is easy. If you'd like to add a ribbon:
- Start with a piece of ribbon about 2.5 inches (6.3 cm) longer than your diary on each side.
- Using a bottle of glue with a nozzle, stick the nozzle into the spine opening of your diary and squeeze a small amount of glue inside. Make sure you get a decent sized glob, but don't add so much that the glue will spill out.
- Poke your ribbon down that opening. You can use a sewing needle or a sharp pencil to press one end of the ribbon about 1–2 inches (3–5 cm) inside the opening. When you close the diary, the spine will press against the binding of the book enough to hold your ribbon and glue while drying.
- Make sure you glue your ribbon to the top of your diary and not the bottom.
- Now trim the end of your ribbon into a nice V-point by folding the ribbon in half vertically, and cutting at an angle with sharp scissors.


Adding a Lock
-
1Gather your supplies. If you want to keep your diary top secret and make sure no one gets inside it, you can add a lock to your journal if it doesn't have one already. If you want to make a diary lock, you will need:
- A hole punch
- A short piece of ribbon or thin piece of leather (long enough to go all the way around your diary)
- Tape
- Scissors
- A diary lock.
-
2Punch a hole close to the edge of the notebook, halfway down. Do this on the front and the back cover of the book. If you want to close your diary with a lock, you will need these holes to close your diary with a lock later.
-
3Thread your ribbon through the holes. Flip your diary over to the back cover and thread the ribbon through the hole on the back cover first. This way, your lock will close at the front of your diary.
-
4Line up the ribbon so both sides meet. Tie a knot at the end at the back and cut off any excess ribbon.
-
5Twist the ribbon around so that the knot is closest to the hole. Tape it down, flip the diary over to the front cover, and bring the ribbon over.
-
6Add your padlock. To lock your notebook, thread the ribbon into the hole from inside the cover and out the front. Slide your lock into the loop you have created.
- Make sure you keep your key somewhere secure so that only you can find it!


Community Q&A
-
QuestionMy mum snoops around to find my diary and reads it. What can I do?
 Community AnswerKeep it with you, or buy a larger book that seems school like or boring, and cut the size of your diary in the pages to hide it in there.
 -
QuestionWhat kind of paper I can use to cover the outside of diary?Community AnswerYou can use a thick colored/construction paper, colorful newspapers, stationery or decorative paper, etc. You can even use colored fabric and use fabric paints.
-
QuestionWhat should I do when I have filled my diary?Community AnswerYou can buy another one or decorate a new notebook and use that as a diary. Keep the old one for your memories!
Warnings
- Don’t leave your diary in a public place and walk away from it. Always make sure you have it with you so you don’t lose it.⧼thumbs_response⧽
- If you lock your diary with a key, make sure you keep the key in a safe place where you won't lose it or forget where it is.⧼thumbs_response⧽
- If you bring your diary to school, don’t mention it to other people. Some people might try to sneak it out of your backpack when you aren’t looking.⧼thumbs_response⧽
- Lock it up if you want to keep it extra safe.⧼thumbs_response⧽
- Keep your diary in a safe place. If you leave it around the house, someone might get curious and accidentally open it.⧼thumbs_response⧽