This article was co-authored by wikiHow Staff. Our trained team of editors and researchers validate articles for accuracy and comprehensiveness. wikiHow's Content Management Team carefully monitors the work from our editorial staff to ensure that each article is backed by trusted research and meets our high quality standards.
There are 9 references cited in this article, which can be found at the bottom of the page.
This article has been viewed 47,551 times.
Learn more...
For centuries, hats have served as fashions statements that make any outfit instantly more exciting. They are fun to wear, but sometimes they can get boring over time. If you feel like your hats need a makeover, you can add new embellishments to make them fresh again. You don’t have to spend a lot of money to get a great style reboot.
Steps
Gathering Your Materials
-
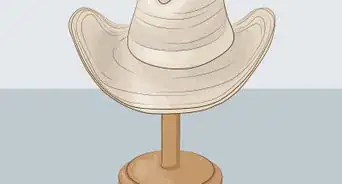
1Choose your hats. Hats are a very personal item, and people like different styles.[1]
- You can use hats that you already have, or buy inexpensive, plain hats to customize.
- Pick your hats based on styles you like, or look into finding hats that complement your features.[2]
- For example, rounder faces look best in hats that have some height and aren’t too close to the face, like a medium-brimmed fedora.[3]
- Baseball caps, wide-brimmed straw hats, fedoras, cowboy hats, top hats, and beanies can all be customized in different ways.[4]
-
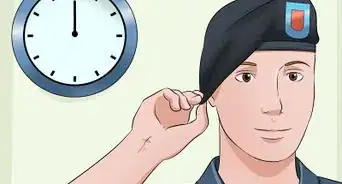
2Determine your occasion. When you plan to wear your hat will have an effect on how you want to decorate.
- For example, if you just want to customize the baseball cap you wear all the time when you run errands, you probably won’t add feathers or glitter.
- However, if you want to make a derby or costume hat, you might want to add more over-the-top decorations.
Advertisement -
3Stock up on pretty decorations. Having lots of materials to work with can help inspire your final design.
- Lay out all your materials in front of you, and think about which colors complement each other.[5] Make piles of decorations you think go together.
- For subtler designs you might want things like: embroidery thread and a needle, fabric paint or fabric markers in an array of colors, and scraps of patterned fabric. Craft stores will often have short ends of fabric on sale.
- For a grander hat consider: ribbon, feathers, fake flowers,sequins, tulle, and glitter.
- Regardless of the extent of your decoration, make sure you have scissors and some type of glue on hand. Especially for bulkier decorations like feathers, hot glue works best and glues easily.


Adding Simple Decor to Your Hat
-
1Put a ribbon on it. A plain hat like a fedora or straw hat can be instantly dressed up by adding a new ribbon above the brim.[6]
- Measure the circumference of the base of the crown of the hat with a flexible measuring tape made for sewing, and cut your ribbon about an inch longer than this measurement, so you have a small overlap to glue.
- Glue the ribbon around the hat. Use a small line of hot glue in the middle of the ribbon. Tuck the exposed edge under slightly so it doesn’t look frayed or become more frayed over time.
- For whimsy, use a bright ribbon with a pattern like polka dots or stripes.
- For a more classic style, use a solid color, satin ribbon.
-
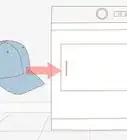
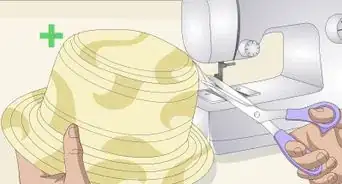
2Make a small, embroidered design. This works well to adorn fabric hats like the top of a baseball cap or a woven bean.[7]
- First, use a piece of white chalk or chalk pencil to draw the design you want to create on your hat. It can help to mark off where you want each individual stitch by using dotted lines.
- Then, thread an embroidery needle with embroidery floss in your color of choice. You can find both of these at most craft stores. They will be labeled for embroidery.
- Follow your design by bringing the need down and through each of your dotted stich marks. When you finish your design, tie off the end of the thread so that your embroidery doesn’t come out.
- If you’ve never embroidered before, start with a simple design, like a geometrical shape or group of shapes like squares or stars.
- You can go back over your design with a different color of thread if you want a bit more complexity.
-
3Add a flower. A single homemade rosette can be a nice touch on a hate like a fedora.[8] You can use any fabric you want, like tulle or thick cotton.
- Cut out petals from your fabric. These should be ovals in varying sizes. You’ll want a few large petals for the bottom of your flower and smaller ones for the top petals.
- To attach them, either sew them together, or glue them on top of one another. Cross two petals on the bottom, and continue them upward until you use your smallest petals.
- Glue the finished rosette to your hat with a large dot of fabric glue or hot glue.
-
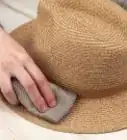
4Draw on your hat. Another two-dimensional way to spice up your hat is to draw on it with fabric markers or paints. This is great for first-time fabric crafters.
- Draw your design on your hat first in pencil or with chalk.
- Use the fabric markers to go over the outline you made, and then fill in your design with additional colors.
- This works well with hats like baseball caps that are made from cotton. It doesn’t work as well on textured materials like straw or felt. If you do want to draw on a more textured hat, opt for the fabric paint over the markers.


Creating Stand-out Hat Designs
-
1Create some sparkle. For an eye-catching design, you might want to add some decorations to your hat that will catch the light.
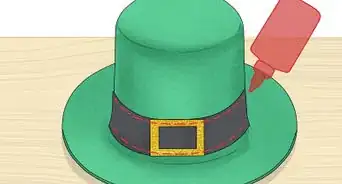
- Use dots of hot glue to add sequins, rhinestones, or shiny buttons all over your hat.
- If you want to use glitter, first spread a thin layer of glue on your hat where you want the glitter to go. Fabric glue works well for this. You could make a design like a star.
- Shake the glitter over your glue design, and then, after waiting about a minute, gently shake off any excess. Make sure you have a piece of newspaper under your hat to catch any excess glitter.[9]
-
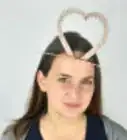
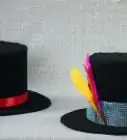
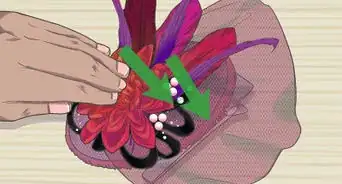
2Increase the height. For an over-the-top hat, you want to add as much tasteful volume as you can.
- Feathers can be glued against the crown of a hat. Try using different colors and sizes in an arrangement for more visual interest.
- A cluster of homemade rosettes can make a great statement, whether they are an array of colors or monochromatic.
- Tulle fabric can be cut and shaped into a huge bow to add to almost any design. If you want a tulle bow, first form the bow and glue it together, and then glue it to your hat.
-
3Create a theme for your hat. This will help you envision your finished product, and make a statement.
- Your theme could be as simple as shades of blue, or more complex.
- For example, you could have a garden theme, and glue branches of fake flowers and little fake bird onto your hat.
- Or, you might have a more modern them, and only use black and white decorations, like clear rhinestones and a spray of black feathers on top of a black hat.


Warnings
- Be careful with the hot glue gun, especially when using materials like tulle. It can cause serious burns if it makes contact with your skin.⧼thumbs_response⧽
Things You'll Need
- Hats to embellish
- Decorative materials of your choice: fabric, paints, glitter, rhinestones, tulle, etc.
- Adhesives (hot glue and fabric glue)


References
- ↑ http://www.evo.com/how-to-buy-hats-types-styles-materials.aspx
- ↑ http://www.goorin.com/find-the-perfect-hat/
- ↑ http://www.marieclaire.com/fashion/news/a14201/best-hat-for-face-shape/
- ↑ http://www.bustle.com/articles/59709-14-different-styles-of-hats-that-will-help-you-start-your-own-legacy-because-millinery
- ↑ http://paletton.com/#uid=14R0u0kllllaFw0g0qFqFg0w0aF
- ↑ http://dalexs.whitvani.net/hat/hatpage.html
- ↑ http://www.craftsy.com/blog/2015/07/embroidery-on-t-shirts/
- ↑ http://sweetcsdesigns.com/5-minute-fat-quarter-rosettes/
- ↑ http://www.madiganmade.com/2014/02/my-essential-tips-for-crafting-with.html
About This Article