This article was co-authored by wikiHow Staff. Our trained team of editors and researchers validate articles for accuracy and comprehensiveness. wikiHow's Content Management Team carefully monitors the work from our editorial staff to ensure that each article is backed by trusted research and meets our high quality standards.
The wikiHow Video Team also followed the article's instructions and verified that they work.
This article has been viewed 72,820 times.
Learn more...
If you want your hat shaped a certain way or to conform to your head, there are several ways you can achieve the look you want. If you're trying to shape a felt or straw hat, use steam to loosen the fibers in the hat and shape it with your hands. To shape a baseball cap, use your hands, hot water, or even a coffee mug to bend the hat however you'd like.
Steps
Steaming a Felt or Straw Hat
-
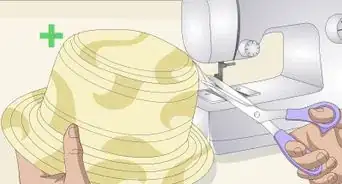
1Create steam using a steamer or kettle. You’ll need a steady stream of steam to loosen up the fibers in the hat, allowing you to reshape it. It’s easiest to use a steamer, but a hot kettle or iron works too.[1]
- Be careful not to burn yourself when creating and using the steam by keeping your hands out of the steam's direct path.
- If you're using an iron, work carefully to avoid burning the hat on the hot iron.
-
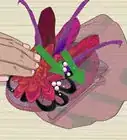
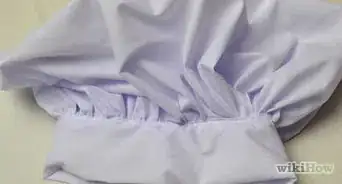
2Hold the hat over the steam so that the pores in the fabric open up. Pick up the felt or straw hat and hold it about 6–12 inches (15–30 cm) away from the spot the steam is coming out of. Slowly move the hat around in the steam for a few seconds so that the hat starts to loosen up, focusing the steam on the sections of the hat you want to reshape.[2]
- Make sure the hat is close enough to be fully-enveloped in the steam.
Advertisement -
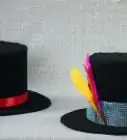
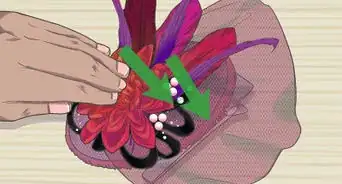
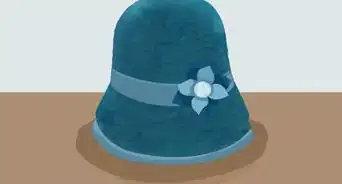
3Shape the hat using your hands. Remove the hat from the steam and start using your hands to create the creases you like. You can make a crease in the crown by pressing down with your fingers, roll the brim up on each side, or generally personalize it however you’d like.[3]
- If you'd like to shape different sections, such as adding a crease to the crown and rolling up the brim, steam and work the hat in separate steps.
- For example, a felt cowboy hat looks better with indents in the crown, while a straw sun hat looks great with rolled up sides.
-
4Steam and shape the hat until you achieve your desired look. If you don’t get your hat exactly how you’d like it after the first steam, continue steaming the hat and then shaping it using your hands. You can do this as many times as needed.[4]
- Take your time while shaping the hat so that you get it just right, sticking it back in the steam after several seconds of shaping.
- Remember not to hold the hat in the steam for more than a few seconds at a time.
-
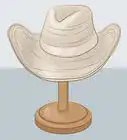
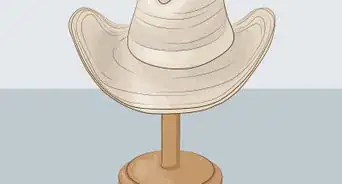
5Let the hat dry so the shape will hold. Once you’re satisfied with how your hat looks, turn off the steam and set the hat in a dry, warm spot. Putting it on a flat table is recommended, and you can place it in natural sunlight or just in a warm room.[5]
- Avoid setting anything on top of the hat so that it can dry perfectly.
- The hat should only take about an hour or two to dry in a warm environment.
- As the hat is drying, you can place it on your head for a few seconds to check the shape, repeating the steaming process if needed.


Molding the Bill of a Baseball Cap
-
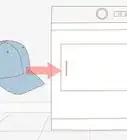
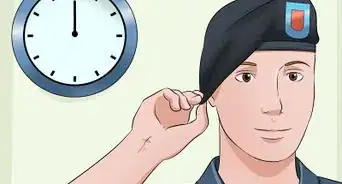
1Soak the crown of the hat in hot water so it softens. Fill a tub or sink with hot water and hold the crown of the hat in the water for a minute or less. Wear the hat until it dries, letting it mold to the shape of your head. Be careful not to burn your hands when using the hot water.[6]
- Avoid getting water on the bill unless you’d like to shape the bill as well.
- If you do want to shape the bill, you can do so before or after shaping the crown.
- Wait a few minutes for the hat to cool before wearing it.
-
2Shape the bill of the hat with your hands for precise bends. Using your hands to bend the bill while it's still dry is the best way to ensure you have the most control over the shape of your hat. Bend the bill however much you’d like, either while you’re wearing the hat or while holding it.[7]
- You’ll need to bend the hat using your hands frequently so that it starts to take the shape you want.
-
3Wrap the dry bill around a softball to make it nicely curved. Place a softball underneath the bill of the hat and use a rubber band to tie the softball to the bill. Make sure the bill is wrapped tightly around the softball so that it will have a real curve. Leave the softball wrapped in the hat for a day or two so it bends properly.[8]
- Undo the rubber band whenever you’d like to check on the bill of your hat, if desired.
-
4Stick the bill of the hat in a mug for an easy fix. This is a good way to bend the bill without a lot of effort or getting the hat wet. Get out an empty, clean coffee mug and fit the bill of the hat inside so that it’s bent in a semicircle. Leave the hat in the mug overnight, or until you’re satisfied with the shape of the hat.[9]
- Pick out a coffee mug that's a perfect circle so that the bill of the cap will form a perfect semicircle.


Things You'll Need
Steaming a Felt or Straw Hat
- Steamer, kettle, or iron with steam function
Molding a Baseball Cap
- Tub of hot water (optional)
- Softball (optional)
- Rubber band (optional)
- Coffee mug (optional)

References
- ↑ https://www.youtube.com/watch?v=Lwr5NSBsewk
- ↑ https://www.youtube.com/watch?v=Lwr5NSBsewk
- ↑ https://www.youtube.com/watch?v=UJI41GdThrk
- ↑ https://www.youtube.com/watch?v=UJI41GdThrk
- ↑ https://www.youtube.com/watch?v=UJI41GdThrk
- ↑ https://healthfully.com/shape-baseball-cap-brim-4915238.html
- ↑ https://www.artofmanliness.com/articles/why-you-should-parent-like-a-video-game/
- ↑ https://healthfully.com/shape-baseball-cap-brim-4915238.html
- ↑ https://www.artofmanliness.com/articles/why-you-should-parent-like-a-video-game/
About This Article