This article was co-authored by wikiHow Staff. Our trained team of editors and researchers validate articles for accuracy and comprehensiveness. wikiHow's Content Management Team carefully monitors the work from our editorial staff to ensure that each article is backed by trusted research and meets our high quality standards.
The wikiHow Video Team also followed the article's instructions and verified that they work.
This article has been viewed 2,268,630 times.
Learn more...
Hats are a great way to add character and fun to a party, play, or dress-up game. Instead of buying hats from the store, however, consider making your own. It is a simple, fun project suitable for all ages. Once you know how to make a basic hat, the possibilities are endless!
Steps
How to Make a Sailor or Alpine Hat
-
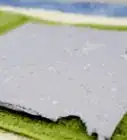
1Crease a rectangular sheet of paper down the middle. Fold the paper lengthwise (hotdog style). Run your fingernail along the crease, then unfold the paper. You will use this crease as a guide later on.[1]
- A sheet of newspaper around 29 1⁄2 by 23 1⁄2 inches (75 by 60 cm) will work the best, but you can use a sheet of printer paper to make a smaller doll-sized hat too.
-
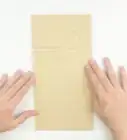
2Fold the paper in half widthwise. Bring the narrow ends together, then flatten the paper (hamburger style). Run your fingernail along the crease to sharpen it. Do not unfold the paper.[2]Advertisement
-
3Fold the top corners to the center crease. Rotate the paper so that the folded edge is along the top of the paper. Fold the top left and right corners to the vertical crease running down the middle of your paper. You will end up with a house shape.[3]
-
4Fold 1 of the flaps along the bottom edge up. There are 2 layers or "flaps" of paper along the bottom edge of your house shape. Take the top flap and fold it upwards. The new crease along the bottom edge of the paper should be flush with the bottom edges of the triangles.[4]
-
5Fold the brim inwards if it is too wide for you. Unfold the brim to reveal a crease. Fold the bottom edge up to this crease, then fold the brim back up, like in the previous step.[5]
- How wide you make the brim is entirely up to you and your personal tastes. Most people like theirs between 1 and 2 inches (2.5 and 5.1 cm).
-
6Flip the paper over and fold the second flap up too. If you folded the brim twice earlier, you should fold it twice this time around too.[6]
-
7Tape the corners of the brim, if desired. You don't have to do this, but it will give your hat a nicer finish. Wrap pieces of tape around both of the side edges of the brim to hold them together. You can also use glue instead, but let the glue dry.
- To make an alpine hat, fold the corners of the brim down behind the band so that your hat looks like a triangle. Glue the edges of the brim to the hat.[7]
-
8Open the base of the hat to put it on. For an alpine or Peter Pan look, wear the hat with the triangle parts over your ears. For a bicorn or pirate look, wear the hat with the triangle parts over your forehead instead.

How to Make a Paper Cone Hat
-
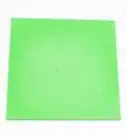
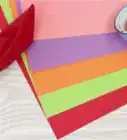
1Choose paper that is twice as tall as the hat you want to make. For example, if you want your hat to be 12 inches (30 cm) tall, the paper should be at least 24 inches (61 cm) tall. Pick a color that works with the type of hat you are making. For example, pink would work well for a cone-shaped medieval princess hat while black would work for a witch hat.[8]
- Construction paper and scrapbooking paper will work well for smaller hats. If you want to make something big, like a princess or witch hat, use poster paper instead.
-
2Draw a semicircle on the paper. You can do this with a plate, compass, or a pencil tied to a piece of string. The circle needs to be twice as tall as you want the hat to be. For example, if you want a 12-inch (30-cm) tall princess hat, the circle should be 24 inches (61 cm) wide.[9]
- Draw the circle along 1 of the edges of the paper. This way, the straight edge will be even.
-
3Cut the semicircle out with scissors. If your paper is plain, now would be a great time to decorate it with paint, markers, stamps, or stickers. Do not put anything too bulky on the paper just yet. If you used paint, be sure to give it time to dry.
-
4Roll the paper into a cone, then secure the seam. Curl the straight edges of the paper together until they meet, then overlap them until you get a cone. The more you overlap the edges, the narrower the cone will be. Once you are happy with the size, tape, staple, or glue the seam together.[10]
-
5Cut a brim and glue it on if you are making a witch's hat. Stand the cone up on a sheet of paper and trace around the base. Set the cone aside, and trace around the circle to make a wider brim. Cut the bigger circle out, then cut the smaller circle out. Tape or glue the brim to the bottom of your cone.
- Hot glue will work, but you can use tape as well--put the tape on the inside of the cone so that you can't see it on the outside.
- Skip this step if you are making a different kind of hat.
-
6Staple a thin elastic cord to the bottom of the hat, if desired. Cut an elastic long enough to wrap under your chin while you are wearing the hat, plus 2 inches (5.1 cm). Tie a knot in each end of the elastic, then staple it to the bottom of the hat. Place the knot above the staple.[11]
-
7Decorate your hat to give it more character. The possibilities are endless here. You can give your hat a different look just by gluing different items to it. Hot glue will work the best here, but you can use tacky glue instead if you have nothing else. Here are some ideas to get you started:
- Clown: paint polka dots on the hat, then hot glue a large pompom to the tip.
- Santa: glue a white pompom to the top of the hat, then more white pompoms around the brim.
- Party hat: cut a fringe from crepe paper, then glue it to the inside of your hat's brim. Hot glue a pompom to the top.[12]
- Princess: add strips of tulle, crepe paper, or tissue paper to the tip. Hot glue a skinny white boa around the base.
- Witch: wrap a Halloween-colored ribbon around the base of the hat. Cut a buckle shape from paper, and glue it over the ribbon.
- Wizard: draw stars and moons using gold or silver glitter glue.
-
8Let the hat dry before you wear it. How long this takes depends on the type of glue you used. Hot glue dries within minutes, but tacky glue can take several hours. Once the glue is dry, your hat is ready to wear!


How to Make a Paper Plate Hat
-
1Fold a large paper plate in half. Choose a thin paper plate that is around 10 to 12 inches (25 to 30 cm) and fold it in half. Make sure that the plate is blank on both sides. Avoid paper plates made from stiff cardboard.[13]
-
2Cut away the rim part way. Turn the plate so that the folded edge is running vertically. Start cutting at the top of the folded edge and stop cutting when you are 1 inch (2.5 cm) away from the bottom of the folded edge. Cut closer to the rim for a larger hat, and further from the brim for a smaller hat. Do not cut the entire center out.[14]
- If you want to make a crown, cut the inside of the plate into wedges like a pizza. Start at the folded edge and stop inside the rim. Do not cut past the rim.
-
3Draw a half-shape along the fold, starting at the 1-inch (2.5-cm) gap. Use a pencil to sketch out half of a shape along the fold, such as a semi-heart, semi-star, or semi-shamrock. Make sure that the bottom of your shape connects to the 1-inch (2.5-cm) gap.[15]
- It is important that your shape connects to that 1-inch (2.5-cm) gap, or it will fall out.
- Skip this step if you are making a crown.
-
4Cut along the lines that you drew. The extra material between the symmetrical shape and the rim of the plate will fall away. Discard this extra material.
-
5Unfold the plate and decorate your hat. When you unfold your plate, you will be left with a ring shape that has a symmetrical shape in the middle. Decorate your hat as desired, then let it dry.[16]
- Paint your hat with acrylic, poster, or tempera paint.
- Draw designs on it with glitter glue.
- Glue rhinestones or sequins to the hat for extra sparkle.
- Decorate the hat with other items, such as stickers, pompoms, or buttons.
-
6Fold the shape up so that it is perpendicular to the hat. Find the spot where your shape connects to the hat. Fold the shape along this gap upwards so that it stands straight up. If you made a crown, simply fold all of the triangles upwards until they stick up.[17]
-
7Wear the hat. If the hat is too small, cut around the inside rim to make it bigger. If the hat is too big, cut the brim apart in the back. Overlap the 2 ends until the hat fits, then glue, tape, or staple them together.

Community Q&A
-
QuestionHow do I measure my head size for the cap?
 Edward LiuCommunity AnswerUse a bendable ruler to measure your head, then measure your paper you are making the hat out of. Soft tape measures for sewing work great.
 -
QuestionCan you actually wear the cone hat? It looks so small.
 Community AnswerOnly if you punch holes and put in elastic to go under your chin and keep it on your head.
 -
QuestionCan we make this for a school project for us to wear?Community AnswerYes. It would make a nice school project.
Warnings
- Do not use a high-temp hot glue gun. It can give you blisters. Use a low-temp glue gun instead.⧼thumbs_response⧽
Things You'll Need
Making a Sailor or Alpine Hat
- Newspaper
- Tape or glue (optional)
Making a Paper Cone Hat
- Paper
- Plate
- Scissors
- Pencil
- Stapler, glue, or double-sided tape
- Thin elastic cord (optional)
- Embellishments (glitter glue, pompoms, rhinestones, etc.)
Making a Paper Plate Hat
- Paper plate
- Scissors
- Pencil
- Stapler, glue, or double-sided tape
- Thin elastic cord (optional)
- Embellishments (glitter glue, pompoms, rhinestones, etc.)
References
- ↑ https://www.origamiway.com/origami-hat.shtml
- ↑ https://www.origamiway.com/origami-hat.shtml
- ↑ https://www.origamiway.com/origami-hat.shtml
- ↑ https://www.origamiway.com/origami-hat.shtml
- ↑ https://www.skiptomylou.org/how-to-make-newspaper-party-hats/
- ↑ https://www.skiptomylou.org/how-to-make-newspaper-party-hats/
- ↑ https://www.goldencarers.com/traditional-alpine-hats/4852/
- ↑ https://www.firstpalette.com/tool_box/quick_how_to/Cone_Hat/Cone_Hat.html
- ↑ https://www.firstpalette.com/tool_box/quick_how_to/Cone_Hat/Cone_Hat.html
- ↑ https://www.firstpalette.com/tool_box/quick_how_to/Cone_Hat/Cone_Hat.html
- ↑ https://www.livingwellspendingless.com/2011/04/26/party-diy-how-to-make-a-paper-party-hat/
- ↑ https://www.livingwellspendingless.com/2011/04/26/party-diy-how-to-make-a-paper-party-hat/
- ↑ https://alphamom.com/family-fun/holidays/diy-holiday-hats-for-every-occasion/
- ↑ https://alphamom.com/family-fun/holidays/diy-holiday-hats-for-every-occasion/
- ↑ https://alphamom.com/family-fun/holidays/diy-holiday-hats-for-every-occasion/
- ↑ https://alphamom.com/family-fun/holidays/diy-holiday-hats-for-every-occasion/
- ↑ https://alphamom.com/family-fun/holidays/diy-holiday-hats-for-every-occasion/
About This Article

To make a paper hat, first fold an 8 by 11 inch (20 by 28 cm) piece of paper in half lengthwise and unfold. Then, fold the paper in half again from top to bottom. Next, fold the top left corner down to the middle crease. Repeat with the top right corner. Now, fold up the top flap along the bottom edge. Flip the paper over, and do the same thing on the other side. Finally, pull the bottom edges apart to open up your hat. To make a paper cone hat for parties, first draw a half circle that’s between 6 and 8 inches (15 - 18 centimeters) across on a piece of construction paper using a compass. Then, cut out the half circle, and bring the ends together to form the cone. The more you overlap the ends, the smaller your cone hat will be. Finally, adjust the cone so it fits your head, then staple or tape the ends together at the base. Keep reading the article if you want to learn how to roll the paper into a cone hat!