This article was co-authored by wikiHow staff writer, Hannah Madden. Hannah Madden is a writer, editor, and artist currently living in Portland, Oregon. In 2018, she graduated from Portland State University with a B.S. in Environmental Studies. Hannah enjoys writing articles about conservation, sustainability, and eco-friendly products. When she isn’t writing, you can find Hannah working on hand embroidery projects and listening to music.
There are 12 references cited in this article, which can be found at the bottom of the page.
The wikiHow Video Team also followed the article's instructions and verified that they work.
This article has been viewed 19,430 times.
Learn more...
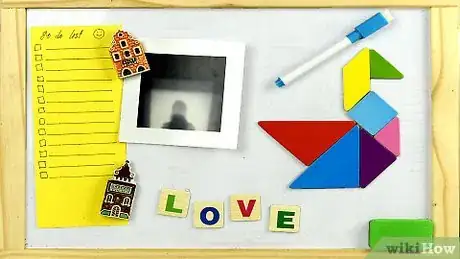
A whiteboard is an excellent tool for teaching, learning, and working. It can also help you stay organized if you use it in your home. Most whiteboards are plain and leave a lot to be desired in the design aspect. To decorate your whiteboard, try framing it with tape or lace, attaching magnets to it, or using a banner to spice it up.
Steps
Adding a Border or Frame
-
1Put baseboards around your whiteboard for a rustic look. If you have a big whiteboard and you’re tired of the plain white color, use wood glue to attach baseboards outlining your whiteboard. If your boards are too long, cut them using a table saw. Add a coat of paint to spice up the frame around your whiteboard.[1]
- You can find old baseboards at hardware reuse stores.
-
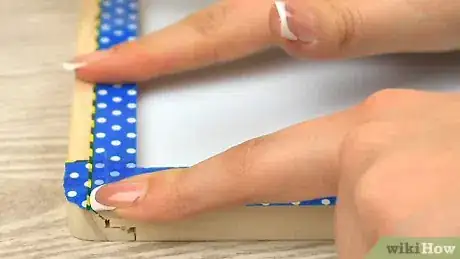
2Add patterned tape around the edges for a simple frame. Find some Washi tape or duct tape that has a cute pattern on it. Remove the screws and the metal frame from around the whiteboard. Cut 4 pieces of tape that are about as long as each side of your whiteboard. Add your tape to the edges of the whiteboard in a straight line. Smooth out each piece of tape so it lies flat. Overlap the pieces on the corner of your whiteboard for full coverage.[2]
- Since you removed the backing of your whiteboard, hang it up with velcro strips instead.
- You can find patterned tape at most craft supply stores.
Advertisement -
3Outline your whiteboard in lace for a feminine look. If patterned tape isn’t quite for you, consider putting down some lace around the outside of your whiteboard. Choose a colored lace so that it shows up against the whiteness of the board. Cut 4 pieces of lace that are about as long as each side of your whiteboard. Tape the lace in place with tape or use hot glue for a more secure bond.[3]
- You can buy lace at most fabric or craft stores.
- You can attach lace over a patterned tape border for a more 3-dimensional look.
-
4Hang a banner above your board to express yourself. Make a banner by cutting out about 20 pieces of paper in a triangle shape. Punch holes at the top of each triangle. Use markers or cut-outs to add letters to each triangle. Spell out the subject of your classroom, a motivating phrase, or a message to your roommates. Run a length of twine through your punched out holes and attach the twine above your whiteboard to the wall with push pins.[4]
- Your banner can even spell out something inspiring, like “Do Your Work,” or “Get Stuff Done.”
-
5Make a whiteboard out of a picture frame for a DIY option. If you want your whiteboard to look great with all of your other decorations, find a picture frame that has a glass front. Put a patterned piece of paper inside of the picture frame and hang it on your wall. Use dry erase markers to write on the glass front of your picture frame.[5]
Tip: If you can’t find a frame that you like, buy some acrylic paint and give an old picture frame a fresh color.
Keeping Your Whiteboard Organized
-
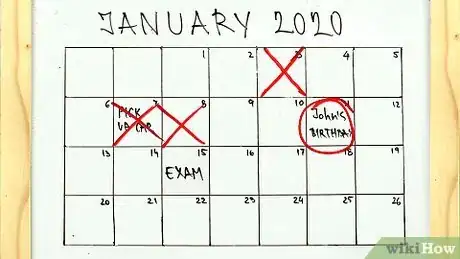
1Draw a calendar on your whiteboard for a monthly agenda. Use whiteboard markers or thin tape to section off about 30 boxes. Add the numbers to correspond with the date in each box. Use your whiteboard calendar to jot down appointments, dates, and deadlines.[6]
- Leave a small space for notes on your whiteboard to write down important information.
-
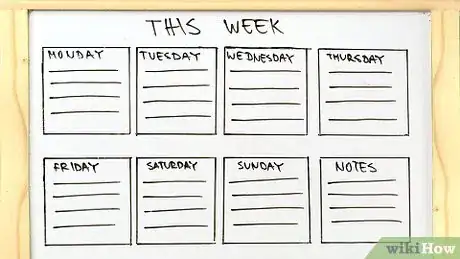
2Create a weekly planner to stay organized. If you use your whiteboard to keep yourself organized, write down the days of the week for a 7-day to-do list. Leave enough room in each section to note assignments and tasks that you need to accomplish. Section the days off with tape or use a dry erase marker to draw straight lines.[7]
Tip: If you plan on using your whiteboard as a planner permanently, draw lines to section off the days in permanent marker.
-
3Make sections out of thin tape for a multi-use whiteboard. If you use your whiteboard for organization, the big blank space in the middle can be intimidating. Break up your whiteboard into days of the week, assignments, or class periods with thin tape. Decide how many sections you want and then cut pieces of tape for each section. Make sure the tape is straight by holding a ruler or level up as you apply the tape. Label each section with a dry erase marker.[8]
- Use patterned tape to be bold, or stick with a simple theme and use plain black tape.
-
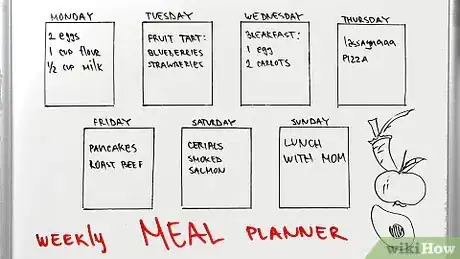
4Mark out a menu to create a meal plan. If you’d like to keep your kitchen organized, section your whiteboard out into days of the week with dry-erase markers or thin tape. Use the sections to write down the meals you are going to eat each day. Keep a small section at the bottom open to jot down a grocery list.[9]
- Keep the whiteboard in your kitchen for easy access.
Attaching Items to the Whiteboard
-
1Use magnets to hold paper and pictures. Most whiteboards are magnetic. Find some cute magnets that are strong enough to hold papers and signs that you’d like to display on your whiteboard. Place them strategically around your board, leaving yourself room to write.[10]
- Hang up photos of your friends and family, inspirational sayings, pretty pictures you find in magazines or online to make the whiteboard unique.
Tip: If you have a small whiteboard, keep your magnets on the outside edges to give yourself enough space.
-
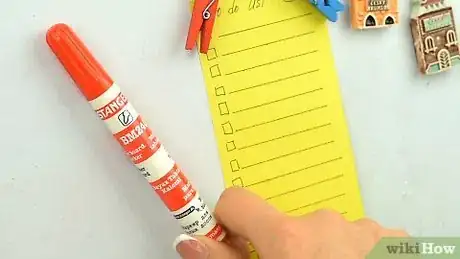
2Opt for magnetic clothespins to hold documents. Use a hot glue gun to attach magnets to the back of clothespins. Hang the clothespins on your whiteboard and use them to hold papers, reminders, and to-do lists. If you’re feeling creative, add some glitter paint to the clothespins before attaching your magnets.[11]
- You can also use clothespins to hold up photos.
-
3Stick dry-erase markers with magnetic backings to the board. It can be easy to lose track of your whiteboard markers. Purchase some markers with a magnetic backing or attach a magnet to your own markers with hot glue. Attach them to your whiteboard to make sure they don’t wander off or fall down.[12]
- Smaller whiteboards usually come with a few dry erase markers that have magnetic backings.
References
- ↑ https://ourpastimes.com/how-to-make-a-cheap-frame-for-a-whiteboard-12609157.html
- ↑ https://www.youtube.com/watch?v=6oZzNcvCtR8&feature=youtu.be&t=108
- ↑ https://www.youtube.com/watch?v=6oZzNcvCtR8&feature=youtu.be&t=151
- ↑ https://www.youtube.com/watch?v=C-xV-NIK2Yk&feature=youtu.be&t=1097
- ↑ https://www.youtube.com/watch?v=VDSyTYGzEx4&feature=youtu.be&t=32
- ↑ https://www.youtube.com/watch?v=D5rozTNVSPA&feature=youtu.be&t=111
- ↑ https://www.youtube.com/watch?v=XjsSfNckKfs&feature=youtu.be&t=92
- ↑ https://www.youtube.com/watch?v=YwPjVFheUyI&feature=youtu.be&t=135
- ↑ https://www.youtube.com/watch?v=aA_8JZx9c4o&feature=youtu.be&t=450
