This article was co-authored by Ollie George Cigliano and by wikiHow staff writer, Janice Tieperman. Ollie George Cigliano is a Private Chef, Food Educator, and Owner of Ollie George Cooks, based in Long Beach, California. With over 20 years of experience, she specializes in utilizing fresh, fun ingredients and mixing traditional and innovative cooking techniques. Ollie George holds a BA in Comparative Literature from The University of California, Berkeley, and a Nutrition and Healthy Living Certificate from eCornell University.
This article has been viewed 12,819 times.
Freezing whole chicken is a great solution when you’re in a pinch, especially if your daily meal schedule is pretty hectic. While it may be tempting, don’t leave your chicken to thaw on the counter, or in any warm, room temperature area where it can develop bacteria.[1] Although it’s always safest to gradually thaw your chicken in the refrigerator, there are few safe ways to defrost your chicken in a matter of minutes or hours.
Steps
Thawing in the Microwave
-
1Read your user manual to see how long meat needs to be heated for. Some microwaves have different settings and power levels, so it’s important to see what the microwave manufacturer recommends. Depending on the model, there might be a special button for meat, or a more general defrost button you can use.[2]
- If you can’t find your user manual, try finding your microwave’s “defrost” button instead.
- If you don’t have a copy of your user manual, check online to see if there’s a digital one you can look at.
-
2Place your frozen chicken on a microwave-safe dish. Find a large bowl or dish that your bird will fit in. The bowl or dish will collect juices and water that escape from the chicken as it defrosts.[3]
- If your chicken is covered in plastic or some kind of wrapping, be sure to remove it before using the microwave.
Advertisement -
3Heat your chicken for 2 minutes on the defrost setting. Find the defrost button on your microwave and press it, if possible. Set the cooking timer to 2 minutes so the meat has time to defrost all the way.[4]
- Don’t use your regular microwave settings for this! If you’re working with raw meat, this may cause your chicken to start cooking.
- Some microwaves may not have a defrost button. Just do the best that you can with whatever settings your microwave has!
-
4Check to see if the chicken is still frozen. Note that when the chicken is fully thawed, there won’t be any cold or otherwise frozen sections of meat on the bird. If the chicken feels completely thawed, remove it from the microwave and get ready to cook it.[5]
- Always wash your hands after handling any kind of raw meat.
-
5Repeat the short heating cycles until the chicken is fully defrosted. Keep heating your chicken in 2 minute increments until it’s completely thawed. Feel the chicken between each microwave cycle—if it still seems frozen, you need to keep defrosting.[6]
Warning: Be sure to cook your chicken as soon it’s thawed.[7]


Soaking with Cool Water
-
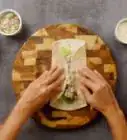
1Place your chicken in a sealed, leak-proof bag. Find a large, resealable storage bag that your whole chicken can comfortably fit into. Tighten the seal along the top of your bag so your chicken is completely air-tight.[8]
- The bag prevents any bacteria from getting into the chicken while it soaks.
- As an extra safety precaution, you may want to use gloves when handling any raw meat. If you touch the raw chicken directly, be sure to wash your hands thoroughly afterwards.
-
2Fill a sink or bowl with cold water. Check the tap to make sure it’s cold to the touch, then add enough water to cover the chicken completely. Don’t fill the sink or bowl entirely, as you don’t want any water to spill out when you add the chicken.[9]
- Since your chicken is in a bag, you don’t need to worry about washing out your sink beforehand.
Warning: Never thaw your chicken with warm or hot water. This invites bacteria to grow and multiply in your chicken, and will make your food unsafe to eat.
-
3Submerge the bag in a sink or bowl filled with cold water. Double-check that the water is cold to touch as you fill the sink or bowl, then submerge the chicken in the bath. Make sure the chicken is surrounded by cool water, which makes the defrosting process more efficient.[10]
- The chicken may float a bit—just do the best you can to keep the bird submerged while it’s soaking!
- If you want to accelerate the process, try placing it under running water.
-
4Drain and refill the sink with new water every 30 minutes. Set a timer for 30 minutes, then dump out the existing water from the bath. Refill the sink or bowl with more cold tap water so your whole chicken continues to thaw evenly. As you change the water, make sure that the chicken is surrounded as much as possible.[11]
-
5Soak the chicken for 30 minutes per every 1 lb (450 g) of meat. Think about how heavy your chicken is—if you’re working with a larger bird, it may take several hours before your chicken is completely thawed and ready to cook. To make the process easier, try to predict the overall thawing time before you start soaking. Once it’s defrosted, try to cook the chicken as soon as possible to prevent it from going bad.[12]
- For instance, if you’re working with a 10 lb (4,500 g) chicken, it’ll take 5 hours of soaking for your bird to thaw out.
- To be extra sanitary, wash out your sink or bowl once you’re done soaking the chicken.


Using the Refrigerator
-
1Set your refrigerator to 40 °F (4 °C). Check the temperature dial inside your refrigerator to see what the temperature is. If it’s set to 35 °F (2 °C), the thawing process might take longer, so raise the dial to 40 °F (4 °C) if you can.[13]
- Make sure your refrigerator isn’t set to anything higher than 40 °F (4 °C). Between 40 to 140 °F (4 to 60 °C), bad bacteria will start to grow.
- If your refrigerator is already set to 40 °F (4 °C), you don’t have to worry about this.
-
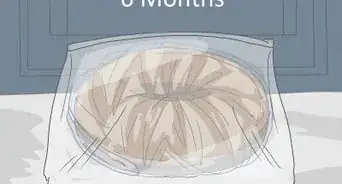
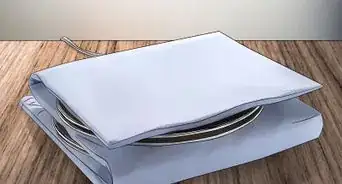
2Transfer your frozen chicken into a sealed plastic bag. Keep any plastic wrap or covering on your bird and place it on a bowl or plate. Seal the bag completely to get rid of any air trapped inside, so the chicken stays as fresh as possible.[14]
- If you're not using a sealed plastic bag or leaving the chicken in its original packaging, then be sure to line the bowl or plate with paper towels first, then add the chicken, then cover with food-safe plastic wrap.
-
3Place the chicken in a bowl or plate. While the bag will probably catch any drippings as the bird thaws, use a bowl or plate as an extra precaution. Make sure there’s room in the bottom of your refrigerator for the bowl or plate.[15]
-
4Refrigerate your chicken for 24 hours for every 5 lb (2,300 g) of weight. Think about how large or small your bird is, and factor this into your total defrosting time. If you’re working with a small chicken, you may be able to thaw it in a day or less. If you have a large chicken, it may take a day or 2 before it’s ready to cook.[16]
- For instance, a 10 lb (4,500 g) chicken would take 2 days, or 48 hours, to defrost completely.
-
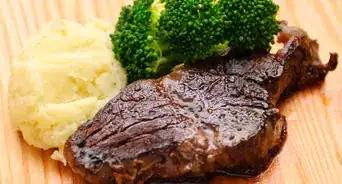
5Remove your defrosted chicken from the refrigerator and cook it. Get your oven or stovetop ready for your thawed chicken. Once the bird is completely defrosted, start cooking it in your preferred way. If you don’t want to use your chicken right away, you can leave it in the refrigerator for up to 2 extra days.[17]
- Try not to leave your thawed chicken in the refrigerator for longer than 2 days. Instead, thaw your chicken when you plan on cooking it.
Tip: If you don’t want to wait for your chicken to defrost, consider cooking it frozen! Add an 50% of the total recommended cooking time to your timer when you get ready to cook. For instance, if your chicken needs 2 hours to bake normally, keep it in the oven for 3 hours, instead.


Warnings
- Never thaw your meat on the countertop. This will encourage bad bacteria to grow, and will make your chicken unsafe to eat. Any temperature between 40 and 140 °F (4 and 60 °C) will encourage bad bacteria to grow.[19]⧼thumbs_response⧽
- If you’re using the cold water or microwave method, always cook the chicken before freezing it again.[20]⧼thumbs_response⧽
Things You’ll Need
Microwaving the Chicken
- Microwave user manual
- Microwave-safe dish
Soaking with Cool Water
- Plastic bag
- Bowl or sink
- Cold water
- Plastic gloves (optional)
- Dish soap (optional)
Using the Refrigerator
- Plastic bag
- Bowl

Expert Interview
Thanks for reading our article! If you'd like to learn more about defrosting a chicken, check out our in-depth interview with Sarena Nelson.
References
- ↑ https://www.fsis.usda.gov/wps/portal/fsis/topics/food-safety-education/get-answers/food-safety-fact-sheets/safe-food-handling/the-big-thaw-safe-defrosting-methods-for-consumers/
- ↑ https://freshfromthefreezer.co.uk/faqs/defrosting-meat-fish/defrosting-chicken/
- ↑ https://www.bbcgoodfood.com/howto/guide/how-defrost-chicken
- ↑ https://freshfromthefreezer.co.uk/faqs/defrosting-meat-fish/defrosting-chicken/
- ↑ https://freshfromthefreezer.co.uk/faqs/defrosting-meat-fish/defrosting-chicken/
- ↑ https://freshfromthefreezer.co.uk/faqs/defrosting-meat-fish/defrosting-chicken/
- ↑ https://www.bbcgoodfood.com/howto/guide/how-defrost-chicken
- ↑ https://www.fsis.usda.gov/wps/portal/fsis/topics/food-safety-education/get-answers/food-safety-fact-sheets/safe-food-handling/the-big-thaw-safe-defrosting-methods-for-consumers/
- ↑ https://www.fsis.usda.gov/wps/portal/fsis/topics/food-safety-education/get-answers/food-safety-fact-sheets/safe-food-handling/the-big-thaw-safe-defrosting-methods-for-consumers/
- ↑ https://www.bbcgoodfood.com/howto/guide/how-defrost-chicken
- ↑ https://www.bbcgoodfood.com/howto/guide/how-defrost-chicken
- ↑ https://www.fsis.usda.gov/wps/portal/fsis/topics/food-safety-education/get-answers/food-safety-fact-sheets/safe-food-handling/the-big-thaw-safe-defrosting-methods-for-consumers/
- ↑ https://www.fsis.usda.gov/wps/portal/fsis/topics/food-safety-education/get-answers/food-safety-fact-sheets/safe-food-handling/the-big-thaw-safe-defrosting-methods-for-consumers
- ↑ https://www.bbcgoodfood.com/howto/guide/how-defrost-chicken
- ↑ https://freshfromthefreezer.co.uk/faqs/defrosting-meat-fish/defrosting-chicken/
- ↑ https://www.fsis.usda.gov/wps/portal/fsis/topics/food-safety-education/get-answers/food-safety-fact-sheets/safe-food-handling/the-big-thaw-safe-defrosting-methods-for-consumers
- ↑ https://www.fsis.usda.gov/wps/portal/fsis/topics/food-safety-education/get-answers/food-safety-fact-sheets/safe-food-handling/the-big-thaw-safe-defrosting-methods-for-consumers
- ↑ https://www.fsis.usda.gov/wps/portal/fsis/topics/food-safety-education/get-answers/food-safety-fact-sheets/safe-food-handling/the-big-thaw-safe-defrosting-methods-for-consumers/
- ↑ https://www.fsis.usda.gov/wps/portal/fsis/topics/food-safety-education/get-answers/food-safety-fact-sheets/safe-food-handling/the-big-thaw-safe-defrosting-methods-for-consumers/
- ↑ https://www.fsis.usda.gov/wps/portal/fsis/topics/food-safety-education/get-answers/food-safety-fact-sheets/safe-food-handling/the-big-thaw-safe-defrosting-methods-for-consumers/
About This Article