This article was co-authored by Shun Pittman. Shun Pittman is a Master Cosmetologist, Author, Owner, and Founder of Corps d’Elite Salon and Corps d’Elite Beauty. With over 25 years of international experience, she is dedicated to and specializes in providing luxury salon services to all hair types and textures and every skin tone and shade. Her services include hair conditioning treatments, cutting, coloring, styling, extensions, and makeup application. Shun has experience working with, coaching, training, and mentoring beauty professionals from multiple companies including L'Oréal, Wella, Matrix, Paul Mitchell, Redken, Big Sexy Hair, and Toni & Guy. She is also a host for national and local media outlets and her work has been featured in The Washingtonian, The Cheddar Network, and WJLA Good Morning Washington's Beauty and Fashion Police segments. Shun is the author of “50 Things Your Hairdresser Wants YOU to Know (and a few things we don’t...)".
There are 11 references cited in this article, which can be found at the bottom of the page.
This article has been viewed 84,518 times.
Marley twists, also called “kinky twists,” are similar to Havana twists. The main difference between the two is thickness: Marley twists are made from only 2 strands of braiding hair while Havana twists are made from 2 or more. Marley twists are also made from Marley hair extensions, which have a kinkier texture than those used for Havana twists, hence the alternative name: kinky twists.
Steps
Preparing and Sectioning Your Hair
-
1Wash and deep condition your hair as you normally would. Since this style will last about 4 to 6 weeks, it would be a good idea to wash your hair and scalp first with a clarifying shampoo to remove any build-up and product residue. Follow-up with a deep conditioner.[1]
- Use the deep conditioner according to the instructions on the label. Most will need to sit in your hair for only 3 to 5 minutes, but some may need to sit for much longer.
-
2Apply your usual hair oil and moisturizing cream. You can use professional, salon products, or you can use natural products, such as olive oil and shea butter. The cream will help keep your hair hydrated while the oil will lock that moisture in.[2]Advertisement
-
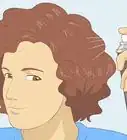
3Blow dry your hair using a low to medium heat setting. It would be even better if you let your hair air dry about 75 to 90% first, then blow dry it. If your hair is prone to damage, then be sure to apply a heat protectant first.[3]
- Letting your hair air dry partway first reduces the overall drying time as well as frizz.
- Consider stretching your hair as you dry it. This will help reduce frizz and make it more manageable.
-
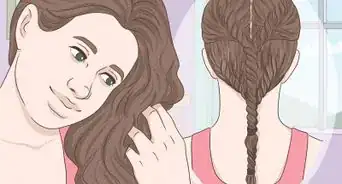
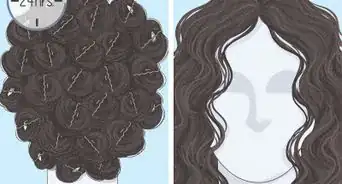
4Divide your hair into 8 sections to make it easier to work with. You will eventually divide your hair up into even smaller sections, so don't worry. These initial 8 sections will simply make the smaller sections easier to create. Plan on doing 4 sections in the front and 4 sections in the back.[4]
- Twist each section into a bun or secure it with a hair clip.
- Use the handle of a rat-tail comb to make your sections neat and even.
- It would be a good idea to comb out each section before you twist it. This will save you work later on.
-
5Divide 1 section into 1 in (2.5 cm) squares with a rat-tail comb. Twist each section into a mini bun, or secure it with a mini hair clip as you go. The parts between the sections will be visible in the end, so make the sections neat and even.[5]
- Arrange the squares in a grid-like pattern, like a checkerboard. Don’t make them random, or they don’t look very neat.
- You may have to make some sections smaller or larger in order to accommodate all of your hair.


Creating the Twists
-
1Apply moisturizing hair cream to 2 strands of Marley hair. When you open a pack of Marley hair, you’ll notice that it separates into about 20 or so strands. Take 2 of these strands and hold them together to make 1 thick strand. Hold the strand by the middle, and apply a moisturizing hair cream to each side.[6]
- Off-set the Marley hair a bit so that the end of the first strand extends past the end of the second strand by about 1 to 2 inches (2.5 to 5.1 cm). This will cause it to taper more naturally.[7]
- You must use Marley hair extensions. Do not use any other hair, such as Havana hair. It won’t give you the same look.
- You can use a cream from the salon, or you can use a natural product, such as shea butter.
-
2Split 1 of your 1 in (2.5 cm) sections in half. Undo 1 of your 1 in (2.5 cm) sections first. Use the handle of a rat-tail comb to split it down the middle. It does not matter if it is split lengthwise or widthwise.[8]
- You will have 2 sections: a left section and a right. Keep track of this!
-
3Apply aloe vera-based hair gel to each half. You can also use another type of gel; the purpose of this is to smooth away frizz and create extra hold. Don’t use moisturizing cream yet, however; you’ll apply that later.[9]
- Take it easy on the gel; a little bit goes a long way. While you want to be generous with moisturizing cream, you only need a small dab of gel.
-
4Center the Marley hair against the split hair section. Find the middle of the Marley hair and set it over the 1 in (2.5 cm) hair section. Add the left half of the Marley hair to the left section, and the right half to the right section. You’ll end up with 2 thick strands.[10]
- Treat your left section, including the Marley hair, as 1 strand. Treat the right section (including the Marley hair) as a second strand.
-
5Twist each strand into ropes while applying moisturizing cream to them. Apply some moisturizing cream to the left strand, and twist it into a rope. Hold it in your left half, then repeat the process for the right section with your right hand.[11]
- You’ll be repeating this step a lot, so you only need to apply the moisturizer to just a few inches/centimeters of hair.
- Make sure that you twist both strands in the same direction. This can be clockwise or counterclockwise.
- Keep the twists tight so that you get 2 ropes, but don’t twist them so that that they hurt.
-
6Twist the ropes together in the opposite direction. This is just like making a rope braid. Recall the direction you twisted your hair in to create the ropes: clockwise or counterclockwise. Next, twist the 2 ropes together in the opposite direction to make a single rope.[12]
- For example, if you twisted your hair counterclockwise to create 2 ropes, you should twist the ropes clockwise to create 1 thick rope.
-
7Repeat the process until you reach the end of the Marley hair. Apply some more moisturizing cream to a couple inches/centimeters of hair. This time, give each strand a single, tight twist before twisting them together. Keep going until you have no more Marley hair to braid.
- If the Marley hair is longer than your desired length, simple stop twisting when the rope braid is close to the length you want it to be.
- After you let go of a finished twist, it will likely spring back a little and feel somewhat loose. This shouldn’t be a problem, though. The twist is still thick enough to stay in place.[13]


Finishing the Twists
-
1Trim off excess Marley hair with scissors or a razor, if needed. Scissors will be safer, but they will result in a blunt cut, which won’t look very natural. A razor will give you a nice, natural-looking taper, but you’ll have to be careful not to nick your fingers!
- The Marley twist may come undone slightly. If this happens, simply find the 2 strands and twist them back into a rope.
- If you are using scissors, consider cutting at a downward angle instead.
-
2Dip the end into boiling water to seal it. Boil some water first, then take it off the stove. Dip the end of your braid into the water for a few seconds, then lift it out. Avoid touching the wet hair with your fingers, as it will be very hot.
- Take the hot water off the stove before you dip the hair into it. You only need to dip it in by about 1 to 2 inches (2.5 to 5.1 cm).
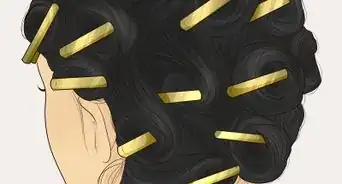
- For an added twist, wrap a perm rod around the end of your hair before dipping it into the hot water. Let the hair dry before removing the rod.
-
3Repeat the entire process to make more twists. Go back to your large section and undo another 1 in (2.5 cm) section of hair. Split it in half and add 2 strands of Marley hair. Twist the hair into a rope braid, then trim the ends. Work 1 section at a time until you are done.
- This can take up to 16 hours. Consider enlisting a friend to help you.
- If you can’t get a helping hand, take plenty of breaks. Cover your hair with a chic scarf to disguise the half-finished twists.


Caring for Marley Twists
-
1Wash your twists with diluted shampoo. Get your hair wet in the shower first. Next, pour shampoo diluted with water over it, focusing on the scalp. Massage your scalp with your fingertips, then rinse your hair with water.
- Plan on using 8 parts water to 1 part shampoo. You can mix this ahead of time in a large bottle so that you have more for later.
- If this method makes the twists too heavy, use a spray bottle to apply the water and diluted shampoo instead.
- How often you wash your hair depends on how fast your scalp gets oily. In general, however, you shouldn’t have to wash it more than once per week.
-
2Let your hair air dry when possible. Use a towel to gently squeeze the excess water from your hair first, then wrap your hair up in the towel for 1 to 2 hours. Remove the towel, then let your hair finish air drying on its own.
- If your twists aren't completely dry after a few hours, speed the process up with a hairdryer. This is important; if you don't, they may develop mold![14]
-
3Moisturize your scalp and twists 2 to 3 times per week. How often you end up doing this really depends on how dry or oily your scalp gets. The more dry your scalp gets, the more often you should moisturize it. You can use a hair moisturizing cream or hair oil to do this.[15]
- Use natural products, such as olive oil or shea butter on your scalp. Massage them in with your fingertips.
- You can use natural or store-bought products from the salon on the twists themselves.
-
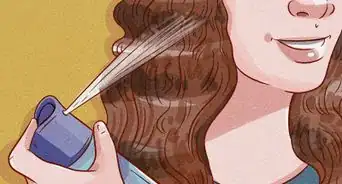
4Smooth down frizz with diluted leave-in conditioner. Like with the shampoo, use about 8 parts water to 1 part leave-in conditioner. Spray the solution onto your twists after you get out of the shower.[16]
- You only need to do this once per week. If you do it more than that, you may get build-up.
-
5Cover your twists with a silk scarf and bonnet when sleeping. If your twists are especially long, you can put them into a loose ponytail first. Wrap a silk scarf around your head to cover all your hair, then put on a bonnet.[17]
- The bonnet is not absolutely necessary, but it will help keep the silk scarf in place as you sleep.
- Don't twist the hair elastic too many times, or you may get dents in your hair. The goal here is just to gather your twists into 1 bunch.


Community Q&A
-
QuestionWill boys like me if I wear this hairstyle?
 Rebecca ClarkCommunity AnswerIt depends on the boy. Either way, you should wear your hair in a style that helps you be yourself! Boys love people who are themselves, and you should focus on making yourself happy more than making boys happy.
Things You'll Need
- 3 to 4 packs of Marley hair
- Wide tooth comb
- Hair clips or pins
- Hair moisturizing cream
- Hair oil or natural oil
- Hair gel
- Scissors or razor
- Boiling water
-Step-12-Version-4.webp)


References
- ↑ http://www.curlynikki.com/2012/08/how-to-create-kinky-twists-natural-hair.html
- ↑ http://www.curlynikki.com/2012/08/how-to-create-kinky-twists-natural-hair.html
- ↑ http://www.curlynikki.com/2012/08/how-to-create-kinky-twists-natural-hair.html
- ↑ http://www.curlynikki.com/2012/08/how-to-create-kinky-twists-natural-hair.html
- ↑ http://www.curlynikki.com/2012/08/how-to-create-kinky-twists-natural-hair.html
- ↑ https://www.youtube.com/watch?v=CAneJmyHaHM&feature=youtu.be&t=45s
- ↑ https://www.youtube.com/watch?v=CAneJmyHaHM&feature=youtu.be&t=55s
- ↑ https://www.youtube.com/watch?v=CAneJmyHaHM&feature=youtu.be&t=1m10s
- ↑ https://www.youtube.com/watch?v=CAneJmyHaHM&feature=youtu.be&t=1m30s
- ↑ https://www.youtube.com/watch?v=CAneJmyHaHM&feature=youtu.be&t=1m57s
- ↑ https://www.youtube.com/watch?v=CAneJmyHaHM&feature=youtu.be&t=2m15s
- ↑ https://www.youtube.com/watch?v=CAneJmyHaHM&feature=youtu.be&t=2m50s
- ↑ http://threenaturals.com/home/?p=2754
- ↑ https://www.glamour.com/story/how-to-wash-braids-locs-and-twists
- ↑ https://www.norealjewelry.com/2017/09/18/natural-hair-care-marley-twists-care-maintenance-tips/
- ↑ https://www.norealjewelry.com/2017/09/18/natural-hair-care-marley-twists-care-maintenance-tips/
- ↑ https://www.norealjewelry.com/2017/09/18/natural-hair-care-marley-twists-care-maintenance-tips/
- ↑ http://www.curlynikki.com/2012/08/how-to-create-kinky-twists-natural-hair.html
About This Article


-Step-12-Version-4.webp)