This article was co-authored by Laura Martin. Laura Martin is a Licensed Cosmetologist in Georgia. She has been a hair stylist since 2007 and a cosmetology teacher since 2013.
There are 17 references cited in this article, which can be found at the bottom of the page.
This article has been viewed 278,302 times.
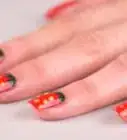
Dip manicures are like a hybrid between a manicure and fake nails, and can last three to four weeks.[1] Compared to typical gel or acrylic nails, dip manicures are thinner, and require less filing and special tools. They have a more natural look, are less likely to lift, and are easier to apply. Furthermore, no odorous liquid monomer or UV light is needed.[2] You can seal up broken or split nails with this lightweight overlay of powder and resin.[3]
Steps
Grooming Your Nails
-
1Use polish remover as well as a cuticle pusher. If you have polish on your nails, remove it with non-acetone nail polish remover on a lint-free pad. Use a cuticle pusher to gently nudge your cuticles slightly back. Gently remove any excess cuticle sticking up with a cuticle trimmer or scraper.[4]
- This will allow new nail growth to show so that your manicure will last longer before needing a fill.
Expert AnswerQA wikiHow reader asked: "How do you get powder nail polish off?"
Laura Martin is a Licensed Cosmetologist in Georgia. She has been a hair stylist since 2007 and a cosmetology teacher since 2013.Licensed Cosmetologist
 EXPERT ADVICEAnswer from Laura Martin:
Laura Martin, a licensed cosmetologist, replies: "Dip powder is a type of acrylic so it is more difficult to remove than regular polish. Soak your nails in acetone and then gently pry the acrylic away from the nail with an orangewood stick."
-
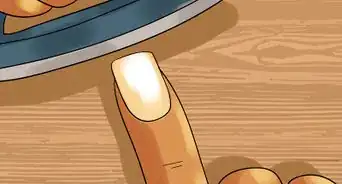
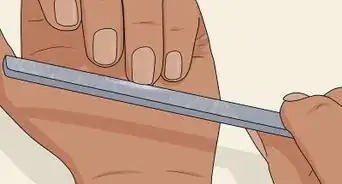
2Buff the top surfaces of the nails. Whether natural, acrylic or gel, smooth the surfaces of your nail manually with a nail file. Use a 180 grit file or block, or a natural nail stone. Brush away the grit from filing with a nail brush or makeup powder brush.[5]
- Pay extra attention to buffing the grooves and the cuticle area.
Advertisement -
3File away any problematic areas. Examine the sides of your nails for any loose or damaged edges. Also look for any lifting if you have a previous dip manicure you’re filling. Use a coarse nail file (100 or 180 grit) on any such areas.[6]
- If you don’t already have tips on and you want to add them to lengthen your nails, trim your natural nails down to short length. Use the nail file to smooth the edges.
-
4Sanitize your nails with alcohol. Dampen a paper towel or lint-free pad with alcohol or nail sanitizer. You can use an antiseptic spray, or a sanitizer in a pourable container. Rub the moistened towel over your nails, and your fingers – from the closest knuckle to your cuticles, down towards your nails.[7]
- This cleans and dehydrates the surface of your nails to prepare them for a dip manicure. You don’t want to seal in any bacteria or grime.
-
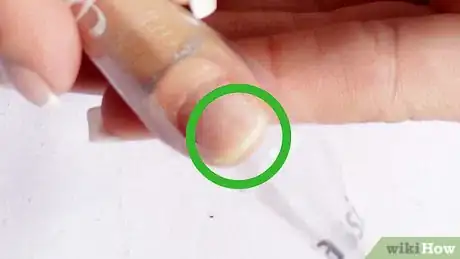
5Find the right-sized tips. If you want to extend the length of your nails, find a tip for each nail that covers no greater than a third of your nail bed. Each tip should reach across the whole width of your nail, from nail groove to nail groove, without overlapping onto your skin.[8] Coat the wells of the tips with tip resin. Hold each one gently but firmly to the tip of the nail at a 45 degree angle for twenty seconds.[9]
- If you can’t find a nail tip that is the right size, you can use a nail file to make slight adjustments so that it will fit securely.
- Pinch the sides of the tips for a few seconds to adhere the tips to curvature of your nail edges. Try not to get resin on your fingers.
-
6Trim and file the tips. File the edges of the tips all the way across. Buff the top surfaces of the tips to remove their shine. Then buff the nails all over.
Coating Your Nails with Powder
-
1
-
2Brush resin onto your nails. Move slowly, and apply it evenly.[12] Resin should be dotted on with the belly of the brush applicator, rather than applied in strokes like nail polish.[13]
- Try to apply the resin as evenly and neatly as possible. Focus on creating a clean edge just above the cuticle, since this will be what your powder adheres to.
- If you’re only doing a fill, and it has been two weeks since your last dip manicure, apply resin to your desired thickness – for instance, three to four coats. No follow-up with powder is necessary.[14]
- If you’re doing a manicure to your natural nails or it has been three or more weeks since your last dip manicure, apply one coat of resin only at this point.
-
3Dip your finger into the container of clear nail powder. Shake the closed container of powder well first. Open the container, then use a nail stick or pusher to mix the powder. Push your finger forward within the container and roll your finger gently. Keep your finger in the powder for five seconds. Remove your finger and tap the edge of the pot.[15] Then, with your other hand, tap the finger you just dipped, to shake excess powder off your finger and back into the container.[16]
- Once the nail is dry, use a nail brush to remove the rest of the extra powder over a paper towel.[17]
- Do not use a colored powder at this point. If you want to add a color, that will come after applying more resin.
-
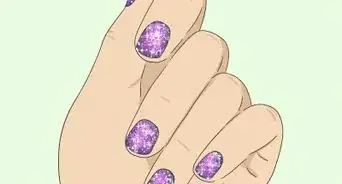
4Apply more resin and powder. Apply a layer of resin over the full nail, including the tips. Paint it on slowly and evenly. If you want to use colored powder, now’s the time to do it! Dip your finger into nail powder again, then remove any excess powder. Add a third and final application of resin.[18]
- You can repeat this step once more to achieve a slightly thicker and stronger manicure.
Curing and Finishing the Nails
-
1Brush on activator. Apply it in strokes as you would regular nail polish. Allow it to sit for five seconds on the nails. Apply a second coat, and allow that to sit for five seconds as well.[19]
-
2File the nail edges to dull and shape them. Use a soft-grid file on the exposed edges and sides of the nails.[20]
-
3Finish with a top coat. Make sure it is a top coat meant for acrylic nails. Keep your fingers sedentary and allow your nails to air-dry for two minutes. Gently rub cuticle oil into the skin surrounding your fingernails.[21]
- Apply the top coat as you would normal nail polish.
-
4Wash your hands. Make sure that your nails are completely dry first. Use warm water, hand soap and a nail brush. Make sure to get around and underneath the tips of your nails. Pat your nails dry with a towel.
-
5Maintain your manicure. Follow tips to prolong the life of your manicure. Your manicure can last three to four weeks before needing a fill. However, you may notice new nail growth near the cuticle area and wish to do the fill as early as two weeks after your dip manicure.[22]
- If you apply colored polish on top of your manicure, don’t get it on your cuticles. This can cause chipping and lifting of the polish. Also, mix the polish by rolling it between your hands instead of shaking it, so that air bubbles don’t promote chipping.
- If you use a fan to dry your nails, opt for cool air instead of warm air. Use a blow dryer on the cool setting.
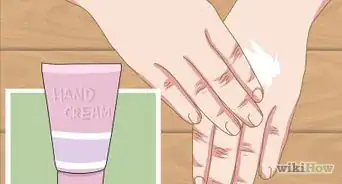
- Reapply a clear top coat every few days to deter chipping. Massage cuticle oil onto your nails every day, if possible.
- Use mild soap to wash your hands instead of applying hand sanitizer. Hand sanitizer is strong and dehydrating, and can eat away at your protective top coat.
Expert Q&A
Did you know you can get expert answers for this article?
Unlock expert answers by supporting wikiHow
-
QuestionIs the dip powder acrylic?
 Laura MartinLaura Martin is a Licensed Cosmetologist in Georgia. She has been a hair stylist since 2007 and a cosmetology teacher since 2013.
Licensed Cosmetologist
-
QuestionWhat are ANC powder nails?
 Laura MartinLaura Martin is a Licensed Cosmetologist in Georgia. She has been a hair stylist since 2007 and a cosmetology teacher since 2013.
Licensed Cosmetologist
-
QuestionWhat is a dip manicure?
 Laura MartinLaura Martin is a Licensed Cosmetologist in Georgia. She has been a hair stylist since 2007 and a cosmetology teacher since 2013.
Licensed Cosmetologist
Warnings
- Acrylics that contain methyl methacrylate (MMA) or ethyl methacrylate (EMA) may lead to nail deformities and damage.[25]⧼thumbs_response⧽
- Avoid using electric nail drills whenever possible. Some doctors and consumer reports indicate that excessive drilling leads to infections and nerve damage.[26]⧼thumbs_response⧽
- An acrylic dip manicure is still a nail enhancement rather than natural nails. It isn’t any less damaging than other nail enhancements such as gel or full acrylic sets.[27]⧼thumbs_response⧽
Things You'll Need
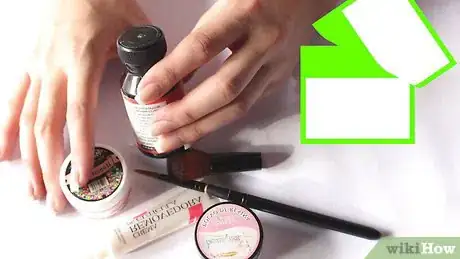
- Nail polish remover
- Cuticle pusher
- Cuticle trimmer or scraper
- 100 or 180 grit nail file
- Tip resin
- Liquid bonder
- Acrylic or gel powder
- Activator
- Top coat
- Nail brush or cosmetic brush
- Paper towels
- Lint-free pads
- False nail tips
- Nail trimmer
- Alcohol or nail sanitizer
- Tap water
- Hand soap
- Cloth hand towel
References
- ↑ https://www.glamour.com/story/dip-powder-nails-are-they-safe
- ↑ https://www.nailsmag.com/381245/acrylic-dip-systems-make-a-comeback
- ↑ http://wreg.com/2016/07/18/consumer-alert-is-nail-dipping-dangerous/
- ↑ http://www.starnail.com/pdfs/demos/Star%20So%20Fine%20Instructions.pdf
- ↑ http://www.starnail.com/pdfs/demos/Star%20So%20Fine%20Instructions.pdf
- ↑ http://www.starnail.com/pdfs/demos/Star%20So%20Fine%20Instructions.pdf
- ↑ https://www.youtube.com/watch?v=59jgP7t0Dhk&feature=youtu.be&t=20
- ↑ http://www.starnail.com/pdfs/demos/Star%20So%20Fine%20Instructions.pdf
- ↑ https://www.youtube.com/watch?v=59jgP7t0Dhk&feature=youtu.be&t=26
- ↑ https://www.youtube.com/watch?v=R3vBq7_KIh4&feature=youtu.be&t=26
- ↑ https://www.youtube.com/watch?v=59jgP7t0Dhk&feature=youtu.be&t=117
- ↑ https://www.youtube.com/watch?v=59jgP7t0Dhk&feature=youtu.be&t=131
- ↑ http://www.starnail.com/pdfs/demos/Star%20So%20Fine%20Instructions.pdf
- ↑ http://www.starnail.com/pdfs/demos/Star%20So%20Fine%20Instructions.pdf
- ↑ https://www.youtube.com/watch?v=R3vBq7_KIh4&feature=youtu.be&t=33
- ↑ https://www.youtube.com/watch?v=59jgP7t0Dhk&feature=youtu.be&t=139
- ↑ https://www.youtube.com/watch?v=228QCptChSs&feature=youtu.be&t=173
- ↑ https://www.youtube.com/watch?v=59jgP7t0Dhk&feature=youtu.be&t=162
- ↑ http://www.starnail.com/pdfs/demos/Star%20So%20Fine%20Instructions.pdf
- ↑ https://www.youtube.com/watch?v=R3vBq7_KIh4&feature=youtu.be&t=87
- ↑ https://www.youtube.com/watch?v=R3vBq7_KIh4&feature=youtu.be&t=104
- ↑ http://www.cosmopolitan.com/style-beauty/beauty/advice/a33593/longer-lasting-manicure-tricks/
- ↑ http://www.starnail.com/pdfs/demos/Star%20So%20Fine%20Instructions.pdf
- ↑ http://www.starnail.com/pdfs/demos/Star%20So%20Fine%20Instructions.pdf
- ↑ http://www.consumerreports.org/cro/news/2010/04/manicures-the-price-may-be-higher-than-it-seems/index.htm
- ↑ http://wreg.com/2016/07/18/consumer-alert-is-nail-dipping-dangerous/
- ↑ https://www.glamour.com/story/dip-powder-nails-are-they-safe
About This Article
To do a dip powder manicure, first remove any existing nail polish with a polish remover and file the tips of your nails. Next, sanitize your nails with an alcohol cleanser, like an antiseptic spray. Once your nails are clean, apply polish to them in strokes with your brush, starting about 1/16 inch from your cuticle. Before you apply the powder, shake the closed container and mix it with a nail stick. After it's mixed, hold your finger in the powder for 5 seconds, then apply another coat of resin followed by a second coat of powder. Follow this with a third coat of resin before applying an activator using brush strokes. Repeat these steps for each of your nails, then gently file down the edges of each nail to shape them. For tips from our Cosmetology co-author on how to cure your nails, read on!
