wikiHow is a “wiki,” similar to Wikipedia, which means that many of our articles are co-written by multiple authors. To create this article, 43 people, some anonymous, worked to edit and improve it over time.
The wikiHow Video Team also followed the article's instructions and verified that they work.
This article has been viewed 437,361 times.
Learn more...
The Electric Slide is a four wall line dance set to Marcia Griffiths' hit song, "Electric Boogie," which hit the States in 1976 when it was created by Ric Silver at a New York Dance Club called VAMPS. Even today, the dance is a huge favorite at weddings, bat mitzvahs, school dances, or just about any place where people want to dance and have a good time. If you want to hit the dance floor instead of the punch bowl the next time this favorite comes on, see Step 1 to start learning the Electric Slide and get your boogie on.
Things You Should Know
- The Electric Slide is usually danced to "Electric Boogie" by Marcia Griffiths.
- Once you get the hang of the dance, add in your own creative flair. Hand claps, finger snaps, and silly poses are all fair game.
- You can do the Electric Slide on your own, but it's more fun with a big group!
Steps
Doing the Electric Slide Step-by-Step
-
1Step to the right with your right foot. You should be counting 1, 2, 3, 4 to the beat of the music and take one step after each beat. That means you should take a step to the right with your right foot on Count 1. This is the very first step to doing a grapevine to your right.
-
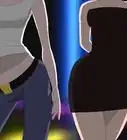
2Step to the right with your left foot, crossing it behind your right. That's why it's called the grapevine -- because you'll be "weaving" one foot behind the other. You can also put your arms into it, and pump them forward or upward slightly every time you take a step. In the "Electric Boogie" video, you can see that the dancers are really pumping their arms, almost as if they were doing the "Running Man" with them; it's up to you how much you want to get into it!Advertisement
-
3Step right with the right foot. This will uncross your feet.
-
4Close your feet together while tapping your left foot by your right. Simply tap the ground with your left foot without putting your weight on the foot. You'll be taking your next step with your left foot, so you should keep the weight on the right foot. You can also clap your hands whenever you tap your feet to add some flair to this dance move.
- Congratulations -- you have just completed a grapevine to the right! The grapevine consists of the moves set out in Steps 1-4.
- If you want to simplify this dance and aren't ready for the grapevine, instead of weaving one foot behind the other, you can instead simply step the right foot to the right, step your left foot to the right to meet your right foot, tap it, and repeat. So you would do a step-tap, step-tap, instead of the grapevine. If this is what you choose, then you should also do this move on the left side.
-
5Step to the left with your left foot. You will now begin mirroring the steps laid out in Steps 1-4 on the left side.[1]
-
6Step to the left with the right foot, crossing your right foot behind your left foot.
-
7Step left with your left foot. This will uncross your feet again.
-
8Close your feet together, tapping your right foot next to the left foot. This time, tap the ground with your right foot while keeping your weight on the left foot. Great work! You have completed the grapevine on your left side.
-
9Step back with your right foot. This begins the process of taking three steps backward and tapping your feet. Just as you did before, count off 1, 2, 3, 4 to the music as you take your steps.
-
10Step back with your left foot.
-
11Step back with your right foot.
-
12Tap your left foot next to your right foot. Remember to keep that weight on your right foot. To add some flair to your steps, you can add a knee-lift, kick, toe-point-and-hip-lift, or whatever you want with your left foot instead of just tapping your feet closed, as long as you keep your weight off the tapping foot.
-
13Step forward with your left foot.
-
14Bring your right foot behind your left foot, and tap your right big toe to your left heel. Many people, instead of tapping with their foot, will kind of do a deep lunge with the left knee, touching (or just reaching for) the floor with their right hand. Others just tap their feet closed.
-
15Step back with your right foot. It's like rocking back and forward twice.
-
16Tap your left foot in front of your right foot.
-
17Step forward with your left foot. Prepare to turn left, getting your hips and arms ready to do the "pivot and brush".
- In the original choreography - this is actually a hop - and the turn happens in the air. The brush step was added later.
-
18Hop on your left foot as you turn yourself to the left 90 degrees. This is known as a quarter turn. Turning to the left means that your left shoulder goes back and your right shoulder comes forward. You can kick your right foot up a bit and brush the ground as you transition to the new position; just kick whichever foot is in back to move to the new side, so that it is next to the left foot again. Many will also do a knee lift (with the right knee) and/or clap their hands here.
-
19Repeat all these steps until the music fades. Start with the very first step. Note that you -- and hopefully the rest of the group -- will be facing a new direction each time you repeat, continuing to turn 90 degrees after every 18-step cycle. That's the beauty of the line dance -- once you can do it in one direction, all you have to do is to keep turning and repeating it until the music fades.
Understanding the Structure of the Electric Slide
-
1Do a grapevine to the right and tap. A "grapevine" is a series of sidesteps in one direction, stepping to the side, then crossing in front or behind with the other foot, then stepping to the side again. A more detailed breakdown is below. Count 1, 2, 3, 4 to the beat of the music and do the grapevine on the right.[2]
-
2Do a grapevine to the left and tap. This is just like the grapevine to the right, except it's to the left. Count 1, 2, 3, 4 to the beat of the music and do the grapevine to the left.
-
3Take 3 steps backwards and tap. This part is conceptually similar to the grapevine steps, except going backwards instead of sideways. As before, count 1, 2, 3, 4 to the music as you step.
-
4Step forward and tap your foot, step backward and tap your foot. This is the fun little boogie-dip move that you will do to transition between turns.
-
5Step forward and turn left. Count 1, 2 to the beat of the music and repeat the process. Once you've finished, take another quarter turn and repeat until the music is over.
Community Q&A
-
QuestionWhat does "pivot" mean in line dancing?
 Community AnswerA pivot is a turn where one foot is in front of the other and the turn is made on the balls of the feet while changing weight. The feet do not leave floor.
 -
QuestionWhat is the part where it says walk back and rock?
 Community AnswerYou're actually supposed to rock then walk back.


References
- ↑ https://www.passion4dancing.com/electric-slide-dance/
- ↑ http://users.rowan.edu/~conet/rhythms/SocialDances/Electricslide.html
- https://www.youtube.com/watch?v=XGx1ebUxMCE
- http://www.youtube.com/watch?v=dv2qKpna3lM
- http://www.instructables.com/id/Electric-Slide/
- http://www.youtube.com/watch?v=dt_9iera9ik
About This Article
To do the Electric Slide, step to the right with your right foot on count 1. On the next count, step to the right with your left foot, crossing it behind the right. On count 3, step right with your right foot, then bring your left foot beside your right foot on count 4 and tap it on the ground. For the next 4 counts, you’ll repeat the steps in reverse, starting by stepping left with your left foot. You’ll then move backward for 4 counts, and forward for the last 4 counts. Repeat throughout the song. Keep reading to learn when to add kicks and claps to your dance!