This article was co-authored by wikiHow staff writer, Christopher M. Osborne, PhD. Christopher Osborne has been a wikiHow Content Creator since 2015. He is also a historian who holds a PhD from The University of Notre Dame and has taught at universities in and around Pittsburgh, PA. His scholarly publications and presentations focus on his research interests in early American history, but Chris also enjoys the challenges and rewards of writing wikiHow articles on a wide range of subjects.
There are 10 references cited in this article, which can be found at the bottom of the page.
The wikiHow Video Team also followed the article's instructions and verified that they work.
This article has been viewed 55,655 times.
Learn more...
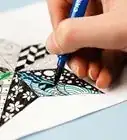
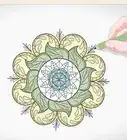
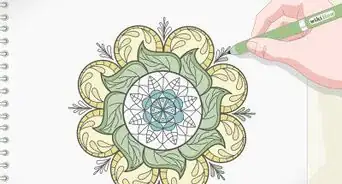
The artistic style commonly called “op art” (due to its use of optical illusions) developed during the second half of the 20th century, but it has deep roots in art history.[1] By utilizing geometry, repetition, and color patterns, op art often looks like it’s jumping off the page or wants to suck you into the canvas. By following some simple instructions, you can easily make your own op art—and it’s also easy to customize the process and make the op art distinctively yours!
Steps
Creating Undulating and Bulging Curves
-
1Draw a wavy line horizontally across the page. Make it look like rolling hills or gentle waves running across the middle of the page. Create random undulations and avoid making sharp angles (like mountain peaks).[2]
- The more “waves” you make, the more complex your finished drawing will appear. Start with about 3-4 waves if you’re a beginner.
-
2Place 8 dots along the line—2 near the edges, 6 randomly spaced. Place a dot on the wavy line within about 1 in (2.5 cm) from the left edge of the paper, and place another one within about 1 inch (2.5 cm) from the right edge. Draw the other 6 dots in between these 2, wherever you feel like putting them![3]
- In your head, label these dots “1” through “8” from left to right—but don’t jot the numbers on the page!
- To increase the complexity, add more dots—but 8 is good for a beginner.
Advertisement -
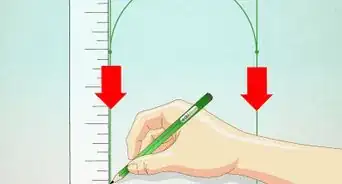
3Draw arches above the wavy line that connect the dots. In other words, draw an upward-curved arch (like a rainbow) that starts at dot 1 and ends at dot 2. Do the same between dots 2 and 3, and so on. Also start arches at dot 1 and dot 8 that disappear off the edge of the page.[4]
- Vary the arches in height, making them about 0.25–0.5 in (0.64–1.27 cm) high. The smaller in height they are, the more complex your drawing will appear.
-
4Repeat the arches again and again until they extend off the page. Draw a new arch on top of the initial arch between dots 1 and 2 (like a double rainbow!), and do the same between dots 2 and 3 and so on. Keep doing this over and over again until all the arches above the wavy line run off the top of the page.[5]
- The arches can vary in height as you go, but try to keep them within the 0.25–0.5 in (0.64–1.27 cm) height range if that’s what you started with.
- Creating arches on arches may get a bit tedious, so try to have fun with it! Watch closely to see how your op art is beginning to appear!
-
5Replicate the arch pattern beneath the wavy line as well. Follow the exact same process under the wavy line as you did above it. The “upside-down rainbows” don’t have to be mirror images of the arches above them, but keep them within the same general height range.[6]
- By the time you’re done, your paper should be filled with arches upon arches!
-
6Color the spaces between a single stack of arches in a 3-color pattern. For example, use red to color the space between the wavy line and the arch between dots 1 and 2. Then, use blue to color the gap above the first arch and beneath the second arch, and black to color the gap above the second arch and beneath the third one. Keep repeating this until you go off the top of the page.[7]
- For an added 3-D effect, color more darkly around the edges of each gap, and more lightly near the center. This creates an appearance of light and shadow.
-
7Mirror the coloring pattern above the wavy line on the stack of arches directly below. Since (for example) you colored the arches in a red-blue-black pattern above dots 1 and 2, color the arches beneath dots 1 and 2 in a blue-black-red pattern.[8]
-
8Repeat the coloring process for each stack of arches above and below the line. For example, color the arch stack above dots 2 and 3 in a blue-black-red pattern, and the arches below dots 2 and 3 in a black-red-blue pattern. The goal is to avoid having consecutive gaps in the same color, although it won’t ruin your picture if this happens occasionally—it’s art, after all![9]
- If you’d rather take a more random approach to your coloring, that’s fine too!
-
9Take a look at your finished piece of op art. What does it look like to you? Colorful worms wriggling in a box? The interlocked fingers of some sort of spooky creature? A satellite view of a compact mountain range on another planet? You’ll see something different each time you look![10]
- Also, your art will turn out differently each time you follow these instructions. Like snowflakes, each drawing is unique!


Making a 3-D Geometric Tunnel
-
1Draw a rectangle that fills most of your sheet of paper. Use a ruler to measure your rectangles and to help draw them straight. Draw the initial rectangle in a 3:4 ratio—in other words, if you’re using 8.5 in × 11 in (22 cm × 28 cm) paper, make the rectangle 6 in × 8 in (15 cm × 20 cm).[11]
- If you want to get the 3-D effect with this type of op art, precision measuring and drawing is important.
-
2Divide the rectangle into 4 equal rectangles. Use your ruler to draw a horizontal and vertical line that meet in the center of your original rectangle. You’ll end up with 4 rectangles, each 3 in × 4 in (7.6 cm × 10.2 cm) in size.[12]
-
3Draw 2 diagonal lines to create 8 triangles. Use your ruler to draw a straight line from the top left to the bottom right corners of the original rectangle. It should pass straight through the intersection of the horizontal and vertical lines you drew to create the 4 smaller rectangles. Draw another diagonal line from the top right to the bottom left corners.[13]
- When you’re done, you’ll see 8 triangles inside your original rectangle.
-
4Measure and mark spots along the perimeter of the main rectangle. From the top left and bottom left corners of the original rectangle, measure across and mark dots at 2 and 6 in (5.1 and 15.2 cm). From the top left and right corners, measure down and mark dots at 1.5 and 4.5 in (3.8 and 11.4 cm).[14]
- These measurements are all based on starting with a 6 in × 8 in (15 cm × 20 cm) rectangle. The horizontal dots should be at 1/4 and 3/4 of the total width of the rectangle, and the vertical dots should be at 1/4 and 3/4 of the total height.
-
5Draw straight lines to connect your dots to the central intersection. Lay your ruler between one of the dots you just made and the center point of the original rectangle, where all the interior lines meet. Draw a straight line to connect these 2 points. Do the same with every other dot you measured and marked.[15]
-
6Measure and mark dots along the corner-to-corner diagonal lines. That is to say, measure and mark along the X-shaped diagonals that meet at the corners of the original rectangle. Starting at the central intersection where all the lines meet, measure and mark each diagonal at the following lengths: 0.5 in (1.3 cm); 1.25 in (3.2 cm); 2.25 in (5.7 cm); 3.5 in (8.9 cm).[16]
- If you started with a 6 in × 8 in (15 cm × 20 cm) rectangle, each diagonal will be 5 in (13 cm) in length from the central intersection to one of the rectangle’s corners (as per the Pythagorean theorem!). If you started with a rectangle of a different size, mark the dots at 1/10, 1/4, 9/20, and 7/10 of the total length of each diagonal section.
-
7Connect the dots on the diagonals to create a series of rectangles. Start by using your ruler to connect the 4 dots at the 0.5 in (1.3 cm)—or 1/10 of the total length—position. You’ll end up with a small rectangle surrounding the central intersection. Follow up by connecting the 4 dots at 1.25 in (3.2 cm), 2.25 in (5.7 cm), and 3.5 in (8.9 cm), respectively.[17]
- You should now see a series of ever-larger rectangles that appear to be emanating from the central intersection.
-
8Alternate between 2 colors as you fill in the smallest rectangle. Due to all the lines that meet at the central intersection, the interior of the smallest rectangle should be broken up into 16 triangles. Choose 2 colors—for instance, black and red—to color in these triangles in an alternating pattern, so that you don’t have the same color in consecutive triangles.[18]
- For example, use black to color the first triangle to the right of the vertical line that points upward from the central intersection. Color the triangle immediately to its right red, and so on.
- Black and white is also a classic color combo for this type of op art, and will save you some time while coloring if you’re using white paper!
-
9Fill in the remaining rectangles using the same checkerboard pattern. Each rectangle has 16 triangles inside it, so keep using alternating colors (like black and red) within them. Start at the same spot within each rectangle and alternate the first color you use—this will give the drawing a 3-D checkerboard appearance.[19]
- For instance, start coloring inside each rectangle at the triangle directly to the right of the vertical line that points upward from the central intersection. Make the triangle black in the smallest rectangle, red in the second smallest rectangle, and so on.
-
10Finish by adding shading, if desired, to enhance the appearance of depth. Use the side of a pencil lead, for example, to slightly darken the area surrounding the central intersection. Use less and less darkening as you get further from the central intersection—which is in fact the “vanishing point” of your finished piece of op art![20]
- Next time you try this style of op art, play with the geometry a bit so that your vanishing point is off-center on the page. Or, try using 4 colors instead of 2 to change up the final appearance!


Community Q&A
-
QuestionDoes it matter if some lines are wonky or irregular?
 VerinTop AnswererNot really. It depends on the effect you're trying to go for; you can decide to add irregular lines on purpose, or make every line as perfectly straight as possible. The choice is up to you.
 -
QuestionWhat is a good size for your paper when doing the bulging curves?VerinTop AnswererIt really only depends on how large you want your final image to be, and where you want to display it (if you decide to display it) afterwards.
References
- ↑ http://www.op-art.co.uk/history/op-art-history-part-iii/
- ↑ https://kinderart.com/art-lessons/arthistory/op-art-shaded-shapes-lesson/
- ↑ https://kinderart.com/art-lessons/arthistory/op-art-shaded-shapes-lesson/
- ↑ https://kinderart.com/art-lessons/arthistory/op-art-shaded-shapes-lesson/
- ↑ https://kinderart.com/art-lessons/arthistory/op-art-shaded-shapes-lesson/
- ↑ https://kinderart.com/art-lessons/arthistory/op-art-shaded-shapes-lesson/
- ↑ https://kinderart.com/art-lessons/arthistory/op-art-shaded-shapes-lesson/
- ↑ https://kinderart.com/art-lessons/arthistory/op-art-shaded-shapes-lesson/
- ↑ https://kinderart.com/art-lessons/arthistory/op-art-shaded-shapes-lesson/
- ↑ https://kinderart.com/art-lessons/arthistory/op-art-shaded-shapes-lesson/
- ↑ https://www.slideshare.net/bthemuck/techniques-op-art, slide 16
- ↑ https://www.slideshare.net/bthemuck/techniques-op-art, slide 16
- ↑ https://www.slideshare.net/bthemuck/techniques-op-art, slide 17
- ↑ https://www.slideshare.net/bthemuck/techniques-op-art, slide 18
- ↑ https://www.slideshare.net/bthemuck/techniques-op-art, slide 18
- ↑ https://www.slideshare.net/bthemuck/techniques-op-art, slide 19
- ↑ https://www.slideshare.net/bthemuck/techniques-op-art, slide 19
- ↑ https://www.slideshare.net/bthemuck/techniques-op-art, slide 20
- ↑ https://www.slideshare.net/bthemuck/techniques-op-art, slide 21
- ↑ https://www.slideshare.net/bthemuck/techniques-op-art, slide 22
- ↑ https://www.tate.org.uk/kids/make/paint-draw/make-op-art-plant-pot
About This Article