This article was co-authored by wikiHow Staff. Our trained team of editors and researchers validate articles for accuracy and comprehensiveness. wikiHow's Content Management Team carefully monitors the work from our editorial staff to ensure that each article is backed by trusted research and meets our high quality standards.
This article has been viewed 25,816 times.
Learn more...
Capiz shells are harvested from windowpane oysters, a type of marine mollusk found around the Philippines. Capiz shells are often used as a substitute for glass because of their durability and translucence. To dye your own shells, use warm water, vinegar, and gel food coloring. You can also make your own faux shells out of wax paper. Once your shells are colored, use them to make one-of-a-kind items.
Steps
Using Food Coloring on Shells
-
1Gather gel food coloring in your desired colors. You can dye your shells 1 solid color, or you can use many colors to create a spectrum of hues. Gel food coloring works well to tint to your Capiz shells. Purchase gel food coloring at most grocery or craft stores.
- Mix yellow and blue together to make green. Mix blue and red together to make purple.
- Popular Capiz shell colors include blue, purple, and pink.
-
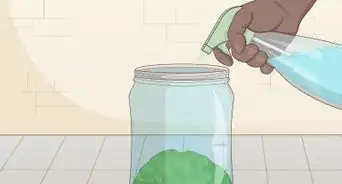
2Use warm water, white vinegar, and gel food coloring to create your dye. Use 1 small, plastic bowl per color of dye. Pour in about 1⁄2 c (120 mL) of warm water, then add in roughly 2 tsp (9.9 mL) of distilled white vinegar. Finally, add about 1 tsp (4.9 mL) of food coloring. Then, mix up your concoction with a spoon.
- The vinegar makes the colors rich and vibrant.
Advertisement -
3Place your Capiz shells in the bowl so they are totally submerged. You can put multiple shells in the same bowl. Make sure each shell is totally covered in your dye mixture. This way, each side gets completely colored.
- You can put the shells in the bowl horizontally and stack them on top of each other.
-
4Let your shells soak for 15-30 minutes. Place the bowl in a spot where it won't get knocked over, and come back to check on them after about 15 minutes.[1]
- It will not take very long for the gel food coloring to take effect.
-
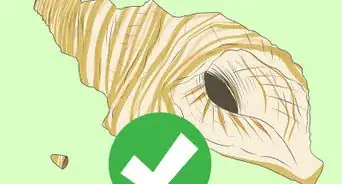
5Remove the shells from the dye with a fork to check the color. After awhile, you can use a fork to lift the shells out of the water. If the color is to your liking, then your shells are ready to dry. If you want a more saturated color, place the shells back into the bowl and leave them sit for another 15 minutes or so.
- The food coloring will not harm your shells.
-
6Place the shells on a paper towel so they can air dry. Once you’ve dyed your shells to your desired shade, take them out of the dye mixture and put them on a paper towel. Avoid stacking them on top of each other so they can dry evenly. Then, pour your mixture down the sink and wash your bowls with soap and water.
- You can let your shells air dry either inside or outdoors.
- Your shells should dry in about 1-3 hours.


Making and Dyeing Faux Shells
-
1Use a 12–18 in (30–46 cm) piece of parchment paper as your base. Rip your piece of parchment paper, and secure it to your table using 4 small pieces of tape.
- This will protect your surface from any paint.
-
2Cut 3 pieces of wax paper about 6–10 in (15–25 cm) long. To create your faux Capiz shells, use layers of wax paper. Rip off your wax paper from the roll, and set them next to your parchment paper when you are ready to paint them.
-
3Squeeze your paint into a small bowl and add 5-10 drops of water. You can use a quarter-size or more of paint. Drip a couple of drops of water from your sink into the bowl. Then, use a paintbrush to mix up your paint. The water makes the paint slightly runny, so the color of your shells looks opaque.
- Avoid using too much water. If your wax paper is too wet, it will not iron correctly.
-
4Use a sponge brush and acrylic paint to cover your wax paper. Place your first piece of wax paper on top of the parchment paper. Dip a small sponge brush into your paint, and paint over your first piece of wax paper. Cover all of the wax paper with your paint. Let your wax paper dry for 2-5 minutes.
- If you run out of paint, simply mix more to finish covering the wax paper.
-
5Place another piece of wax paper on top and iron it for 10-15 seconds. Warm up your iron before you use it. After your paint is dry, stack an unpainted piece of wax paper on top of your painted piece. Then, use a low heat setting to iron your pieces of wax paper together. They will stick together after 30-90 seconds of ironing.
- Make sure you cover the edges well, so they don't lift up and peel away.
-
6Lay your last piece of wax paper on top, paint it, and iron it again. Once your first and second layers are adhered, place your final piece of wax paper on top, and paint the surface with your sponge brush. Let the paint dry completely, then flip it over so the paint side faces the other wax paper. Iron the third piece to the others so they all stick together.
- Use a low heat setting when you do this, as well.
-
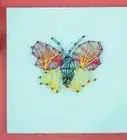
7Use scissors to cut your faux shells into circles or squares. When your wax paper layers are all secure, cut them to your desired size. You can use a circular or rectangular stencils and a pencil to draw guidelines, if you'd like. Cut your shells anywhere from 1⁄2–3 in (1.3–7.6 cm) to use for various craft projects.
- You can also use an X-ACTO knife to cut out your faux shells.
-
8Poke a sewing needle through the top of your shell to hang them. If you intend on creating dangling crafts like ornaments or garland, take a needle and stab it through the shell about 1⁄8–1⁄4 in (0.32–0.64 cm) from the top.
- This way, you can easily run thread or string through your faux shells to make different items.


Creating Crafts with Capiz Shells
-
1Attach Capiz shells to a box to make a unique jewelry box. To best adhere your shells, use a grout mastic compound, which you can get at hardware stores. Spread a thin, even layer over the top of your box using a palette knife. Then, assemble rows of Capiz shells over the top. Press down on the shells with gentle pressure so they stick to the box, and let the compound dry overnight.[2]
- This creates a personalized, beach-inspired decoration or gift.
- For best results, use square Capiz shells and work from top to bottom.
- Choose to layer the shells for an opaque look, or place them side by side for a transparent style.
-
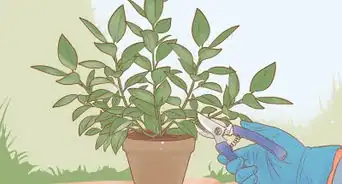
2Attach Capiz shells to a picture frame for a beach-themed decoration. Apply a thin, even layer of craft glue to the back of your shells using a small craft brush. Then, place your shells 1 by 1 on your picture frame. You can overlap the shells slightly if you’d like. Continue gluing on your shells until the frame is covered, working from top to bottom. Let your frame dry overnight for best results.[3]
- For a more permanent hold, apply a small dab of hot glue to the edges of your shells. Use this instead of the craft glue.
- You can also do this around the edge of a mirror.
-
3String Capiz shells together to make custom ornaments or garland. Capiz shells come on strands when you purchase them. To make ornaments, simply cut the strand to your desired length. Then, apply a small dab of hot glue to the shell at the end of the strand, and attach a 2–4 in (5.1–10.2 cm) ribbon. To make garland, cut a piece of string about 2–4 ft (0.61–1.22 m) long, and thread your shells through each hole of the string. Tie a small knot at either end of the shell to hold it in place, then string your next shell onto the cord.[4]
- You can then hang your ornaments or garland around your home or from a holiday tree.
-
4Dangle Capiz shells from a piece of driftwood for a nautical decoration. Use a drill and a small drillbit to create 3-7 horizontal holes down your piece of driftwood. Cut 3-7 pieces of twine to about 30 in (76 cm) long, and feed your shells through the string. Put the string through the first hole, run it through the second hole, and tie the string to hold the shell in place. Run a piece of twine through the hole, and knot it on the top end to secure the string.
- Locate a piece of driftwood from a beach, or buy 1 online.
- You can spread out your shells, or you can place them directly next to each other. Either option creates a lovely decoration.
- Use a simple knot to secure your shells, then double or triple knot the string at the top to connect it to your driftwood.
- For a secure hold, apply a small dab of hot glue over the string on top. This way, your string will not fall out of the driftwood.
-
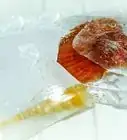
5Accent a lampshade with Capiz shells for a beachy touch. Pull a 2–4 in (5.1–10.2 cm) piece of nylon thread through the pre-drilled hole in your shell, and then run the thread to an eye of a sewing needle. Tie a knot at the end so the thread stays in place. Pierce your needle through the bottom edge of your lampshade, and pull the shell into place. Tie the thread in a knot at the edge of your shade to secure the shell. Continue hand sewing your shells until your lamp is decorated to your liking.
- You can match the color of your thread to the color of your lampshade.
- Arrange your shells immediately next to each other, or leave 1⁄4–1⁄2 in (0.64–1.27 cm) in between each shell.


Things You’ll Need
Using Food Coloring on Shells
- Capiz shells
- Small bowl
- Gel food coloring
- Water
- White vinegar
- Spoon
- Paper towel
Making and Dyeing Faux Shells
- Wax paper
- Parchment paper
- Sponge brushes
- Iron
- Acrylic paint
- Scissors
Creating Crafts with Capiz Shells
- Capiz shells
- Box
- Grout mastic compound
- Palette knife
- Picture frame
- Driftwood
- String
- Ribbon
- Hot glue gun
- Drill
- Needle
- Thread
-Step-11.webp)

References
About This Article


-Step-11.webp)