This article was co-authored by Carroll Kelly. Carroll Kelly is a Shoe Care Specialist and the Owner of Austin Shoe Hospital in Austin, Texas. With over 37 years of experience, Carroll specializes in sustainable shoes, boots, belts, handbags, and luggage repair. Carroll graduated with a Bachelor’s degree from the University of Texas. Austin Shoe Hospital is a family-run business that started over 105 years ago from a single horse-drawn carriage. Today they are the largest and most recognized shoe repair company in the world.
There are 9 references cited in this article, which can be found at the bottom of the page.
wikiHow marks an article as reader-approved once it receives enough positive feedback. In this case, 80% of readers who voted found the article helpful, earning it our reader-approved status.
This article has been viewed 661,251 times.
Whether you are creating a new leather item or restoring an old one, leather dying instructions can quickly take you to your finished product. Knowing how to dye leather will allow you to easily change the color of a leather item. Keep in mind that every piece of leather is different and may accept the color a little differently.
Steps
Using Commercial Leather Dye
-
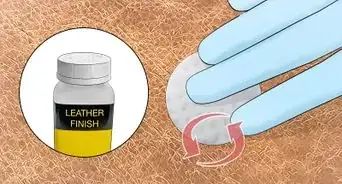
1Choose your leather dye. Most commercially prepared leather dyes come with leather preparer, the dye itself, and a finish (such as leather sheen). Consider the following when choosing a dye:
- Alcohol-based dyes stiffen the leather, while water-based dyes leave it soft and supple. Many water-based dyes are actually coatings, which can completely change the color of the piece.
- The color of the dye is not representative of the final color. Test on a small sample first. If you are touching up an already dyed piece, use a color-matching service to get an exact match.
- Dyes can be spray-on, paint-on, or sponge-on. Choose the type that works best for you in terms of ease of use.
-
2Tape off any area that you do not want dyed. Cover any buckles or metal pieces that you do not want dyed with masking tape. The tape may damage the leather finish, but you'll be removing that anyway to make the surface available for dyeing.Advertisement
-
3Move to a well-ventilated area. Most leather preparers and leather dyes release fumes that are unhealthy to breathe. Work in a space with good ventilation. If dyeing your leather outdoors, keep it out of direct sunlight and extreme heat.
- Most dyes give best results at air temperatures of 60ºF (15ºC) or above.[1]
-
4Protect your hands and floor from stains. Leather dye can stain skin for a week and other surfaces permanently. Wear two pairs of latex or nitrile gloves. Lay down plastic drop cloth to catch spills.
-
5Apply the leather preparer. Rub the leather preparer or de-glazer on with a clean cloth. This removes the leather finish so the dye can penetrate evenly into the material.
-
6Wet the leather. Use a spray bottle filled with water to dampen the surface of the leather. Do not over-saturate the leather, but make sure you have an even covering. This helps the leather absorb the dye evenly, resulting in a smooth finish.
- Some leather dyes do not require this step. Check the label.
-
7Apply your first coat. Start by painting the edges with a paintbrush. For the rest of the job, apply the dye in a thin coat using a sponge, wool dauber, paintbrush, or sprayer. Check the dye label to see which tool the manufacturer recommends, or weigh the following pros and cons:
- Sponges can apply a special affect or texture to the leather. Apply in a circular motion for an even look.
- Wool daubers are easy to use when applying liquid dye to small areas. They may not work well with gel dyes.
- Paintbrushes are good for edges and small areas, but it is hard to hide the brush strokes over large areas. Apply the first layer left to right, the second up and down, and the next layer in circular motions to ensure even coating.
- Sprayers makes it easy to blend colors for repairs or multi-color dye jobs. An airbrush or touch-up spray gun provides the most control.[2] Check the dye instructions to see if it is suitable for spraying.
-
8Apply additional coats of leather dye. Let the first coat dry a little, then apply another one. Repeat with additional coats of leather dye until it reaches the desired color, usually after three to six coats.[3] Applying several thin coats makes it easier to achieve a uniform color.
-
9Allow the leather to dry completely, manipulating it periodically to keep it supple. Allow the leather to dry for at least 24 hours. Pick it up and flex it occasionally (wearing gloves) to prevent it becoming rigid. The leather may feel sticky at first, but this should disappear after buffing or applying leather sheen.
-
10Buff the leather with a clean cloth or apply leather sheen. Buffing with a cloth removes any dye residue and polishes the surface of the leather. You may use leather sheen to leave a shiny finish on the leather.

Using Vinegar and Rust
-
1Use vinegar and rust to dye leather black. This old-fashioned recipe, called vinegaroon or vinegar black, is a cheap and easy way to permanently dye your leather dark black. The color will not rub off onto fingers or clothes, and you can save the leftover dye for later use.
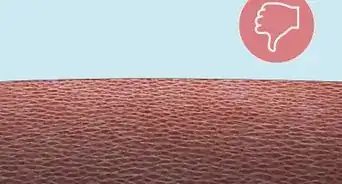
- This method works best on vegetable-tanned leather (or antique pit-tanned leather). If the leather is already dyed, it was probably chrome-tanned and sealed, and vinegaroon will not give good results.
-
2Choose a source of rust. You can use uncoated iron nails, iron shavings, or any other material that will rust (and ideally has already started to rust). Steel wool is one of the fastest options, since you can tear it into small fragments, but it has an oil coating to prevent rust. Get rid of this first by dunking the steel wool in acetone, squeezing it out, then letting it dry completely.
-
3Warm the vinegar. Heat about a half gallon (two liters) of white vinegar or apple cider vinegar until it is hot, but not too hot to touch. Pour it back into the container it was sold in, or into any convenient container.
-
4Drop the metal into the vinegar. Over time, the rust (iron oxide) will react with the vinegar (acetic acid). This form a substance called ferric acetate, which reacts with tannins to dye the leather.
- The amount of iron to add depends on the concentration of the vinegar. The easiest approach is to start with a large quantity (thirty nails, as a ballpark estimate), then keep adding metal until it stops dissolving.[6]
-
5Keep in a warm, ventilated container for at least a week. Punch a hole in the lid to let off gases, or the container could explode. Close the lid and put the container in a warm location for at least a week or two. The "vinegarroon" is ready when the iron is dissolved and there is no strong vinegar smell.
- If it still smells strongly of vinegar, add more iron. If there's already iron in there, heat over the stove to speed up the reaction.
- Once almost all of the acetic acid is gone, any remaining iron will rust normally, turning the liquid reddish. At this point you can leave the lid off for a couple days to help the last dregs of the acetic acid evaporate.
-
6Filter out the liquid. Run the vinegaroon through paper towels or coffee filters repeatedly until the liquid is free from solids.
-
7Soak your leather in black tea. Brew an extra-strong black tea, then let the water cool. Soak the leather in it to add extra tannin. This will improve the effects of the vinegaroon, and help prevent cracking.
- Professional leather workers sometimes use tannic acid or logwood extract instead.
-
8Soak the leather in vinegaroon for thirty minutes. The liquid will penetrate into the leather and add a deep, permanent dye. Don't be alarmed if the color looks grey or bluish. It should deepen to black during the process, and become darker after oiling.
- It's a good idea to test a similar piece of scrap leather first, or one corner of the object. If it cracks after a couple days, dilute the vinegaroon in water and try again.
-
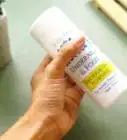
9Neutralize the leather using a baking soda solution. Mix 3 tbs. (45 mL) baking soda in one quart (1L) of water. Saturate the leather with the solution and then rinse with clean water. This neutralizes the acid in the vinegar solution to keep your leather from disintegrating later on.
-
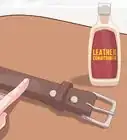
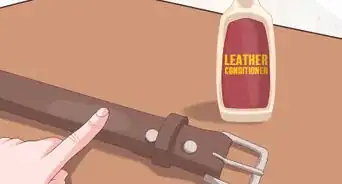
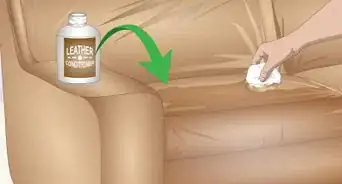
10Condition the leather using oil. While the leather is still damp, rub your favorite leather oil over the surface. You may need two coats of the oil to fully condition the leather. Choose the oil that works best for your leather product by testing on a small portion of the leather.
Using Mink Oil
-
1Use mink oil when you only want to darken the leather.[7] Mink oil is a natural substance that lubricates and soaks into leather to condition it. Mink oil also has waterproofing abilities and protects from salt, mildew, mold and other elements.
- Warning: Mink oil is controversial, since it can leave an oily layer that repels other products (making further polishing or enhancement difficult). Worse, "mink oil" products are not standardized, and may contain silicone or other ingredients that can damage your leather.[8] Research product reviews before using it on high quality leather.
-
2Clean the leather. Before dyeing, ensure the leather is free of dust, dirt, or other extraneous material. Use a brush or lightly damp cloth to remove any dirt or dust from the surface.
-
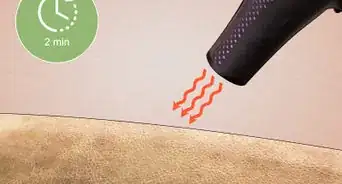
3Place leather in the sun. Gently warm up your leather in the sun. Heating the leather helps the mink oil "pull" the dye into the leather, making it permanent and indelible.
- You should never place your leather in the oven to warm it; it is very easy to ruin the leather.
-
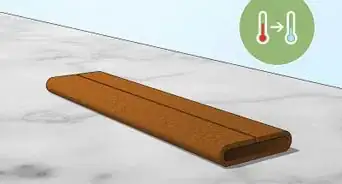
4Warm up mink oil. Place the bottle of mink oil into a container filled with hot water to gently heat up the oil. This will ensure an even coating of mink oil on your leather by helping to pull the oil into the leather.[9]
-
5Apply mink oil. Use clean, smooth strokes from an oil-soaked cloth to spread the mink oil across the length of the leather. Give the leather an even coating to ensure an even finish. You may need to make multiple applications to get to the desired darkness.
-
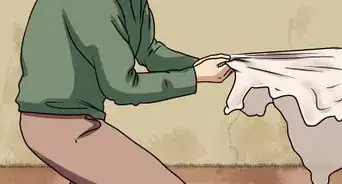
6Let dry for 30 to 60 minutes. Occasionally move the leather back and forth so that the leather does not stiffen. This also helps to work the oil into the leather.
-
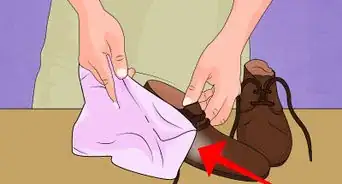
7Buff or polish the leather with a cloth or shoe polish brush. For a pleasing, shiny finish give your cooled leather a buffing with a clean brush or cloth. Buff the leather by rubbing the cloth in circles.
-
8Handle your finished leather cautiously. Be careful when handling or wearing the leather after finishing the process, as it's possible for fresh oil to rub off onto clothes, skin, or anything else it comes into contact with in the first few weeks after dying.
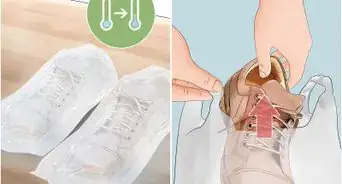
- You may want to keep your dyed leather in a safe place in your closet until the dye fully sets to prevent accidental stains.
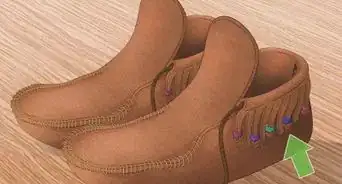
- If you are unhappy with the shade of your finished leather, repeat this entire process as needed for deeper color saturation.
Community Q&A
-
QuestionI spilled some coffee on a leather satchel, leaving a discolored spot. Could apply coffee to the rest of the satchel to even out the color, or is this risky?
 RubnrestoreCommunity AnswerGreat idea! The only trouble you may encounter is a bold ring or perimeter around the original stain, which may be difficult to conceal. Before staining with more coffee, try cleaning the original stain (or lightening the ring) with white vinegar.
 -
QuestionDo these methods work on all types of leather?RubnrestoreCommunity AnswerNo. There are many types of leather, distinguished by the method of tanning. Suede, for example, has a fuzzy nap and is very absorbent. It easily stains and can be etched and stiffened by liquids, so dyeing is not recommended. Many full-grain or corrected-grain leathers, on the other hand, have a polyurethane coating that resists oil and natural homemade dyes made with plants, coffee, or tea. These leathers require a leather dye or coating to restore or change the color.
-
QuestionHow can I dye the edge of black belt that was cut by Amish leather (was dyed first, then cut to length and buckle put on)?
 Community AnswerEven many of the pros use a black Sharpie on the edges.
Warnings
- Always test your dye method on a small, unseen portion of the leather to avoid ruining the leather.⧼thumbs_response⧽
Things You'll Need
- leather dye kit, vinegar and rusty metal, mink oil or tea bags (depending on method)
- 2 clean cloths
- sponge or wool dauber
- spray bottle


References
- ↑ http://www.iosrjournals.org/iosr-jpte/papers/Vol1-issue4/C0141013.pdf
- ↑ http://www.leatherworldtech.com/Leather-Dyeing-s/1881.htm
- ↑ http://thedreamstress.com/2013/09/tutorial-how-to-dye-leather-shoes-handbags/
- ↑ https://www.ccohs.ca/oshanswers/chemicals/chem_profiles/acetone.html
- ↑ http://amo-csd.lbl.gov/downloads/Chemical%20Resistance%20of%20Gloves.pdf
- ↑ http://americanlongrifles.org/forum/index.php?topic=10251.0
- ↑ Carroll Kelly. Shoe Care Specialist. Expert Interview. 17 December 2020.
- ↑ https://www.reddit.com/r/goodyearwelt/comments/1ubpyl/introductory_leather_care_guide/
- ↑ http://leatherworker.net/forum/index.php?showtopic=38370
About This Article

If you want to dye leather with a commercial dye, use masking tape to cover any areas that you don’t want to be dyed, and protect your hands with two pairs of latex or nitrile gloves. In a well-ventilated space, apply your first coat of dye, using a brush to paint the outside edges of the leather and a sponge, paintbrush, or sprayer for the rest of the piece. Let the first coat dry a little, then apply another one. Repeat until you achieve your desired shade, which usually takes 3-6 coats, then allow the leather to dry for at least 24 hours. To learn how to make your own leather dye from natural substances, read on!