X
wikiHow is a “wiki,” similar to Wikipedia, which means that many of our articles are co-written by multiple authors. To create this article, 14 people, some anonymous, worked to edit and improve it over time.
This article has been viewed 268,477 times.
Learn more...
Avidemux is a free open-source and cross platform (it runs on Microsoft Windows, Linux and Mac OS X) video editing program. Avidemux natively supports a great number of file types, formats, and codecs. It's a powerful tool, but not a particularly user-friendly one. Follow this guide to perform some of the basic video editing functions available in Avidemux.
Steps
Method 1
Method 1 of 5:
Joining Video Clips
-
1Open the initial video clip. To do this, click File and select Open. Browse for the first video that you want to open.
- If you are attempting to join converted video files, open the main VOB file and the rest will be joined automatically. The main VOB file is typically VTS_01_1.vob.
-
2Add a second clip to the end. Click File and then select Append. Browse for the file that you want to add to the end of the first clip.
- The second file must be the same width, height, and framerate as the original file.
Advertisement -
3Add more clips. You can continue to add clips to the end of the file by following the same method.


Advertisement
Method 2
Method 2 of 5:
Cutting Clips
-
1Set your starting point. Use the navigation bar at the bottom of the video to find the start of the clip that you want to remove from the video. Press the A button in the playback menu or press the “[“ key to set the starting point for the cut.
-
2Set the end point. Move the navigation bar further down the line to set the end point of the cut. Once you have it set, press the B button or the “]” key to set the end point of the cut. The section will be highlighted, representing the clip that will be removed.
-
3Delete the segment. If you are satisfied with the selection, press the “Del/Delete” key to delete the highlighted segment. If you want to Cut the segment instead so you can paste it elsewhere, Select Cut from the Edit menu or press Ctrl+X.[1]


Advertisement
Method 3
Method 3 of 5:
Changing the Format and File Size
-
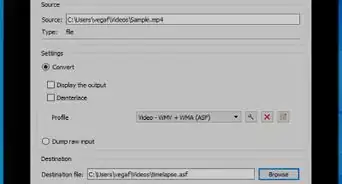
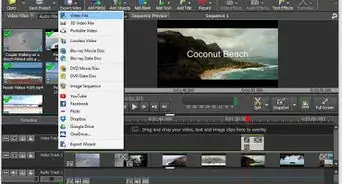
1Choose a format preset. If you have a specific device that you want the video to be compatible with, click the Auto menu and select it from the list of presets. All of the settings will be configured automatically. If your device is not on the list or you want to convert to something else, continue to the following steps.
-
2Select your video codec. In the Video Output section in the left frame, click the dropdown menu and select the codec that you need. Mpeg4 (x264) is one of the most common formats accepted by most media players.
- Selecting Copy will keep the existing format.
-
3Select your Audio codec. In the Audio Output section, directly beneath the Video Output section, click the pulldown menu and select the audio codec that you prefer. AC3 and AAC are two of the most popular codecs.
-
4Select your format. In the Output Format section, click the pulldown menu to select the format you want the file to be. MP4 will play on most devices, and MKV is one of the preferred formats for PC use.
-
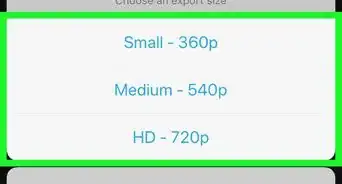
5Change the file size of the video. Click the Calculator button in the top row of icons to adjust the final file size. Set the “Custom size” field to the size that you want the file to be. The bitrate of the video will be changed automatically to meet that size requirement.[2]
- Small videos will end up with a lower quality that larger video files.


Advertisement
Method 4
Method 4 of 5:
Adding Filters
-
1Click the Filters button in the Video Output section. Here you can select a variety of filters that will affect the look of your final video. Some of the more popular options will be outlined in the following steps.
-
2Transform your video. The Transform category of filters will allow you to adjust the way the video is displayed. You can add borders to the video, put a logo in, and more.
- To change the dimensions of a video, use the “SwSResize” filter to manually adjust the resolution of the final video. You can resize via percentage or by the actual pixel size of the video.
- The “crop” filter will allow you to cut out the edges of your video. Double-click it to define how much you want to cut off from each edge.
- Fade in and out of the video by using the “Fade” filter. Double-click it to set the time in the video that you want to start the fade at.
-
3Adjust the colors. Use the Colors category to adjust saturation, hue, and more. Stack multiple filters to get a really unique looking color scheme for your video.
-
4Add subtitles. If you have a subtitle file for your video, you can add it into the video using the SSA filter in the Subtitle category. You can adjust where the subtitles appear on the screen.
-
5Get more filters. You can add custom filters developed by community members. These filters can be downloaded online from Avidemux community websites. Once you have downloaded a filter, click the “Load filters” button to add it to the list.


Advertisement
Method 5
Method 5 of 5:
Previewing and Saving Your Work
-
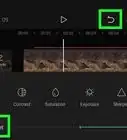
1Switch to Output mode. In the top row of icons, click the Output button, which has an arrow pointing to the right edge of a screen. This will switch your display to the final version of your video, where you can review the filters and changes you have made.
- Press the Play button in the bottom to watch the Output version of the video.
-
2Press Save. You can select Save from the File menu or press the Save button in the top row of icons. Name the file and select where you want to save it to.
-
3Wait for the encode to complete. Once you have clicked Save, the Avidemux will begin encoding the video according to the settings you defined earlier. Depending on how much encoding you are doing, this can take a significant amount of time. Once the encoding is finished, open the video in your preferred media player to test it out.


Advertisement
Community Q&A
-
QuestionHow do I convert an MP4 file into an audio file so I can copy the audio file onto a CD?
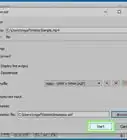
 Community Answer1.) Choose an .MP4 video or any other supported media file from your device or cloud storage. 2.) Select ".mp3" as the conversion format from the dropdown menu. 3.) Click the "Start" button to start converting your file. 4.) When the conversion is completed, click on the download link to get your converted .MP3 file.
 -
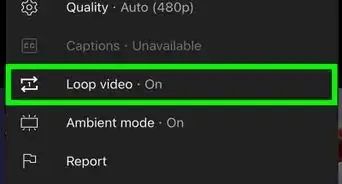
QuestionCan I change the speed of the video or play it in slow motion?In YouTube, yes you can, but you can only speed it up unfortunately. You can only speed it up a certain amount as well, but the highest should be fast enough. If it is a video is on your iPhone, iPad, etc. you can install certain apps for this.

Advertisement


References
About This Article
Advertisement