This article was co-authored by wikiHow staff writer, Nicole Levine, MFA. Nicole Levine is a Technology Writer and Editor for wikiHow. She has more than 20 years of experience creating technical documentation and leading support teams at major web hosting and software companies. Nicole also holds an MFA in Creative Writing from Portland State University and teaches composition, fiction-writing, and zine-making at various institutions.
The wikiHow Tech Team also followed the article's instructions and verified that they work.
This article has been viewed 203,179 times.
Learn more...
Video subtitles are useful for displaying dialogue and sounds as on-screen text for people who are hard-of-hearing or for language translation. If you're using YouTube, you can easily upload an existing subtitle file (usually in the SRT format) or type your own subtitles by hand. If you want to add subtitles to a video file on your computer, you can create an SRT file and add it to your video with HandBrake. This wikiHow teaches you how to add subtitles to a YouTube video, as well as a video on your PC or Mac.
Steps
Embedding Subtitles into a Video File
-
1Download and Install Handbrake. Handbrake is a free video transcoder tool that can embed subtitles in videos. You can download Handbrake from https://handbrake.fr/downloads.php.
- To embed subtitles into your video, you need an external SRT file containing subtitles for your video. If you do not have an SRT file, you can make one using a free app called Clideo SRT Editor, or you can code them by hand in Notepad or TextEdit.
-
2Open Handbrake. Once you download and install Handbrake, you can open it in the Windows Start Menu, or in the Applications folder on a Mac.Advertisement
-
3Click File. It's the second option in the menu on the left. This opens a file browser.
- Alternatively, you can drag and drop the video you want to embed subtitles into the box on the right.
-
4Click the video you want to embed subtitles in and click Open. This opens the video in Handbrake.
-
5Click Subtitles. It's one of the tabs in the center of the screen below the video source information.
-
6Click Import SRT. It's at the top of the box below the "Subtitles" tab.
-
7Select the SRT file that corresponds to the video and click Open. This imports the SRT file into Handbrake.
-
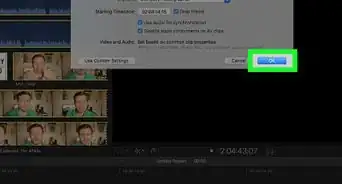
8Click Browse. It's the grey button in the lower-right corner.
-
9Type a name for the new file and click Save. This creates a save file and location for the final video with the embedded subtitles.
-
10Click Start Encode. It's at the top of Handbrake next to the green icon with the Play triangle. This encodes the video with the embedded subtitles. You can turn on the subtitles in your media player by selecting the subtitle menu and then enabling subtitles.


Uploading Subtitles to YouTube
-
1Go to https://www.youtube.com in a web browser. You can use any web browser on your PC or Mac.
-
2Upload your video to YouTube. If you haven't already done so, use the normal methods to upload your video to YouTube from your computer.
- If your video is available in Dutch, English, French, German, Indonesian, Italian, Japanese, Korean, Portuguese, Russian, Spanish, Turkish, or Vietnamese, YouTube will automatically add captions to your video once it is processed.[1] If the captions aren't as accurate as you'd like, you can edit them.
-
3Click your profile photo and select YouTube Studio. Your profile photo is at the top-right corner of the page. If you don't have a photo set, you'll see your first initial here instead.
-
4Click Subtitles. It's in the left panel. A list of your videos will appear.
-
5Click the video you want to edit. If you haven't already set a language for the video, you'll be asked to set one now. Choose and language and select CONFIRM if prompted to do so.
-
6Click Add. It's to the right of the video.
- If automatic subtitles have already been generated, you'll see DUPLICATE AND EDIT instead. If you choose this option, you can make changes to the subtitles manually, or upload your own transcript to replace them.
- To edit the timings of each automatic caption, click EDIT TIMINGS at the top of the window.
-
7Choose how to add your subtitles.
- Click Upload file to upload a subtitle or closed-caption file that contains time codes. YouTube supports the following subtitle formats: .ASC, .CAP, .CIN, .DFXP, .LRC, .MPSUB, .RT, .SBV, .SAMI, .SCC, .SMI, .SRT, .STL, .SUB, .TDS, .TTML, and VTT.[2]
If you are editing an automatically-subtitled video and want to upload a subtitle file, click the three vertical dots next to "EDIT TIMINGS" and select Upload file instead.
- If you do not have a caption file, you can make one using a free app called Clideo SRT Editor, or you can code them by hand in Notepad or TextEdit.
- If you choose this option, you'll be prompted to choose With timing or Without timing and select Continue. Select your file and then click Save to proceed.
- Click Auto-sync if you want to paste a text transcript from another file and have YouTube sync it to the video. Once your transcript is added, click ASSIGN TIMINGS, and then click CLOSE.
- Click Type manually if you want to type the captions as you watch the video. YouTube will sync your captions to the video as long as you enter at least 5 lines of captions.
- Click Upload file to upload a subtitle or closed-caption file that contains time codes. YouTube supports the following subtitle formats: .ASC, .CAP, .CIN, .DFXP, .LRC, .MPSUB, .RT, .SBV, .SAMI, .SCC, .SMI, .SRT, .STL, .SUB, .TDS, .TTML, and VTT.[2]
If you are editing an automatically-subtitled video and want to upload a subtitle file, click the three vertical dots next to "EDIT TIMINGS" and select Upload file instead.
-
8Click PUBLISH to save your captions. This adds your new or edited captions to your YouTube video.


Creating a Subtitle File with Clideo SRT Editor
-
1Go to https://clideo.com/create-srt-file in a web browser. You can use a free web-based tool called Clideo SRT Editor to create subtitle files for your videos. Start by loading the website in your favorite desktop or mobile web browser.
- This method can also produce a subtitled version of the video that you can download, although it will be watermarked.
-
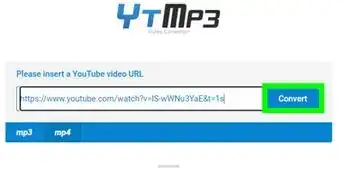
2Select a video file. If the video is on your computer, phone, or tablet, click Choose file, select it, and then click Open. If it's on the web, click the down-arrow next to the "Choose file" button and pate the URL into the field.
- You can also select a video from your Google Drive or Dropbox in the menu.
-
3Click Add manually. This takes you to the SRT editor.
-
4Add your first subtitle. Click the Play button to find the part of the video where you'd like to place the first subtitle. Then, type your first subtitle into the "New Subtitle" field in the upper-right area of the page. You'll see a preview on the screen.
-
5Drag the subtitle to the desired timing on the screen. The subtitle can appear on the screen for the length of time you'd like.
- For example, if your first line should appear on the screen from 7 seconds in to 14 seconds in, drag the box to 7 seconds, and then expand or reduce the size of the box to hit the 14-second marker.
-
6Click +Add subtitle to add the next line. Now you'll do the same thing with your next subtitle.
- Continue adding subtitles and moving/resizing them as needed. This creates the timestamps in the SRT file.
- Once you add more subtitles, you'll be able to overlap them to make multiple captions appear on screen at the same time. Just drag any subtitle so it overlap another at the desired timing.
-
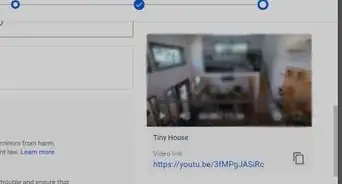
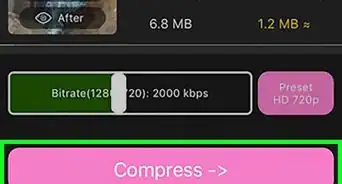
7Click Download SRT. It's in the bottom-right corner of the page. If the download doesn't start immediately, click Save or similar to save the file to your computer. Now that you have a proper SRT file, you can upload it to YouTube.
- You can also click Export to save a version of the video with built-in subtitles. Because the service is free, this will add the "Clideo" watermark to the corner of the video. But if you don't mind that, choose this option and click Download to save it to your computer, phone, or tablet now.


Creating a Subtitle File by Hand
-
1Open a text editor. You can use Notepad for Windows, TextEdit on macOS, or any other text editor you like.
- Windows 10: Click the Windows Start menu, select the Windows Accessories folder, and choose Notepad.
-
Mac:
- Click the magnifying glass icon in the upper-right corner.
- Type TextEdit.app and press Return.
- Click TextEdit.app.
- Click New Document.
-
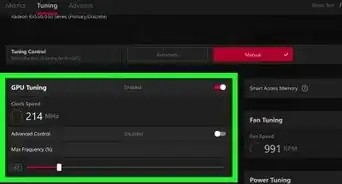
2Type the number for your first subtitle and press ↵ Enter. Each subtitle in your SRT file is numbered in the order they appear. Type "1" for the first subtitle, and "2" for the second title and so on.
-
3Type the starting time for the subtitle. This is the time the subtitle starts in the video. The starting time for each subtitle should be written in "[hours]:[minutes]:[seconds],[milliseconds]" format.
- For example, the first subtitle starting at the beginning of the video may read 00:00:01,000.[3]
-
4Type --> immediately after the starting time. Typing two dashes and an arrow separates the starting time and the ending time for the subtitle.
-
5Type the ending time for the subtitle. This is the time when the subtitle stops displaying. The ending time should be in "[hour]:[minutes]:[seconds],[milliseconds]" format. The entire line containing the subtitle time stamp should look something like this 00:00:01,000 --> 00:00:05,040.
-
6Press ↵ Enter or ⏎ Return. After you type the time stamp for the subtitle, press the Enter key to add a new line.
-
7Type the subtitle. The third line contains the actual subtitle that displays on the screen.
-
8Press ↵ Enter or ⏎ Return twice. After you finish typing the subtitle, press the Enter key twice to create line-space between the subtitle you just made and the next subtitle. Repeat these steps for each subtitle in the video.
-
9Repeat these steps for each subtitle in the video.
-
10Click File and then click Save As. After you finish typing your subtitles, you'll need to save the file as a ".srt" file.
- In TextEdit on Mac, click Save instead of "Save as".
-
11Navigate to the folder containing the video. You should save the SRT file in the same folder as the video that the subtitles correspond to.
-
12Give the text document the same file name as the video. Use the box next to "Filename" in Windows, or "Save As" on Mac to type a name for the SRT document. Both the video and the SRT file should have the same filename. If the file name for the video is "Introduction.mp4", the SRT file should be titled "Introduction.srt".
- Using VLC, you can test the subtitles if the SRT file is saved to the same location and has the same filename as the video file. Click Subtitles and then select a subtitle track.
-
13Save the document as an SRT file. Here's how:
- Windows: While saving the file in Notepad, delete the ".txt" extension at the end of the file name and replace it with ".srt". Then click Save.
- Mac: Click Save to save the file as a ".rtf" file. Use Finder to navigate to the location of the file and click it once to select it. Click File and then Rename. Delete the ".rtf" extension at the end of the file name and replace it with ".srt". Click Use .srt when asked if you want to keep the extension.


Here is an example of subtitle text properly formatted in an SRT file:
1 00:00:01,001 --> 00:00:05,040 Welcome to our video tutorial.
2 00:00:07,075 --> 00:00,12,132 In this video, we will be discussing subtitles.
3
00:00:14,013 --> 00:00:18,021
Let's start by making an SRT file.


References
About This Article

1. Upload your video to YouTube.
2. Open YouTube Studio.
3. Click Subtitles.
4. Select the video.
5. Select a language if prompted.
6. Choose how to add your subtitles.
7. Add subtitles manually if necessary.
8. Click Publsh.