This article was co-authored by Noël Reid-Killings. Noël Reid-Killings is a Professional Hair Stylist and the Owner of Noël New York Salon & Boutique. With over a decade of experience, Noël specializes in curating and customizing hair solutions for all hair types and textures. She has worked with countless A-list celebrities including Alicia Keys, Ciara, Yara Shahidi, and Simone Missick. Her work has been featured on makeover shows and in magazines including Essence, Sophisticates Black Hair, Teen Vogue, Elle, 21Ninety, WWD, POPSUGAR, Allure, The Cut, The Huffington Post, and Swaay.
This article has been viewed 79,852 times.
Feathering your hair is one of the easiest ways to show off your face. It’s a great choice for a retro look, and you can even try it with a modern twist by using less product and parting your hair to the side. If you already cut your own hair, you can learn to add feathering to layers around your face. Keep in mind, though, that you will need layered hair if you want to cut a feathering effect. You can, however, still feather parts of your hair without cutting it. Try feathering your bangs to flatter your face shape, or feathering natural layers around your face.
Steps
Adding Feathers to Layered Hair
-
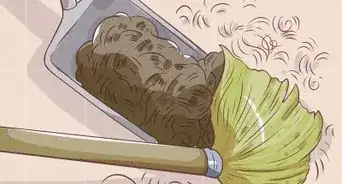
1Wash and dry your hair until it’s damp. You should always cut your hair when it’s been freshly washed. Otherwise, oil and product buildup can interfere with your cut. You can wash and condition it as usual. Afterwards, towel-dry your hair until it’s no longer dripping. Don’t dry it all the way--just get it damp! Damp hair is much easier to work with than either wet or dry hair.[1]
- Keep a spray bottle filled with warm water nearby so that you can keep your hair damp as you are cutting.
-
2Comb your hair out. Gently comb your hair out until it lies flat and has no tangles. This will help you cut your hair correctly and evenly. If you have fragile or very curly hair, applying a little hair serum or leave-in conditioner before you start combing will help prevent breakage.Advertisement
-
3Part your hair. If you are going for a retro 1970s look, part your hair in the middle. If you want something a little more modern, part your hair to the side. Either side is fine, and if you aren't sure what kind of part you want, you can just go with your usual part!
-
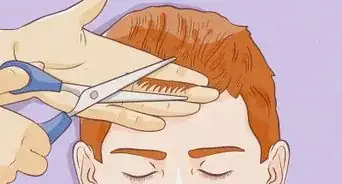
4Divide your hair into small sections.[2] To get even sections, start by tracing a line from one ear to the other over the top of your head using a rat tail comb. Use stylist clips to secure each section while you work. Then, trace a second line from your forehead to the nape of your neck. This will produce four quadrants. Divide each quadrant in half to get eight appropriately portioned sections.
-
5Hold the end of each section between two fingers. Slide your index and middle fingers around one of the sections and slowly pull down until your fingers are about 1⁄2 inch (1.3 cm) away from the tips. Your fingers should be holding your hair like a pair of scissors.[3]
- Be sure to use your non-dominant hand! Otherwise you’ll have to switch hands to cut your hair.
-
6Pull your hair away from your face and twist.[4] Feathered hair should be styled pointing away from the face. Pull the section of hair away from your face and twist it--this will help the feathered layers frame your face naturally.
-
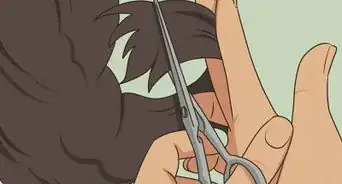
7Use feathering shears to cut the tips of your hair.[5] Take a pair of feathering shears in your other hand and snip at the ends of your hair. Your cuts should point vertically instead of horizontally to get a feathered look. Don't cut too much--you shouldn't be removing more than 1⁄8 inch (0.32 cm) at the most.[6]
- If you don’t have feathering shears, you can use a hairstylist’s razor. Don’t use regular scissors. They won’t give your hair a feathered effect.
-
8Make random cuts along the tips of your hair. To get a feathered look, make your vertical cuts slightly different lengths and angles. The ends of your hair should look like a zigzag rather than a straight line.
-
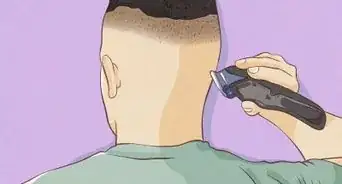
9Repeat with the other sections. Do the same thing to all the other sections of your hair. For the back, lower your head slightly and hold the end up in front of a mirror so you can see it.
-
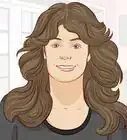
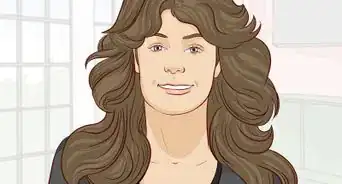
10Dry and style your hair as usual. You can add a feathered style on top of the cut if you want, but even if you just dry your hair and wear it in your usual style, it will still have a feathered effect.


Feathering Your Bangs
-
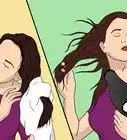
1Wash and dry your hair. You can get a feathered look just by styling your hair instead of cutting or adding layers to it. Start by washing and drying your hair as usual.
-
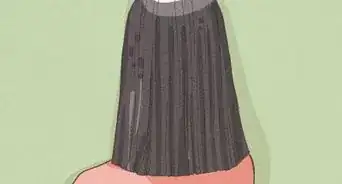
2Comb your bangs out. Brush your hair and part it as usual, but take special care to comb your bangs out until they are as smooth and straight as possible. Any tangles will show up in your feathers, so make sure they’re combed out!
-
3Apply hair gel or mousse. Use styling product to keep it stable while you style it. You can use gel or mousse, whichever works better for your hair type. If you have hair that has a hard time holding its shape, you may need more product than someone with naturally textured hair.
-
4Roll your bangs out with a round brush . Take a round brush and roll your bangs over and around it. Pull your hair across the center line of your head. The brush should be behind the hair, and the ends should be pushed toward the mirror. You can use any size brush you want, but a smaller brush will create tighter curls.[7]
- If you part your hair down the middle, simply hold the brush at the center of your forehead.
-
5Move a blow dryer from your roots to your end until your bangs are completely dry. Work the brush repeatedly from your roots to your ends, following it closely with your dryer. Keep this process going until all the moisture has been evaporated from your bangs. The heat will help hold the style in and create a feather effect. After you’ve blow-dried it, gently unroll the brush.
- Remember to keep the dryer moving. Holding the dryer stationary can burn or damage your hair.
-
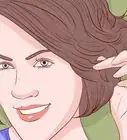
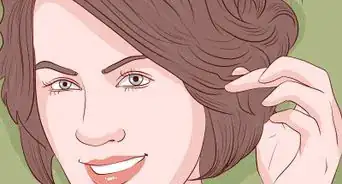
6Separate the ends of your bangs with your fingers. Use your fingers to gently feather the ends of your bangs. Simply grasp a few strands at a time with your fingertips and pull the ends of your bangs lightly in opposite directions. Repeat until your bangs are feathered.[8]
-
7Lock in your hairstyle with hairspray. Spray hairspray on your bangs to keep them in place. Don’t use too much or spray too close--this will make your bangs too stiff.[9]


Feathering Layers around Your Face
-
1Wash and dry your hair. You can get a feathered look just by styling your hair instead of cutting or adding layers to it. Start by washing and drying your hair as usual.
-
2Comb your hair out. Make sure your hair is completely free of tangles and is lying as flat as possible against your head. It’s much easier to feather hair this way!
-
3Part your hair. If you are going for a retro 1970’s look, part your hair in the middle. If you want something a little more modern, part your hair to the side. Either side is fine!
-
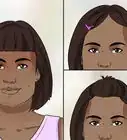
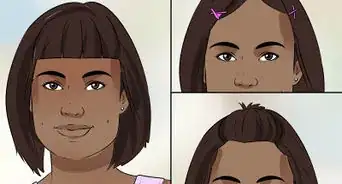
4Separate and clip a section of hair on each side of your face. Separate one section about 2 inches (5.1 cm) wide on each side of your face. Use stylist clips near the root to hold them apart from the rest of your hair.
-
5Apply hair gel or mousse (optional). If your hair is very wavy or curly, put in some styling product to keep it stable while you style it. You can use gel or mousse, whichever works better for your hair type.
-
6Roll each section around a round brush forward and out from your face. Remove the clips and take a round brush and roll each section around it. The hair should be rolled over the brush and away from your face.
-
7Blow-dry against the brush until your hair is dry. Blow dry your hair, working the brush from your roots to your tips and following closely with your dryer. Keep working the brush and dryer over your hair until is is completely dry. The heat will help hold the style in and create a feather effect. After you’ve blow-dried it, gently unroll the brush.
- Do not hold the dryer stationary over any given section of hair. This could lead to burning or damage to your locks.
-
8Curl the section with a curling iron or curlers. If you choose not to style with a blow dryer, you'll need extra help to hold the curl in. Use a curling iron or curlers to hold the curl. The curling iron should be used on dry hair only.
- If you use unheated curlers, you’ll have to wait overnight to see any effect.
-
9Separate the ends of your hair with your fingers. Use your fingers to gently feather the ends of your bangs. Simply grasp a few strands at a time with your fingertips and pull the ends of your bangs lightly in opposite directions. Repeat until you’ve feathered all the ends of your hair.
-
10Lock in your hairstyle with hairspray. When you’re done feathering, spray a light mist of hairspray over your entire hair. This will help keeps your feathering bouncy and lifted from your face.
- If your hair is very fine, you may need to spray the hairspray while your hair is still in curlers.


Things You’ll Need
- Feathering shears or hairstylist’s razors
- A spray bottle full of water
- A round brush
- Blow dryer
- Curling iron or hair curlers
- Hairspray
- Styling gel or mousse
- Comb
- Stylist clips
You Might Also Like
This is a modal window.
This is a modal window.
-Step-18-Version-2.webp)
This is a modal window.

References
- ↑ https://hairglamourista.com/cut-your-own-hair
- ↑ Noël Reid-Killings. Celebrity Hair Stylist. Expert Interview. 25 November 2020.
- ↑ https://hairglamourista.com/cut-your-own-hair
- ↑ Noël Reid-Killings. Celebrity Hair Stylist. Expert Interview. 25 November 2020.
- ↑ Noël Reid-Killings. Celebrity Hair Stylist. Expert Interview. 25 November 2020.
- ↑ https://hairglamourista.com/cut-your-own-hair
- ↑ http://living.thebump.com/feather-bangs-10968.html
- ↑ http://living.thebump.com/feather-bangs-10968.html
- ↑ http://living.thebump.com/feather-bangs-10968.html
About This Article
Temporarily feathering your hair is a great way to frame your face with a retro look. You’ll need to start with clean, damp hair to achieve the effect. Separate your hair into 2 sections. Then, roll the hair you want to feather around a round brush away from your face while blow drying it. Once your hair is dry, curl it with a curling iron. If you don’t have a curling iron, you can just blow dry your hair while rolling it around your brush. Then, grasp a few strands at a time with your fingertips and pull your hair lightly in opposite directions to feather it. Finally, apply a little hairspray to hold your feathered hair. For more tips from our Beauty co-author, including how to permanently feather your hair, read on!