This article was co-authored by wikiHow staff writer, Luke Smith, MFA. Luke Smith is a wikiHow Staff Writer. He's worked for literary agents, publishing houses, and with many authors, and his writing has been featured in a number of literary magazines. Now, Luke writes for the content team at wikiHow and hopes to help readers expand both their skillsets and the bounds of their curiosity. Luke earned his MFA from the University of Montana.
There are 12 references cited in this article, which can be found at the bottom of the page.
Learn more...
You may not have thought about it too much, but houseplants need fertilizing the same way outdoor plants and large-scale crops do. It can be a bit confusing to navigate all the different products, however, and how do you know which to pick for your particular plant? We’ve made a handy guide to help you choose a fertilizer and know when to give it to your plant, plus a simple breakdown of the many different forms houseplant fertilizer can take.
Things You Should Know
- Choose a high-nitrogen fertilizer for leafy plants, and a high-phosphorus fertilizer for flowering plants.
- Use a balanced fertilizer with equal parts nitrogen, phosphorus, and potassium if you need to fertilize many different plants.
- Fertilize your houseplants from spring through early fall, while they’re in active growth.
Steps
Choosing a Fertilizer
-
1Give houseplants with heavier foliage fertilizers high in nitrogen. Nitrogen encourages growth and helps support lusher, greener foliage in leafy plants like spider or snake plants.[1] A balanced fertilizing mix, such as one with equal part nitrogen, phosphorous, and potassium also works well for foliage plants. Usually, this is indicated by the three large numbers on the bag, e.g. X-X-X, which represent the percentages by weight of each of the three major nutrients in the mix)[2]
-
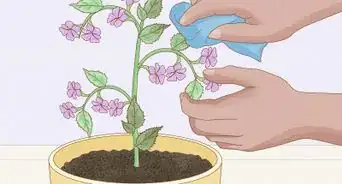
2Use a fertilizer high in phosphorus for flowering houseplants. Phosphorous reinforces roots and gives a boost to a houseplant’s flowers.[3] For flowering plants like orchids or lilies, look for a fertilizer with a high center number on its label, such as 15-30-15, which indicates a high amount of phosphorus.[4]
- Some exotic houseplants like African violets thrive on a more specialized fertilizer mix tailored to their needs.[5] If you have an uncommon houseplant or just want to give your common houseplant more involved care, consult a growing guide for any special needs the plant may have.
Advertisement -
3Choose a balanced fertilizer to use on many different plants. If you have a number of different types of plants in your home and don’t have the budget or patience to give each their own special fertilizer, you can choose one with equal amounts of nitrogen, phosphorus, and potassium. This ratio of nutrients will satisfy tons of different types of houseplants. [6]


Common Fertilizer Types (And How to Apply Them)
-
1Powdered fertilizers. Like the name, this type comes as a mix that might resemble potting soil. It can be mixed into the soil while potting, or mixed into the topsoil of an established plant. It’s water-soluble, and so will incorporate deeper into the pot and reach the roots of the plants when you water it. Powdered fertilizers are quickly available for the plant to intake, and so are great for plants that need a quick nutritional pick-me-up.[7]
- These fertilizers are widely available in nurseries and home-improvement stores, and are relatively cheap.
-
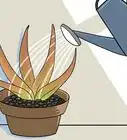
2Liquid fertilizers. Liquid fertilizers are water-soluble and absorb directly into the soil and roots, so they’re fast-acting, potent, and easy to apply. The drawback is that they can be fairly expensive, don’t last very long, and need to be reapplied fairly often.[8] Dilute these in water according to the product’s instructions and apply these directly to the top of your plant’s soil.[9]
- If you’re able to administer fertilizer to your plant yourself by hand, liquid fertilizers or granule/powdered fertilizers are good choices that you can apply directly into the soil.[10]
-
3Granular fertilizer. This type comes in pellets which can be mixed into the soil or layered over the top, and will then dissolve into the soil when you water your houseplant. They’re potent and fast-acting, but also a bit harder to control, so be sure to consult the instructions on the fertilizer’s packaging.[11] These can be mixed into the soil when potting, or gently worked into the upper layer of an established plant’s soil.
- Granular fertilizers also come in slow-release form and give your plant a controlled amount of nutrients over a long period of time. However these nutrients, as the name implies, are slow to distribute, and so you may not see immediate results.[12]
-
4Fertilizer sticks. Also called “spikes,” fertilizer sticks are solid chunks of slow-release fertilizer that you push into your houseplant’s soil. They release fertilizer slowly over time and are easy to use.[13] Choose these if you don’t want to be fussing over your plant’s fertilizer regularly.
- If you’re busier or not home consistently enough to fertilize your plants yourself, time-release sticks or time-release granules are a convenient form of fertilizer that will distribute nutrients over a long span of time.[14]


When to Fertilize an Indoor Plant
-
1
-
2Avoid fertilizing plants in the winter. Most houseplants aren’t growing very much in the winter (about November-February), and so don’t need much or any fertilizer, since they won’t be taking up very many nutrients. Let your plants rest during these months, but keep up with your watering.[17]
- If you live in a tropical climate with year-round sunshine, fertilize your plants throughout the whole year to accommodate their continuous growing seasons.[18]
-
3Fertilize cacti and succulents only a few times a year. Because these plants are hardy and do without much water or nutrients in the wild, they don’t need as much fertilizer, and are even more sensitive to damage due to over-fertilizing. Use a high-phosphorus fertilizer once or twice a year on cacti, and 3 or 4 times a year on succulents.[19]
-
4Avoid fertilizing seedlings. You may be growing indoor plants from seeds, and in this case, wait until the plant has several sets of fully-grown leaves to apply fertilizers. This is because seedlings get all the nutrients they need from the seed itself![20]


References
- ↑ https://www.guide-to-houseplants.com/fertilizer.html
- ↑ https://hgic.clemson.edu/factsheet/indoor-plants-cleaning-fertilizing-containers-light-requirements/
- ↑ https://www.guide-to-houseplants.com/fertilizer.html
- ↑ https://hgic.clemson.edu/factsheet/indoor-plants-cleaning-fertilizing-containers-light-requirements/
- ↑ https://africanvioletresourcecenter.com/african-violet-fertilizer-how-to-grow-a-healthy-plant/
- ↑ https://s3.amazonaws.com/assets.cce.cornell.edu/attachments/18531/FertilizingHouseplants.pdf?1478879035/
- ↑ https://extension.unh.edu/blog/2018/03/fertilizing-houseplants
- ↑ https://getbusygardening.com/fertilizing-houseplants/
- ↑ https://www.mygardenlife.com/garden-tips/tips-for-fertilizing-houseplants
- ↑ https://s3.amazonaws.com/assets.cce.cornell.edu/attachments/18531/FertilizingHouseplants.pdf?1478879035
- ↑ https://www.mygardenlife.com/garden-tips/tips-for-fertilizing-houseplants
- ↑ https://getbusygardening.com/fertilizing-houseplants
- ↑ https://getbusygardening.com/fertilizing-houseplants/
- ↑ https://s3.amazonaws.com/assets.cce.cornell.edu/attachments/18531/FertilizingHouseplants.pdf?1478879035/
- ↑ https://s3.amazonaws.com/assets.cce.cornell.edu/attachments/18531/FertilizingHouseplants.pdf?1478879035/
- ↑ https://hgic.clemson.edu/factsheet/indoor-plants-cleaning-fertilizing-containers-light-requirements/
- ↑ https://s3.amazonaws.com/assets.cce.cornell.edu/attachments/18531/FertilizingHouseplants.pdf?1478879035/
- ↑ https://theindoornursery.com/blog/how-often-to-fertilize-indoor-plants/
- ↑ https://extension.umn.edu/houseplants/cacti-and-succulents#fertilizing-1421913
- ↑ https://extension.umn.edu/planting-and-growing-guides/starting-seeds-indoors#watering-and-fertilizing-1179613
- ↑ https://hgic.clemson.edu/factsheet/indoor-plants-cleaning-fertilizing-containers-light-requirements/
About This Article