This article was co-authored by wikiHow staff writer, Hunter Rising. Hunter Rising is a wikiHow Staff Writer based in Los Angeles. He has more than three years of experience writing for and working with wikiHow. Hunter holds a BFA in Entertainment Design from the University of Wisconsin - Stout and a Minor in English Writing.
There are 10 references cited in this article, which can be found at the bottom of the page.
This article has been viewed 339,413 times.
Learn more...
Propane is stored in liquid form in high-pressure tanks, and it turns into a gas when its pressure is lowered by opening the valve. Depending on the type of propane tank you have, you may be able to fill it on your own when it’s empty from a larger supply tank. Before you fill your propane tank, be sure to check that the tank is in good condition and that filling it yourself is legal in your area. If you can fill your tank, remember to be extremely careful since propane is flammable and could ignite!
Steps
Inspecting the Propane Tank
-
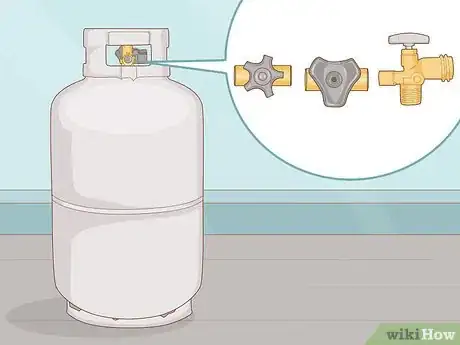
1Check that the propane tank has a triangular valve. Propane tanks cannot be filled unless they have an overfilling protection device, or OPD. Look at the top of the propane tank to find the valve used to open it. If the valve has a triangular shape or has the letters OPD printed on it, then it’s safe to fill. If it doesn’t have have a triangular valve, then you cannot fill the tank safely.[1]
- Some OPDs were made before they were required to have the letters printed on them. Check the label or wrapper on your tank if it has a triangular valve but doesn’t have OPD printed on it.
-
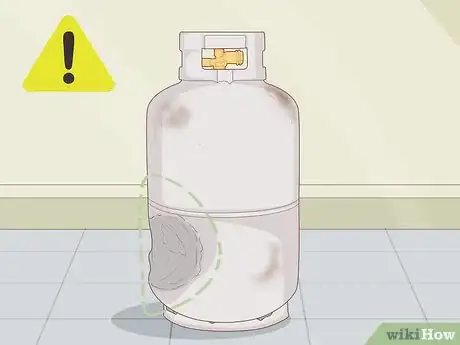
2Look for any damage or dents on the outside of the tank. Rotate the tank and check for any visual damage, such as dents, bulges, or welds on the surface. If the tank has any damage on the outside, avoid filling it since it’s less stable than a new tank. If the tank also has a coat of rust on the outside, don’t use it or fill it since it could be unsafe.[2]
- Cut off the label around the body of the tank and check underneath it for rust or cracks.
Tip: If you can’t use your propane tank anymore, look for recycling services or propane dealers to find out how to properly dispose of it.
Advertisement -
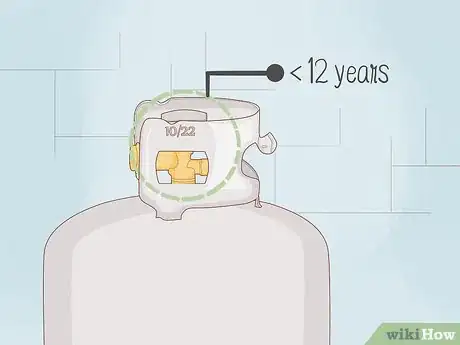
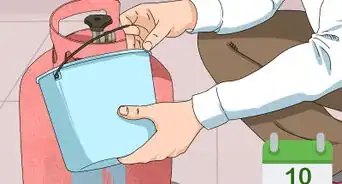
3Confirm that the date printed on the tank is less than 12 years ago. Standard propane tanks you would use in a gas grill only last for 12 years before they need to be recertified. Look around the collar of the tank, which is the raised round area surrounding the valve, for a listed in MM/YY format. If the tank is older than 12 years, then either replace or have it inspected by a professional propane service. Otherwise, the tank is safe to use.[3]
- If your tank was recertified, there may be a second date printed on the collar with the letter E next to it. Use the most recent date rather than the first one printed.
- Get your propane tank recertified 12 years after the first printed date and every 5 years after.
-
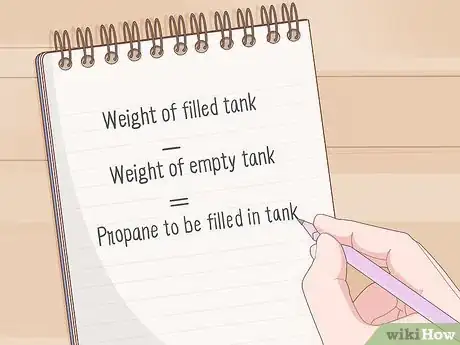
4Locate the tare weight and amount of propane the tank holds on the collar. The collar of the tank will list the weight of the propane your tank can hold as well as the weight of the empty tank in pounds. Write down both of the numbers so you know how much propane you should add to your tank when you fill it.[4]
- Propane in typically measured by weight rather than volume.
Transferring Propane from Another Tank
-
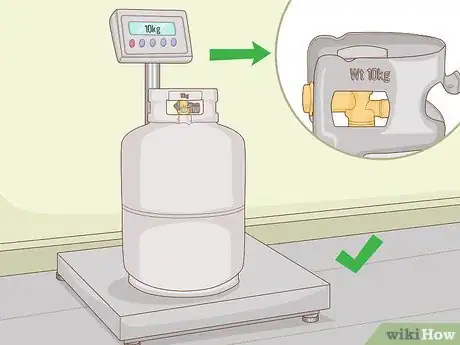
1Set the propane tank on a scale to weigh it. Set a bathroom scale outside and make sure it’s zeroed out so you get an accurate reading. Put your empty propane tank on top of the scale and read the weight. Compare the weight of the tank to the tare weight to see if there is any difference.[5]
- For example, if your tank has a tare weight of 20 pounds (9.1 kg) and it weighs 22 pounds (10.0 kg) on the scale, then it still has 2 pounds (0.91 kg) of propane left.
- Make sure the scale and tank are on a flat surface so they don’t tip over while you’re filling.
-
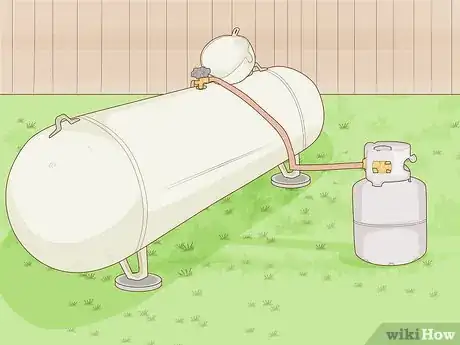
2Connect the empty propane tank to a larger supply tank with a connector hose. Choose a connector hose that has propane fittings on the end and is long enough to reach between your propane tank and the larger supply tank. Screw the connector hose counterclockwise onto the port attached to the valve on your empty tank until it’s hand-tight. Then use a wrench to tighten the connection so it doesn’t leak. Connect the other end of the hose to the port on the supply tank you’re transferring propane from.[6]
- You can buy connector hoses and propane fittings from your local hardware store.
- If you don’t have a propane supply tank on your property, you may need to go to a propane dealer where they can fill your tank for you.
- If you’re filling a 1 pound (0.45 kg) propane tank, you can buy a connector that attaches to the larger tank.
-
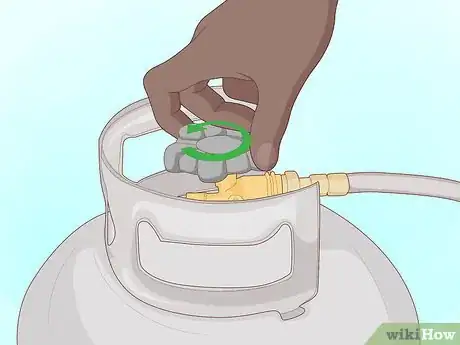
3Open the valves on each of the propane tanks. Turn the valve on the empty tank counterclockwise to open it and let propane inside. Then, open the valve on the tank you’re transferring propane from by turning it counterclockwise. You will start to hear the propane hissing through the connector hose once both of the tanks are open.[7]
-
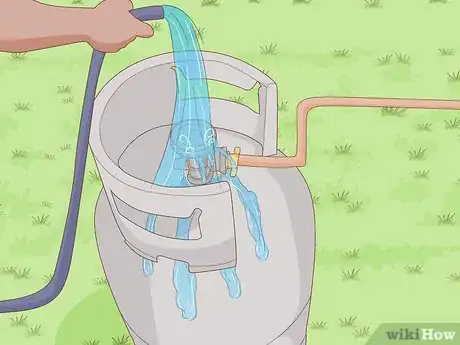
4Cool the tank you’re filling with cold water to help the propane transfer. If your tanks are the same temperature, then the propane won’t transfer between them easily. Turn on a garden hose so a weak stream comes out of the nozzle. Set the nozzle on top of the tank so the water runs down the sides and cools the tank while it’s filling up.[8]
- If you’re filling an empty 1 pound (0.45 kg) propane tank, then you can put it inside a freezer for 30 minutes for you fill it to make it colder.
-
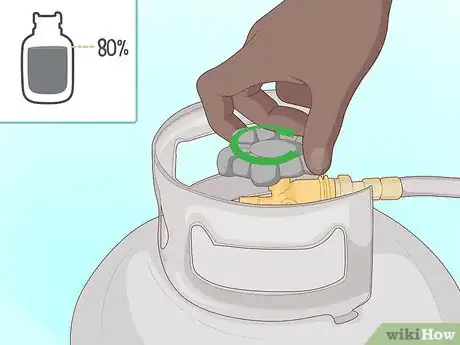
5Close the tank valves when the tank is 80% full. Since propane expands when it’s hot, you can only fill it up to 80% full so it doesn’t burst when it gets hot. Calculate 80% of the tank’s capacity and add the tare weight to find how much your tank will weigh when it’s full. When the tank reaches the weight you calculated, rotate the valves on both tanks clockwise to close them.[9]
- For example, if your tank can hold 20 pounds (9.1 kg) of propane and the tare weight is 20 pounds (9.1 kg), stop filling the tank once the scale reads 35–36 pounds (16–16 kg).
-
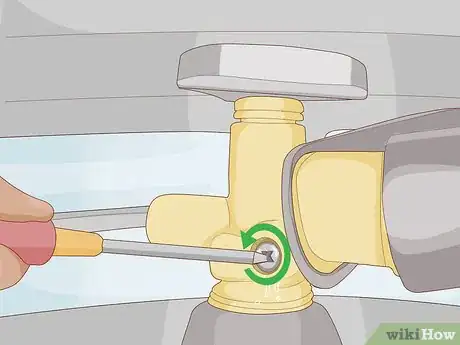
6Open the bleeder valve on the tank you filled to make sure it isn’t too full. The bleeder valve is a screw underneath the main valve and helps remove any excess propane from your tank. Put on gloves to protect yourself from any liquid propane if there is any. Turn the screw counterclockwise with a screwdriver to open the bleeder valve. If liquid squirts out of the valve, leave it open until there’s only vapor. If gas or vapor comes out of the valve, turn the screw clockwise to seal it again.[10]
Warning: Liquid propane is extremely cold and could cause frostbite quickly if you touch it.
Community Q&A
Did you know you can get answers researched by wikiHow Staff?
Unlock staff-researched answers by supporting wikiHow
-
QuestionHow to fill a horizontal propane tank?
 wikiHow Staff EditorThis answer was written by one of our trained team of researchers who validated it for accuracy and comprehensiveness.
Staff Answer wikiHow Staff EditorStaff Answer
 -
QuestionHow much does it cost to fill a propane tank?
 wikiHow Staff EditorThis answer was written by one of our trained team of researchers who validated it for accuracy and comprehensiveness.
Staff Answer wikiHow Staff EditorStaff Answer
 -
QuestionWhen should I fill my propane tank?
 wikiHow Staff EditorThis answer was written by one of our trained team of researchers who validated it for accuracy and comprehensiveness.
Staff Answer wikiHow Staff EditorStaff Answer
Warnings
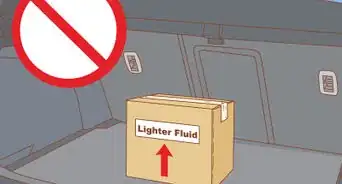
- Propane is extremely flammable and can cause an explosion near heat sources or open flames. Use extreme caution when you refill your tank.⧼thumbs_response⧽
- Do not overfill your propane tanks since they could explode if they get too hot.[11]⧼thumbs_response⧽
- You cannot refill propane tanks that are labeled as “single-trip,” “nonrefillable,” or “disposable.”[12]⧼thumbs_response⧽
Things You’ll Need
- Bathroom scale
- Propane tank
- Gas connector hose
- Propane fittings
- Wrench
- Screwdriver
- Gloves
References
- ↑ https://site.utah.gov/dps-fire/wp-content/uploads/sites/19/2015/06/LP-Gas-Basic-Filling-Procedures-Gen-Info-1.pdf
- ↑ https://site.utah.gov/dps-fire/wp-content/uploads/sites/19/2015/06/LP-Gas-Basic-Filling-Procedures-Gen-Info-1.pdf
- ↑ https://site.utah.gov/dps-fire/wp-content/uploads/sites/19/2015/06/LP-Gas-Basic-Filling-Procedures-Gen-Info-1.pdf
- ↑ https://youtu.be/XjMyveIvAAk?t=114
- ↑ https://youtu.be/XjMyveIvAAk?t=130
- ↑ https://youtu.be/3XOzopMfjU8?t=145
- ↑ https://youtu.be/XjMyveIvAAk?t=146
- ↑ https://youtu.be/XjMyveIvAAk?t=186
- ↑ https://youtu.be/XjMyveIvAAk?t=328
About This Article
To fill a propane tank, you’ll need a bathroom scale, supply tank, connector hose, and a garden hose. Start by placing your empty tank on a bathroom scale so you can measure the weight. Connect your empty tank to the supply tank with a connector hose. Once you’ve connected the tanks, open the valve on the empty tank, then the supply tank. Since your empty tank needs to cool to easily receive the propane, pour a weak stream from your garden hose on it. When your scale shows that your tank is 80 percent full, close the tank valves. Propane can expand when it gets hot, and this prevents the tank from exploding. Finally, open the bleeder valve, which is a screw underneath the main valve, which will expel any excess propane. If liquid comes out, let it run until only vapor comes out. For more tips, including how to make sure a propane tank is empty before you refill it, read on!
