This article was co-authored by wikiHow Staff. Our trained team of editors and researchers validate articles for accuracy and comprehensiveness. wikiHow's Content Management Team carefully monitors the work from our editorial staff to ensure that each article is backed by trusted research and meets our high quality standards.
This article has been viewed 80,884 times.
Learn more...
An outdoor barbecue is a great DIY project that anyone with a little masonry experience can handle. To build a simple but effective brick grill, choose a safe location and start by laying a concrete footer. Build up the courses of bricks layer by layer. When you’ve reached a height that’s comfortable for grilling, you can insert some supports for the grill surface. Top it off with some solid bricks, lay the grill surface down, and you’re ready to fire it up!
Steps
-
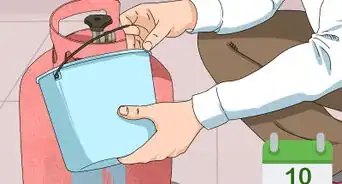
1Gather your materials. If you’ve got a little bit of masonry experience, this is a project you should be able to handle. Still, you’ll need to make a run to the hardware store to get:[1]
- Fiber-reinforced concrete mix
- Mortar mix
- A trowel
- A hammer
- Bricks (including some solid bricks)
- A mason’s line or level
- Chalk
- Gravel mix
- 4 inches (100 mm) lengths of steel rebar
- A metal grill surface
-
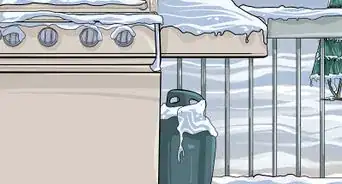
2Dig out the grill area. Use a spade and start digging in your grill area. You’ll want to create a hole that is 4 feet (1.2 m) by 8 feet (2.4 m) and 6 inches (150 mm) deep. Pick a spot that’s away from your house and anything else that could easily catch fire.[2]
- Keeping the grill area away from your house will also help prevent smoke from blowing in and bothering anyone.
Advertisement -
3Pour concrete into the hole to create the footer. Prepare the concrete mix according to the package instructions. Pour it directly into the hole you dug out for the grill area. If you use fiber-reinforced concrete mix, it will be just fine to pour the concrete on bare dirt.[3]
- Let the concrete dry thoroughly before continuing. This will take 3 to 5 days, typically.
-
4Draw an outline of the barbecue on the concrete. Grab your chalk and draw a rectangular outline on the concrete footer. You will need to leave at least 2 inches (51 mm) on all sides for safety reasons. Leave a bit more space if you want to make the barbecue area smaller than this.[4]
- The interior of the grill will need to be just a little bigger than the grill surface that you bought.
- You can used stretched out mason’s line or a yardstick to make sure the lines you draw are straight.
-
5Lay some bricks for a dry fit. Lay two courses of bricks just inside the outline you drew, without using any mortar. Leave 0.5 inches (13 mm) between each brick to account for the mortar that will be added later. Check to make sure that everything looks straight.[5]
- You can use concrete blocks instead of bricks, if you wish. You will probably lay fewer courses, since standard blocks are taller than bricks.


Laying the Courses
-
1Prepare your mortar mix. You’ll need to have this ready to start laying bricks. Follow the instructions on the mix package, and keep the prepared mortar near your work area so it’s easy to reach.[6]
- Use bonding cement (prepared to package instructions) rather than mortar if you are making a grill from concrete blocks.
-
2Start laying bricks at the corners. Put a line of mortar down just inside the outline on the footer, then lay down some bricks at all the the corners. Don’t forget to put 0.5 inches (13 mm) of mortar between each brick. Build the corners up four courses high.[7]
- To build up each course, smear a layer of mortar (about the thickness of your finger) on top of the bricks on the ground. Lay new bricks on top of the mortar so that they overlap the old ones and create an interlocking pattern. Repeat.
- If you are using concrete blocks, you only need to build up two or three courses at this point.
-
3Fill in the rows. Work from corner to corner. Make sure to put some mortar down on the top of each course of bricks before laying the next one down. Continue to leave 0.5 inches (13 mm) of mortar between each brick as well. You’ll now have a rectangle that is four full courses high.[8]
- Wait for the mortar to dry before moving on to the next steps.
-
4Spread a layer of gravel inside the bricks. You can use any ordinary gravel mix that’s available. The type of gravel is not as important as making sure that the footer on the interior of the brick square you have created is covered by a thin layer of it.[9]
-
5


Adding the Grill Surface
-
1Continue building up bricks on three sides. After you have the barbecue base, you’ll need to build it up higher to provide a place for the charcoal and grill surface to rest. Continue laying courses of bricks, but only on three sides. That way, you’ll be able to access the charcoal and grill surface from the open front side.
-
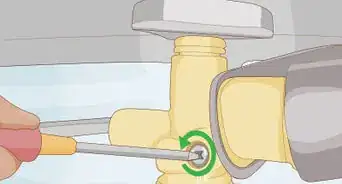
2Insert rebar to support the charcoal pan. When you reach about four courses above the base, insert 4 inch (10.2 cm) (100 mm) lengths of steel rebar into the mortar between one course of bricks and the next. The rebar should jut out just a bit into the interior, open space of the grill area.[11]
- Use a level to check and make sure each course of bricks is level as you lay it.
- Alternatively, you can lay one course of bricks sideways to provide a support surface for the charcoal pan.
-
3Add supports for the grill surface. Lay a couple more courses of bricks, and then insert more short pieces of rebar (or bricks laid sideways). This will provide a nice, sturdy support for the grill surface, slightly above the charcoal pan.
-
4Top off the grill walls. Add at least a couple more courses to your grill walls. When it has reached a height that you like, place solid bricks on the top row. This will give the grill a finished look.[12]
-
5Surround the grill with more bricks (optional). Once you’ve laid the basic grill, you can lay another row of bricks surrounding the sides and back, but not the front. This is optional, but some people like the look of thicker sides on the grill. You may also find it provides some insulation between the heat of the charcoal and the outside of the grill.
- If you decide to add this layer, just start laying courses of bricks directly around the perimeter of the grill. Keep building up courses of bricks several rows above the top of the center grill area.
- Make sure to leave the front side open.
-
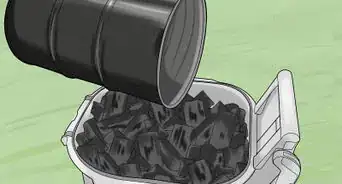
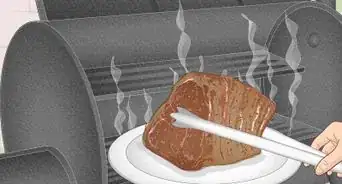
6Set the grill surface and charcoal pan in place. Lay the metal charcoal pan down on top of the lower set of rebar supports, and the grill surface on the upper ones.They should fit securely inside the grill, but you can remove them later if you need to clean it. Now you’re ready to fire up your very own grill![13]
- Make sure to use only food-grade metal for your grill surface and charcoal pan. Do not use any metal that has been painted or in contact with petroleum or any chemicals.


Community Q&A
-
QuestionWhere do I buy the fire pan, grate, and paver?
 Community AnswerYou can try Walmart, Shopko, or Sam's Club.
 -
QuestionDo I need a permit to build an outdoor barbecue?
 Community AnswerIt depends on your town. Each municipality may be different. Stop in at your city/town hall.
 -
QuestionHow many bricks do I need to build an outdoor barbecue?Community AnswerIt definitely depends on the size and place you want it. You could talk to a contractor or a builder to find out the exact number.


References
- ↑ https://www.quikrete.com/pdfs/projects/barbeques.pdf
- ↑ https://www.thisoldhouse.com/ideas/all-about-built-barbecue-pits
- ↑ https://www.quikrete.com/pdfs/projects/barbeques.pdf
- ↑ https://www.quikrete.com/pdfs/projects/barbeques.pdf
- ↑ https://www.thisoldhouse.com/ideas/all-about-built-barbecue-pits
- ↑ https://www.quikrete.com/pdfs/projects/barbeques.pdf
- ↑ https://www.quikrete.com/pdfs/projects/barbeques.pdf
- ↑ https://www.quikrete.com/pdfs/projects/barbeques.pdf
- ↑ https://www.quikrete.com/pdfs/projects/barbeques.pdf
About This Article