This article was co-authored by Ricardo Mitchell and by wikiHow staff writer, Janice Tieperman. Ricardo Mitchell is the CEO of CN Coterie, a fully licensed and insured Lead EPA (Environmental Protection Agency) Certified construction company located in Manhattan, New York. CN Coterie specializes in full home renovation, electrical, plumbing, carpentry, cabinetry, furniture restoration, OATH/ECB (Office of Administrative Trials and Hearings/Environmental Control Board) violations removal, and DOB (Department of Buildings) violations removal. Ricardo has over 10 years of electrical and construction experience and his partners have over 30 years of relevant experience.
There are 17 references cited in this article, which can be found at the bottom of the page.
This article has been viewed 37,174 times.
Before drilling into a wall in your home, you should always use a wire or circuit tracer to avoid electrocution and damaging your wiring. This wikiHow article will teach you how to use socket- and lead-based tracers to stay safe during your home improvement projects.
Steps
Connecting a Tracer to a Socket or Wire
-
1Remove the receiver from the transmitter if they’re attached. Check the user manual to see how your device fits together. If the receiver is stored on 1 end of the transmitter, pinch and pull the receiver out of its compartment. If your transmitter and receiver are completely separate, then you don’t have to worry about this.[1]
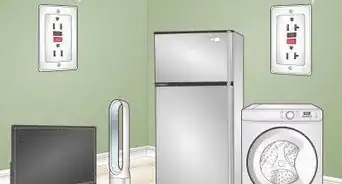
- You can purchase a circuit or wire tracer at your local hardware or home improvement store. Some devices track non-live wires, or circuits that are turned off, while others track and identify live wires. Live wire trackers tend to be more expensive than their non-live counterparts.
- The transmitter is the largest part of the device, and is about the size of a brick. The receiver is usually thinner and smaller, with a pointed tip on 1 end.
-
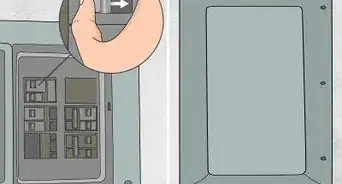
2Attach your device to a socket if it has a plug. Check the manufacturer’s instructions to find a way to plug in and connect your transmitter to the electrical circuit. If your device comes with a traditional electrical plug, connect it to a socket at the base of the wall. To keep the transmitter sturdy, try to place it upright on the floor or another flat surface.[2]
- If your transmitter doesn’t have a long connecting wire, prop it up against the wall.
Advertisement -
3Connect the wire tracer to a cable if there’s one protruding from the wall. If possible, open up the compartment on the back of your device to find different wire connectors. If a cable is sticking out of the wall, choose a connector bit that will plug into the cord correctly. To finish the set-up, turn on your transmitter.[3]
- Check your user manual for specific information on how to turn on and operate your transmitter.
-
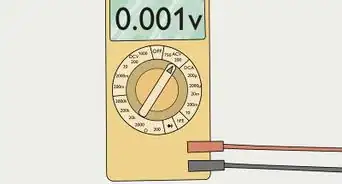
4Power on both the transmitter and receiver. Check the user manual for your device to find the power button and other general settings. Press the power button on both the transmitter and the receiver, so you can get an accurate reading on your wall.[4]
- If your device has an LED screen, it should be lighting up when powered on.
-
5Place the receiver against the wall. Check the user manual for guidance on how to arrange your device. Depending on the tool, you might only arrange the tip of the receiver on the wall, or you might need to hold the entire device flat.[5]
- If you don’t position the receiver correctly, you might not get an accurate reading.
-
6Move the receiver in a slow, horizontal line across the wall. Slide the device slowly, taking small, careful steps while you guide the receiver forward. If you’d prefer, try moving the device up and down while it’s still traveling in a horizontal path. Don’t move too quickly, or you won’t be able to pinpoint the exact location of the wire.[6]
- Many wires run vertically through walls, so moving your receiver up and down won’t affect your chance at a reading.[7]
-
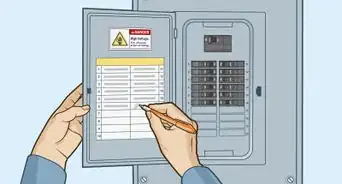
7Pause the device when you hear a long beep. Continue moving the receiver along the wall, keeping a steady pace as you go. Listen for a loud, distinctive beep, which means that the device has found a wire. If you’re looking to drill along the wall, mark the wire’s location with a pencil so you can complete your home project safely.[8]
- If your signal is consistently reading at a high level, try turning down the sensitivity. This can help you to better pinpoint the location of the wire.[9]
-
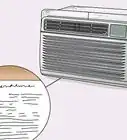
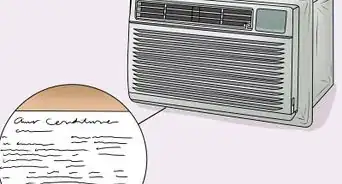
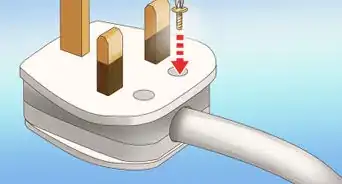
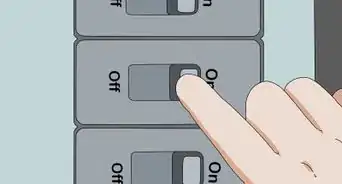
8Use a remote return path to find wires in impenetrable walls. Use your transmitter to plug a single prong, or lead, into an electrical socket of the wall you’re tracing. Next, a remote lead with a longer wire into the transmitter, and plug this lead into a separate wall socket. Then, you can arrange your receiver on the wall as you normally would![10]
- Don’t plug both ends of the remote lead into sockets attached to the same wall.
-
9Guide the device in a straight line to find the rest of the wire. After your tracer detects a signal, continue dragging the device in a straight, horizontal line across the wall. Continue listening for a persistent beeping sound, which indicates the location of the electrical wire in your wall.[11]
- Take note of or physically mark the location of the wire in the wall. If you’re planning on renovating the area, you don’t want to drill into a wire by mistake!


Attaching Leads to Different Wires
-
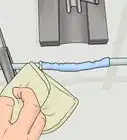
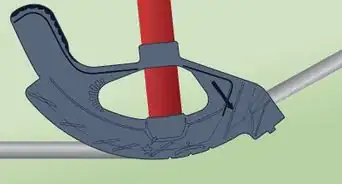
1Clamp your transmitter to a visible wire if your device has test leads. On top of the transmitter, plug the red lead cord into the red input and the green cord into the black input. Next, use the provided clamp to attach the red lead to a visible wire. To balance out the transmitter, clamp the green lead cord to a nearby metallic object, like a pipe.[12]
- This device works best for homes that are under construction or renovation.
- If you don’t attach both leads, you won’t get an accurate reading.
-
2Turn on the transmitter so your receiver can check for wires. Check your user manual to find the power button on your transmitter. Once you’ve located the correct button, press it firmly to create an active signal. Before you continue, make sure that the display is visibly lit up.[13]
- If the transmitter isn’t powered on, then your receiver won’t be able to locate any wires.
-
3Power on the receiver and arrange it on the wall. Using the instruction manual, locate the power button on the receiver. After pushing the button, check that the LED display is lit up and functioning properly. If the receiver isn’t working correctly, consult the user manual for help, or call the manufacturer for further assistance.[14]
- Both the transmitter and receiver need to be turned on for the tracing process to be successful.
-
4Move the tracer in a slow, horizontal line. Arrange the tip of the device along the wall, and guide the tool in a gradual line. As you guide the device forward, adjust the tracer’s sensitivity until the signal strength is between 50 and 75%. Watch the signal bar on the display of your receiver; once the bar is fully expanded, you’ve found your wire.[15]
- If the device is too sensitive, it might not pick up on the wire’s signal.
- Some devices will beep when the receiver locates a wire.[16]
-
5Drag the device in a straight line to continue tracing the wire. Keep guiding your receiver slowly, checking the LED display for changes as you go. As you move the device along, mark or take a mental note of where any wires are within the wall. Keep the wire locations in mind before proceeding with your home improvement project.[17]


Expert Q&A
-
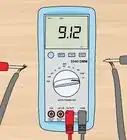
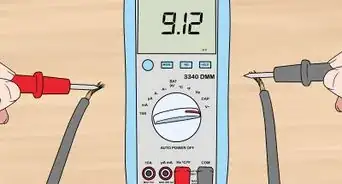
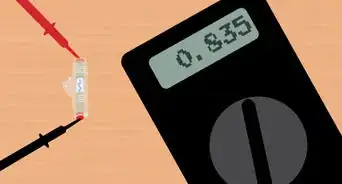
QuestionWhen a fuse is broken, what does it read on a multimeter?
 Ricardo MitchellRicardo Mitchell is the CEO of CN Coterie, a fully licensed and insured Lead EPA (Environmental Protection Agency) Certified construction company located in Manhattan, New York. CN Coterie specializes in full home renovation, electrical, plumbing, carpentry, cabinetry, furniture restoration, OATH/ECB (Office of Administrative Trials and Hearings/Environmental Control Board) violations removal, and DOB (Department of Buildings) violations removal. Ricardo has over 10 years of electrical and construction experience and his partners have over 30 years of relevant experience.
Electrician & Construction Professional, CN CoterieWhen a fuse is broken, it reads the circuit is not complete, so it reads an open line on the multimeter.
Things You’ll Need
- Wire, cable, or circuit detector


References
- ↑ https://m.youtube.com/watch?v=71Yzk_RqNvo&t=0m51s
- ↑ https://m.youtube.com/watch?v=mJGqh-XJVpk&t=0m15s
- ↑ https://m.youtube.com/watch?v=71Yzk_RqNvo&t=1m24s
- ↑ https://m.youtube.com/watch?v=mJGqh-XJVpk&t=0m22s
- ↑ https://m.youtube.com/watch?v=UHQh6J4AaE0&t=2m7s
- ↑ https://m.youtube.com/watch?v=UHQh6J4AaE0&t=2m8s
- ↑ https://m.youtube.com/watch?v=08733z958qY&t=2m8s
- ↑ https://m.youtube.com/watch?v=08733z958qY&t=2m4s
- ↑ https://m.youtube.com/watch?v=mJGqh-XJVpk&t=1m21s
- ↑ https://m.youtube.com/watch?v=mJGqh-XJVpk&t=1m6s
- ↑ https://m.youtube.com/watch?v=mJGqh-XJVpk&t=1m25s
- ↑ https://m.youtube.com/watch?v=OyJsXpVZc5E&t=2m47s
- ↑ https://m.youtube.com/watch?v=HwPwGteUDNQ&t=0m37s
- ↑ https://m.youtube.com/watch?v=HwPwGteUDNQ&t=0m39s
- ↑ https://m.youtube.com/watch?v=HwPwGteUDNQ&t=0m24s&t=0m43s
- ↑ https://m.youtube.com/watch?v=OyJsXpVZc5E&t=3m20s
- ↑ https://m.youtube.com/watch?v=HwPwGteUDNQ&t=0m52s
About This Article