This article was co-authored by David Bitan. David Bitan is a roofing professional, licensed contractor, and the owner and founder of Bumble Roofing based in Southern California. With over 12 years of construction industry experience, David specializes in restoring, repairing, and maintaining residential, commercial, and industrial roofs. With over 60 years of combined experience, Bumble Roofing provides easy, friendly services to structures including residential, commercial, industrial, multi-family, and government buildings along with hospitals, hotels, and churches.
There are 8 references cited in this article, which can be found at the bottom of the page.
This article has been viewed 15,112 times.
Repairing shingles is some of the simplest DIY work you can do. The main concern is staying safe, which you can handle by choosing the right day to work and using safety equipment. Shingles are always placed and repaired with a pry bar and roofing cement. Knowing this, you can easily fix cracks, stop curls, and even install new shingles to prevent leaks in your roof.
Steps
Taking Safety Precautions
-
1Choose a warm and dry day before accessing the roof. Climbing onto a roof is dangerous even for professionals. Rain and ice are hidden threats, especially on dark-colored shingles. Wait for pleasant weather, if possible, to reduce the risk of accidents. Warm weather has the added bonus of making the shingles more pliable, too.[1]
-
2Wait for the roof to dry before you step on it. Delay your work until the afternoon. On a good day, this gives the roof a few hours to warm up. Morning dew can be an issue as well as any rain or ice from the previous day. Let it evaporate so you don’t have to deal with a slick roof.Advertisement
-
3Wear a harness and other safety gear when on the roof. A safety belt and harness are essential when working on a steep roof or staying up top for a while. Hook the belt to the harness and an anchor point, such as a manually-installed bracket. Find harness kits online or at home improvement centers.[2]
- Safety gloves and polycarbonate goggles are also worth wearing when fixing shingles.
-
4Use a roofer’s ladder to climb the roof. To get on the roof, you will need an extension ladder. Some roof ladders are tall enough for this, while others are only meant for use on the roof. A roofer’s ladder has stabilizing hooks that latch onto the roof’s slope and hold the ladder in place.
- Rent or purchase the ladders from industrial supply stores or some home improvement stores.


Replacing Shingles
-
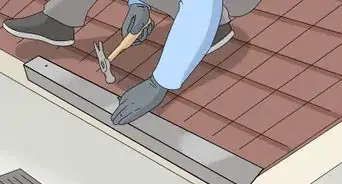
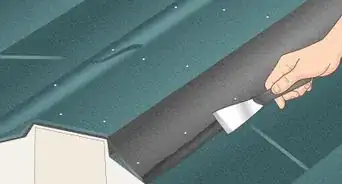
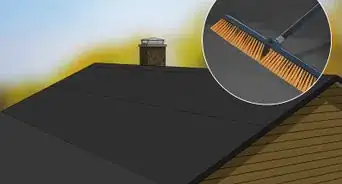
1Slip a utility knife under the shingles to break the seal. Push the sharp end of the knife under the shingle’s bottom end. Holding the knife horizontally, drag the tip across the shingle to free it from the roof. Then repeat this with the shingles above the broken one.[3]
- Shingles come in “tabs” of 3. Each tab has a top and bottom square. The bottom square is visible on the roof and covers the top part of the shingle in the row below it.[4]
- If the shingle is completely gone, such as when blown off by the wind, loosen the shingle above the space.
-
2
-
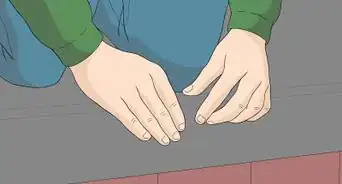
3Pull the nails out of the shingle. Remove the pry bar and lay the shingle flat against the roof again. Use the pry bar or the claw end of a hammer to remove the nails. Push down on the shingle with your other hand to make this easier. Also remove the nails in the shingle above, since these pass through the shingle you’re replacing.[7]
- Work slowly to avoid damaging the good shingles.
-
4
-
5Nail the shingles to the roof. Use 7⁄8 in (2.2 cm) galvanized roofing nails from a hardware or home improvement store.[10] Place a nail on either side of the shingle, right below the shingle above it, and hammer them down. Also, place the upper shingle’s nails back in the same holes you removed them from.[11]
-
6Seal the shingles with roofing cement. Gently lift the shingles again. Dab beads of roofing cement, purchased from a home improvement store, onto each shingle. Spread the beads across the shingle to coat it in a thick, even layer. Lay the shingles flat on the roof to seal them in place.[12]
- Some roofing cement, also called sealant, comes in canisters for use with a caulking gun, while others come in buckets and are spread on with a brush. Both work the same, so choose whichever way suits your preference.
-
7Fill in any nail holes you see. Unsealed nail holes cause water to leak through your roof. In particular, this happens when you create new nail holes. Go back over the shingles and spread a dab of cement over each hole. It’s better to be safe than to have water dripping into your home.


Flattening Curled Shingles
-
1Load roofing cement into a caulking gun. Pick out a tube of cement from the home improvement store. Load it into the gun like you would with a tube of caulking. Slice off the tube’s end to open it.[13]
- Brush-on sealant is also safe to use here.
-
2Spread sealant under the corners. Apply a bead of cement underneath the curled corners. Spread the cement using the caulking gun, a brush, or a putty knife. Pressing the shingle against the roof will also spread and flatten the layer of cement.[14]
-
3Weigh down the shingle for 24 hours. A sturdy brick works well for this. Press the shingle flat, then place the brick on top of it. Come back in a day and your shingle should be stuck in place.[15]
- Curled corners occur in old shingles. Keep a close watch on the shingles and replace them when they break.


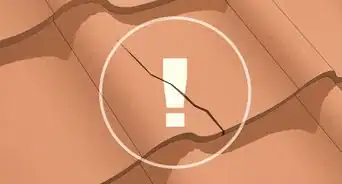
Repairing Cracked Shingles
-
1Lift the shingle with a pry bar. Wedge the end of a pry bar or utility knife underneath the shingle. Gently lift it to avoid loosening the nails or cracking the surrounding shingles.[16]
-
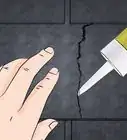
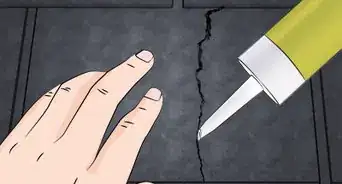
2Apply roofing cement underneath the crack. Add the cement using a caulking gun, brush, or putty knife. Focus on spreading a generous amount of it right underneath the crack. If the crack runs all the way through, this will seal the crack from the bottom as well as glue the shingle to the roof.[17]
-
3Press the shingle against the roof. Lay the shingle flat again. Push the cracked ends together so they seal properly. Then press on the shingle with your hands so it sticks in place.
-
4Apply more sealant on top of the crack. Add another bead of sealant over the crack with the caulking gun, brush, or knife. Apply generous amounts of sealant to ensure that the crack fills, making the shingle stronger and more resistant to the weather.[18]
-
5Spread the sealant with a putty knife. Hold the knife flat against the shingle. Drag the blade over the crack to spread the sealant. Doing this will also push more sealant into the crack. Add more sealant as needed to fill the crack and continue spreading it with the knife.[19]
-
6Sprinkle granules on the cement to color it. Check your gutters for colored granules washed off the shingles. You can pick this dust up with your hand and dump it into a cup for easy transportation. Take it back to the shingle and pour it onto the cement. Doing this is optional, but it makes the repair work much less noticeable.[20]


Expert Q&A
-
QuestionWhat do you use to glue down an individual shingle?
 Kevin TurnerKevin Turner is a handyman and the owner of Red Gator Maintenance, a handyman business based in Fresno, California. Working on handyman-related projects since the age of 12, Kevin specializes in a wide variety of home improvement projects such as (but not limited to) lighting/electrical, plumbing, deck staining, drywall repairs, cabinet installation, air conditioning, trash removal, and window, roof, and appliance repairs.
Commercial HandymanInstead of glue, it's actually best to pry up the surrounding shingles and slide the loose shingle underneath. Then, nail the shingles down with roofing nails. -
QuestionWhat is the best shingle removal tool?Kevin TurnerKevin Turner is a handyman and the owner of Red Gator Maintenance, a handyman business based in Fresno, California. Working on handyman-related projects since the age of 12, Kevin specializes in a wide variety of home improvement projects such as (but not limited to) lighting/electrical, plumbing, deck staining, drywall repairs, cabinet installation, air conditioning, trash removal, and window, roof, and appliance repairs.
Commercial HandymanUse a flat bar to pry up your old shingles by sliding it up under the bottom of the shingle.
Warnings
- Roofing work is dangerous and should always be done with another person.⧼thumbs_response⧽
- If you install the nailing incorrectly, you could puncture holes in the second layer underneath the shingles and you're going to have leaks in the first rain that comes around.[21]⧼thumbs_response⧽
Things You’ll Need
Replacing Shingles
- Ladder
- Safety harness
- New shingles
- Utility knife
- Pry bar
- Roofing cement
- Hammer
- 7⁄8 in (2.2 cm)
Flattening Curled Shingles
- Ladder
- Safety harness
- Roofing cement
- Brick
Repairing Cracked Shingles
- Ladder
- Safety harness
- Pry bar
- Roofing cement
- Putty knife
- Cup


References
- ↑ https://www.bobvila.com/articles/roof-leaking-repair/
- ↑ https://www.familyhandyman.com/tools/how-to-properly-use-a-roof-safety-harness/view-all/
- ↑ https://www.todayshomeowner.com/video/how-to-replace-a-damaged-asphalt-roof-shingle/
- ↑ Kevin Turner. Commercial Handyman. Expert Interview. 15 July 2020.
- ↑ Kevin Turner. Commercial Handyman. Expert Interview. 15 July 2020.
- ↑ http://www.popularmechanics.com/home/outdoor-projects/how-to/a3760/roof-repair-leaks-and-shingles/
- ↑ http://www.dummies.com/home-garden/exteriors/roofing/how-to-replace-asphalt-shingles/
- ↑ Kevin Turner. Commercial Handyman. Expert Interview. 15 July 2020.
- ↑ https://www.thisoldhouse.com/ideas/fixing-damaged-roof-shingles
- ↑ Kevin Turner. Commercial Handyman. Expert Interview. 15 July 2020.
- ↑ https://www.todayshomeowner.com/video/how-to-replace-a-damaged-asphalt-roof-shingle/
- ↑ https://www.todayshomeowner.com/video/how-to-replace-a-damaged-asphalt-roof-shingle/
- ↑ https://www.bobvila.com/articles/roof-leaking-repair/
- ↑ https://www.thisoldhouse.com/ideas/fixing-damaged-roof-shingles
- ↑ https://www.thisoldhouse.com/ideas/fixing-damaged-roof-shingles
- ↑ https://www.bobvila.com/articles/roof-leaking-repair/
- ↑ https://www.thisoldhouse.com/ideas/fixing-damaged-roof-shingles
- ↑ https://www.thisoldhouse.com/ideas/fixing-damaged-roof-shingles
- ↑ https://www.bobvila.com/articles/roof-leaking-repair/
- ↑ https://www.thisoldhouse.com/ideas/fixing-damaged-roof-shingles
- ↑ David Bitan. Roofing Contractor & Maintenance Professional. Expert Interview. 14 July 2020.
About This Article