This article was co-authored by wikiHow staff writer, Dan Hickey. Dan Hickey is a Writer and Humorist based in Chicago, Illinois. He has published pieces on a variety of online satire sites and has been a member of the wikiHow team since 2022. A former teaching artist at a community music school, Dan enjoys helping people learn new skills they never thought they could master. He graduated with a BM in Clarinet Performance from DePauw University in 2015 and an MM from DePaul University in 2017.
There are 10 references cited in this article, which can be found at the bottom of the page.
This article has been viewed 25,167 times.
Learn more...
Nothing is more frustrating during a practice session or performance than constantly having to retune your violin strings because of a loose peg. How can you fix this problem for good? Most of the time, the answer is as simple as rewinding the affected string or rubbing peg compound on the problematic peg. We’ve put together a step-by-step guide to both of these solutions, plus more tips on how to keep your pegs in good shape. If you’re ready to tighten your loose pegs once and for all, keep scrolling!
Things You Should Know
- Rewind the string on a loose peg so that it coils towards the head of the peg. This provides the tension needed to keep the peg in place while you play.
- Apply peg compound to problematic loose pegs. Peg compound is a substance that both lubricates and provides friction to the peg.
- Gently push the peg inwards while you turn it to secure it in the pegbox holes. Be careful not to apply too much pressure, as the violin or peg could break.
Steps
Rewinding the String on the Peg
-
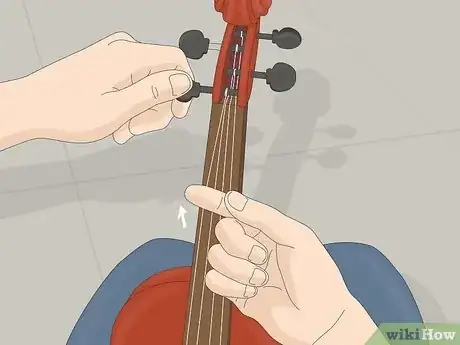
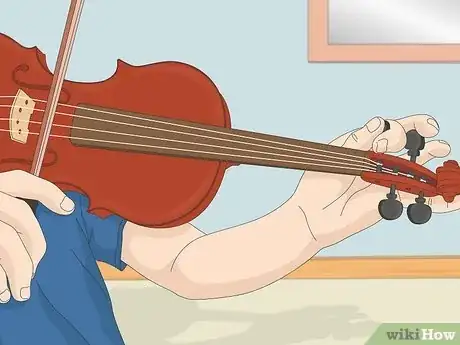
1Place a finger under the loose string to put tension on it. Lift it slightly at the neck of the violin to separate it from the other 3 strings and take up the slack. To keep the soundpost and the bridge aligned, only adjust one string and peg at a time.[1]
- Hold the violin vertically in your lap the first time you do this. As you get more comfortable, you can do it quickly on your shoulder.[2]
-
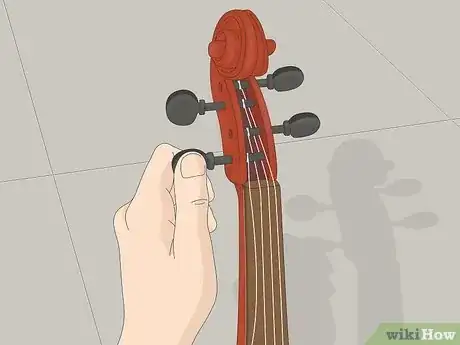
2Loosen the problematic peg with your other hand. Slowly turn the loose peg away from the scroll to partially unwind the string. Turn it about 2 times so that the end of the string is still wrapped around the peg 1 or 2 times (otherwise you’ll have to completely rethread the string).[3]
- Turn the A and E strings counterclockwise or the D and G strings clockwise to loosen them.[4]
Advertisement -
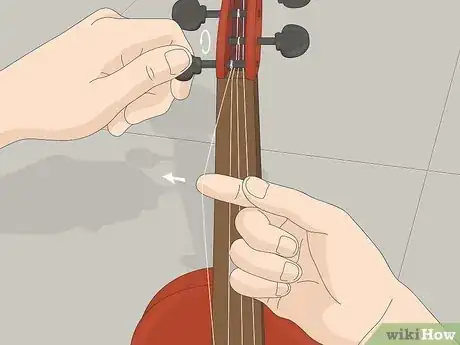
3Angle the loose string toward the head of the peg. Gently pull the string with your finger toward the side of the violin where the loose peg is sticking out. Pull until the string is slightly taut, but not so hard that you risk unraveling the string from the peg or breaking it.[5]
- If you’re fixing the A or E string, pull to the right of the violin neck. Pull to the left for the G or D string.
-
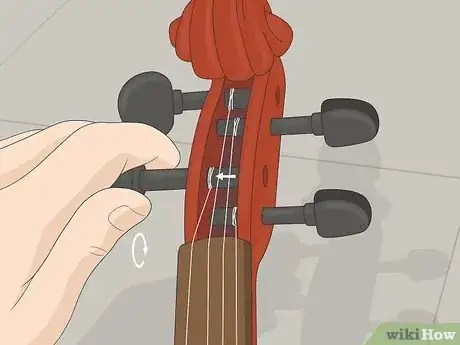
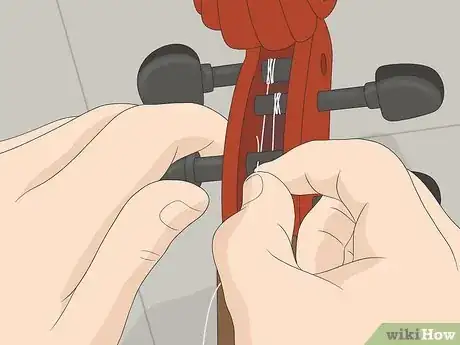
4Wind the peg so the string coils towards the wall of the pegbox. Turn the peg towards the scroll to increase tension on the loose string. Maintain your outward tug on the string while you turn the peg so the coils move closer and closer to the wall of the pegbox (near the peg head).[6]
- Wind until the string can stay taut without you having to support it with your finger anymore.
- When the string is coiled against the wall of the pegbox, it provides the tension needed to hold the peg in place and prevent it from slipping.
- Push inward while you turn the peg to help it grip the edges of the pegbox holes.[7]
-
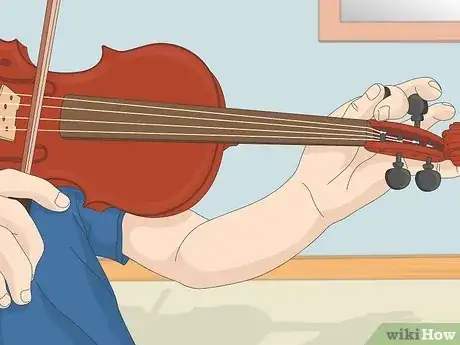
5Tune the string and check the peg’s stability. Put the violin on your shoulder and bow the string you just rewound while you turn the peg towards the scroll. Gradually tighten the string to raise the pitch until the string is in tune (turn clockwise for the A and E strings or counterclockwise for the G and D strings). Check the pitch with an electric tuner.[8]
- If the tension in the peg is restored, the pitch will hold constant while you play.
- The standard pitch for each string is:[9]
- G string (G3): 196 Hz
- D string (D4): 293.66 Hz
- A string (A4): 440 Hz
- E string (E5): 659.26 Hz
Applying Peg Compound
-
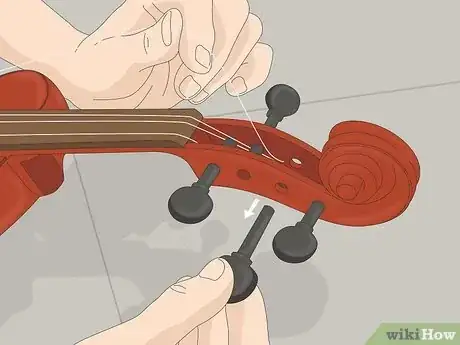
1Unwind and remove the string and the loose peg from the pegbox. Turn the peg counterclockwise (away from the scroll) to loosen the A and E strings, or clockwise (away from the scroll) to loosen the G and D strings.[10] Slide the string out of the hole in the peg, then slide the peg out of the pegbox.[11]
- Check the peg for damage once it’s out—if it’s cracked or warped, you’ll need a replacement.
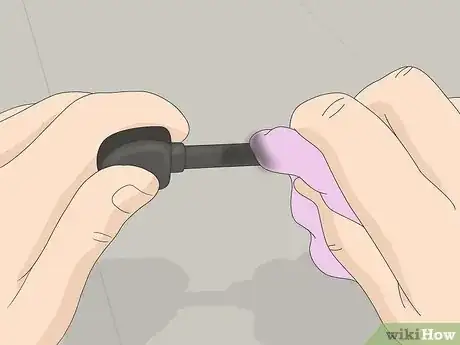
- Wipe the peg clean with a dry cloth to remove any grease or buildup that might be causing it to slip.[12]
-
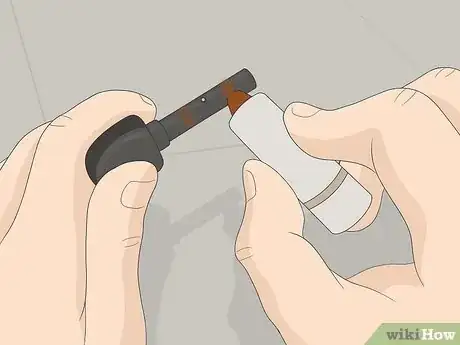
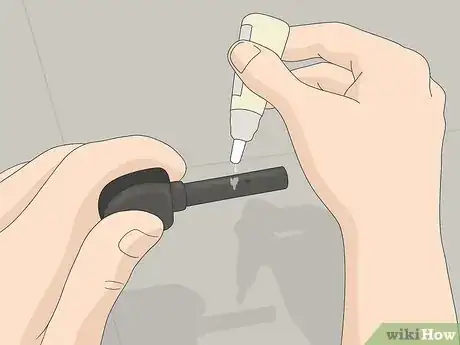
2Rub peg compound on the parts of the peg that contact the pegbox. Look at the peg—there should be 2 shiny rings that indicate where the peg rubs against the wood of the pegbox. Rub a small amount of compound on these rings, making sure to lightly cover the peg all the way around.[13]
- Peg compound often looks like a tube of chapstick. Remove the cap and twist the bottom of the tube to apply it.
- Some players use soap, wax, chalk, or rosin in place of compound for a quick fix, but these can be too abrasive and damage your peg or pegbox.[14]
- If there are no shiny rings around the peg, that means it is not a good fit for the peg hole and should be replaced.
-
3Reinsert the peg into the pegbox and turn it to distribute the compound. Spin the peg in either direction a few times to make sure it turns smoothly and to evenly coat the compound around the peg. Wipe away any excess compound before restringing the peg.[15]
-
4Restring and tighten the peg. Thread the end of the string through the small hole in the shaft of the peg. Angle the string away from the peg head with one hand and turn the peg toward the scroll with the other hand to wind up the string. After 2 turns, angle the string toward the peg head so that it wraps over the previous coils.[16]
- Continue winding the string towards the peg head so that it wraps up primarily against the wall of the peg box. This will help maintain tension on the peg.
- Wind until the string is taut and close to its final tension.
- Push gently inward as you turn so the conical peg fits fully into the peg holes.
-
5Tune the string to test if the peg will stick. Put the violin on your shoulder and bow the string you just restrung. Gradually tighten the string by turning the peg clockwise (A and E string) or counterclockwise (G and D string) until the string resonates at the proper pitch. Use an electric tuner to check the pitch.[17]
- If the peg is secure, the pitch on the string will remain largely constant throughout the day.
- The standard pitch for each string is:[18]
- G string (G3): 196 Hz
- D string (D4): 293.66 Hz
- A string (A4): 440 Hz
- E string (E5): 659.26 Hz
-
6Apply peg drops in place of compound for a quick fix. Peg drops are similar to peg compound, but are more liquidy and don’t hold as long to the peg. To apply, unwind the loose peg and remove the string. Take the peg out of the pegbox and add a drop or two to the spots where the peg contacts the pegbox.[19]
- Reinsert the peg and turn it a few times to evenly distribute the drops.
- Wipe away any extra liquid on the peg, and be careful not to let the drops get on the varnish of your instrument.
Maintaining Secure Pegs
-
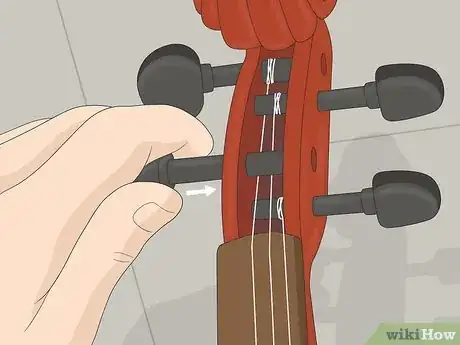
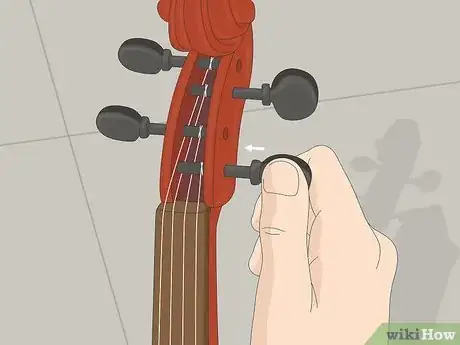
1Push the peg gently inwards while you turn it. Since pegs are slightly conical, the solution might be as simple as pushing the peg deeper into the pegbox. If you notice a peg slipping, grip it securely and push inward into the scroll while you turn it.[20]
- If needed, rest the head of the violin on a soft surface so you can apply more pressure to the peg while you turn it.[21]
- Pushing inwards is a short-term solution to constantly slipping pegs. If the problem continues, apply compound or rewind the string.
- Be careful not to push too hard. Violins are fragile (especially old ones) and the pegbox might crack if you apply too much pressure.
-
2Wipe your pegs clean with a dry cloth. Excess grease or oil on the pegs will make them lose their friction. Simply remove the peg and wipe it down with a clean, dry cloth to degrease it. If you’ve previously applied products like peg compound, use a small amount of soapy water.[22]
- If you use soapy water, wait for the peg to completely dry before you insert it back into the pegbox.
-
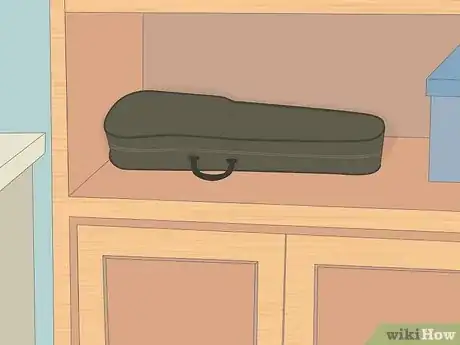
3Store your violin in a room with 30% to 50% humidity. When temperature and humidity increase, violin pegs swell and can get stuck. In cold, dry conditions, they’ll shrink and become loose. Store your violin indoors in a climate controlled environment to keep the pegs a consistent size.[23]
- If needed, purchase a violin case humidifier to maintain the right conditions inside your case.[24]
- In a pinch, place a damp sponge in a plastic container inside your case to raise humidity.
-
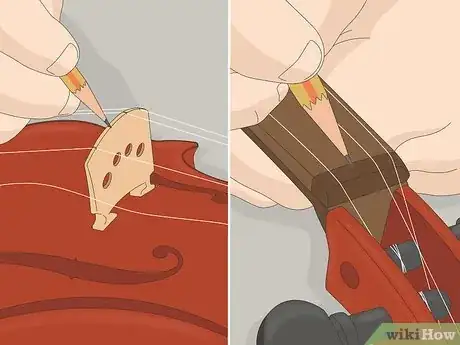
4Add graphite to the bridge and nut to improve string tension. If the string isn’t slipping correctly over the nut and the bridge, it might lose tension even though the peg is secure and working correctly. To fix it, just grab a pencil and “draw” over the string grooves on the bridge and the nut.[25]
- Graphite acts like a dry lubricant and will equalize the tension at all parts of the string.
- Graphite also helps pegs that are too tight. Remove the peg from the pegbox and apply graphite to the shiny bands where the peg rubs against the pegbox.
- Apply graphite every time you restring your instrument for consistently smooth results.
Community Q&A
-
QuestionI loosened my G string by playing with the fine tuner. What do I do?
 wikiHow Staff EditorThis answer was written by one of our trained team of researchers who validated it for accuracy and comprehensiveness.
Staff Answer wikiHow Staff EditorStaff AnswerIf all you did was loosen the fine tuner, you can twist it again in the opposite direction to tighten up the string. If you're concerned that the string is not securely attached to the tailpiece, unscrew the fine tuner most of the way, remove the string from the tailpiece and peg, and restring it.
Warnings
- Be careful not to push a loose peg too hard into the pegbox. This could cause the pegbox, neck, or scroll of the instrument to crack (which is a costly repair!).[28]⧼thumbs_response⧽
References
- ↑ https://www.connollymusic.com/stringovation/what-is-the-proper-way-to-string-an-instrument
- ↑ https://www.violinschool.com/knowledgebase/how-to-change-a-violin-string/
- ↑ https://www.connollymusic.com/stringovation/what-is-the-proper-way-to-string-an-instrument
- ↑ https://www.connollymusic.com/stringovation/how-to-tune-your-violin-with-the-pegs
- ↑ https://www.get-tuned.com/how-to-string-a-violin.php
- ↑ https://www.get-tuned.com/how-to-string-a-violin.php
- ↑ https://smartstringteacher.com/how-to-wind-strings-properly/
- ↑ https://www.connollymusic.com/stringovation/how-to-tune-your-violin-with-the-pegs
- ↑ https://www.get-tuned.com/how-to-tune-the-violin.php
- ↑ https://www.connollymusic.com/stringovation/how-to-tune-your-violin-with-the-pegs
- ↑ https://www.violaonline.com/instrumentcare.htm
- ↑ https://violintrend.com/my-violin-wont-stay-in-tune/
- ↑ https://www.violaonline.com/instrumentcare.htm
- ↑ https://www.violaonline.com/instrumentcare.htm
- ↑ https://www.violaonline.com/instrumentcare.htm
- ↑ https://www.get-tuned.com/how-to-string-a-violin.php
- ↑ https://www.connollymusic.com/stringovation/how-to-tune-your-violin-with-the-pegs
- ↑ https://www.get-tuned.com/how-to-tune-the-violin.php
- ↑ https://www.violaonline.com/instrumentcare.htm
- ↑ https://www.violaonline.com/instrumentcare.htm
- ↑ https://violintrend.com/my-violin-wont-stay-in-tune/
- ↑ https://violintrend.com/my-violin-wont-stay-in-tune/
- ↑ https://www.musicalexpert.org/what-are-violin-pegs.htm
- ↑ https://www.grushecky.com/how-to-lower-humidity-in-violin-case/
- ↑ https://violintrend.com/my-violin-wont-stay-in-tune/
- ↑ https://violintrend.com/my-violin-wont-stay-in-tune/
- ↑ https://www.violaonline.com/instrumentcare.htm
- ↑ https://violintrend.com/my-violin-wont-stay-in-tune/
