This article was co-authored by Chad Zani and by wikiHow staff writer, Eric McClure. Chad Zani is the Director of Franchising at Detail Garage, an automotive detailing company with locations around the U.S. and Sweden. Chad is based in the Los Angeles, California area and uses his passion for auto detailing to teach others how to do so as he grows his company nationwide.
There are 12 references cited in this article, which can be found at the bottom of the page.
This article has been viewed 146,914 times.
Air bubbles, wrinkles, and creases will often appear in window tint if you don’t clean the window thoroughly or don’t smooth the tint down as you install it. However, these bubbles and wrinkles will often appear naturally after a few years as the vehicle heats and cools in the sun and shade repeatedly. In most cases, you can remove any mistakes in a tint job by heating the area and pushing them towards any edge of the window. However, if you can’t smooth the mistakes out or there are dozens of them, you probably need to replace your tint.
Steps
Smoothing Out Mistakes
-
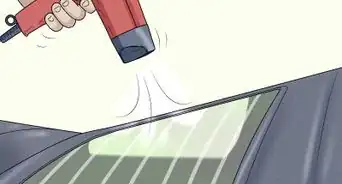
1Buy or rent a heat gun to loosen up the tint and melt the glue. Either buy a heat gun or rent one at a construction supply store. To remove air bubbles, wrinkles, creases, or minor mistakes, you reheat the tint to soften the adhesive and push the mistakes out. You cannot do this with a blow dryer since it doesn’t get hot enough to melt the glue.[1]
- You can buy a heat gun for $20-60. You may be able to rent one from your local construction supply store for $10-15, though.
Tip: If there are more than 5-6 air bubbles in your tint, or your bubbles are more than 3–4 inches (7.6–10.2 cm) in diameter, you probably need to replace the tint entirely. Some mistakes cannot be smoothed out. If a shop recently installed your tint and it bubbles up, they’ll usually replace it for free, though.
-
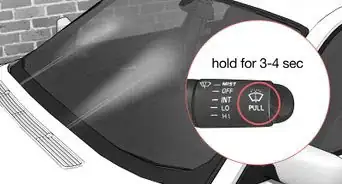
2Heat the area around the bubble on high heat for 3-5 seconds. Do this on the outside of the window. Turn the dial or press the button on your heat gun to set it to the highest setting available. Hold the heat gun 3–6 inches (7.6–15.2 cm) away from the bubble and pull the trigger for 3-5 seconds. Move the gun in a circular motion around the bubble, crease, or wrinkle to soften the glue up.[2]
- The tint should get hot enough that you can’t touch it for more than 2-3 seconds. Keep your hands off of the glass after you’ve heated it.
- Do not heat the window from the inside. You will damage your window tint if you do this.
- If the mistake is in the middle of the window, heat it directly. If it’s within 3–4 inches (7.6–10.2 cm) of the edge of the window, heat the area just outside of the mistake so that the heat gun is slightly closer to the middle of the window. The heat gun will melt the trim or plastic around the window if you heat it directly.[3]
Advertisement -
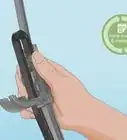
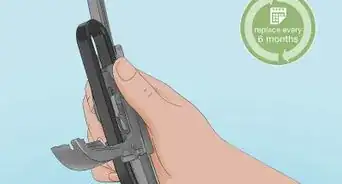
3Work the mistakes towards any edge of the window with a plastic razor. Grab a plastic razor or old gift card. Open the vehicle door to go to the other side of the window. Take your plastic straight edge and hold it with the longest side towards the window. Drag the edge at a 25- to 35-degree angle over the bubble, wrinkle, or crease to push it towards the edge of the window. Do this for 20-30 seconds to smooth the mistake out.[4]
- You can move the bubble or wrinkle out by pushing the problem to the top, bottom, or sides of the window. It doesn’t really matter. Just choose whichever edge is closest to the mistake.
- For wrinkles and creases, hold the straight edge perpendicular to the line in the tint.
- If the bubble or wrinkle isn’t moving at all, heat it for another 3-5 seconds.
Warning: Do not use metal—especially if you’re considering using a regular razor blade. If you do, you’re more likely to tear the tint film than remove your mistake.
-
4Reheat the area whenever the bubble or wrinkle stops moving. It may take 3-5 rounds of heating and smoothing out to remove the mistake entirely. Whenever the bubble, wrinkle, or crease stops gets hard to move with your straight edge, go back outside of the door and reheat the blemish for another 3-5 seconds.[5]
-
5Continue smoothing the mistake out until you push it over an edge. Once you’ve reheated the adhesive, open the door again and pick your plastic straight edge back up. Keep dragging the plastic edge over the mistake until you push it to an edge of the window. Repeat this process until your tint is entirely smooth and uniform.[6]
- If there is debris trapped in the window or the mistake is so bad that you can’t get it to the edge of the window, you may need to replace the tint.
- Repeat this process for all of the bubbles, wrinkles, and creases in your window.


Replacing the Tint
-
1Replace the tint if there’s debris or you can’t remove the problem. If you can physically see hair, dust, or some other contaminant trapped between the tint and the window, you won’t be able to fix it. Some air bubbles and mistakes will also be too stubborn to actually remove. In these cases, you can replace the tint on the window.[7]
- If a professional shop installed your tint and there are visible mistakes, they’ll usually fix it free of charge.
-
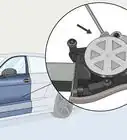
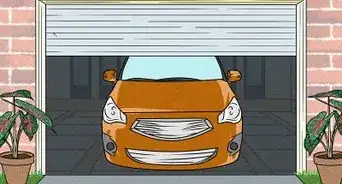
2Take your car outside when it’s warm to remove the tint yourself. If it’s hotter than 65 °F (18 °C), you can use the sun to remove the tint. Drive your car out into the driveway or park it on the street to do this. You may want to remove the tint if you’re replacing it yourself, or to save some money at the tint shop.[8]
- If you’re going to pay a professional to replace the tint, you can always take your vehicle to them and ask them to remove it. You’ll save yourself $15-30 in labor if you do this yourself though, and it’s not particularly hard to do.
Alternative: If it’s not warm enough to do this out in the sun, just run your heat gun around the film from the inside of the window for 20-30 seconds. Then, peel the tint off by hand or use a metal straight edge to scrape the tint off in smaller sections.
-
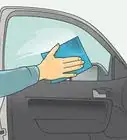
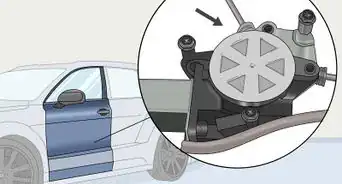
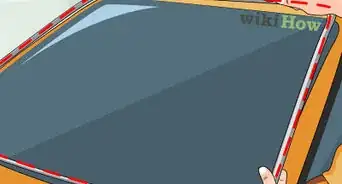
3Spray the inside of the window down with glass cleaner. Grab a commercial glass cleaning spray. Open the door on your vehicle and spray the tint down with your glass cleaner. Really soak the tint to get the entire window soapy and wet. The glass cleaner won’t damage the interior, so don’t worry about drips. You can just wipe them away with a clean cloth.[9]
-
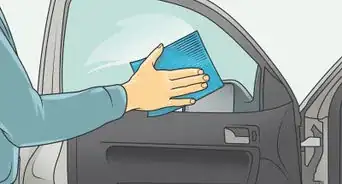
4Cover the inside of the window with a black trash bag. Grab a black trash bag or a sheet of black plastic. Spread the black plastic over the inside of the window and smooth it out over the door. Push the plastic against the glass with the palm of your hand. The plastic will stay in place since it will stick to the window cleaner. Make sure every section is covered by the plastic.[10]
-
5Shut the door and let the tint bake in the sun for 20-45 minutes. Close the vehicle door and let the trash bag stick out around the sides of the door. Let the vehicle sit in the sun for 20 minutes if it’s 80 °F (27 °C) or hotter. If it’s a little on the cooler side, wait a little longer.[11]
- The plastic insulates the window as the sun heats the glass up. The adhesive will melt while it sits out on the sun and make removing the plastic easy. You can achieve the same effect with a heat gun, but this is much easier and safer for your vehicle.
-
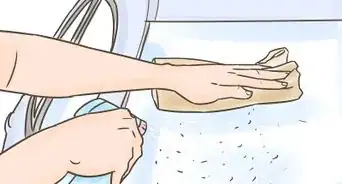
6Peel the film off in one sheet to remove it from the window. After the vehicle has sat out in the sun for a while or after you’ve heated it with the heat gun, open the door and peel the black plastic bag off the window. The tint should have wrinkled up a little in the sun. If it did, grab a wrinkle near the edge of the window and slowly peel the tint off like you’re removing a sticker. If you can’t do it by hand, grab a metal straight edge, like a razor blade, and scrape the tint with the edge to peel it off in strips.[12]
-
7Bring your vehicle to a professional to get the tint replaced by a pro. Either go back to the shop where you got the tint, or look up a tint shop in your area. Take your vehicle to the professionals and pay them to replace your window. This is the best way to ensure you don’t end up with a bad tint job.[13]
- It typically costs $100-400 to tint an entire vehicle, but it will cost considerably less to get a single window replaced.
-
8Redo your tint job if you want to install the tint yourself. If you installed the tint on your own, you already know what you’re doing. The odds are high that your main mistake was not cleaning your window enough, or not smoothing the tint out with your straight edge correctly. This time, spend an extra 5-10 minutes cleaning the window with soapy water and spend an extra 10-15 minutes smoothing it out when you reinstall the tint.[14]
- Tinting a vehicle is a pretty touchy process. If your first attempt to tint your windows was unsuccessful, you likely got enough practice to nail the process this time.
EXPERT TIPChad Zani is the Director of Franchising at Detail Garage, an automotive detailing company with locations around the U.S. and Sweden. Chad is based in the Los Angeles, California area and uses his passion for auto detailing to teach others how to do so as he grows his company nationwide.Auto Detailing Expert Chad Zani
Auto Detailing ExpertTo protect your tint, use a streak-free cleaning product. When you're cleaning your windows, opt for a streak-free product, and don't overspray it. Also, avoid using window cleaners that have acetone in them, as these will cause your tint to become discolored.


Community Q&A
-
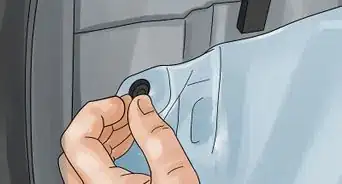
QuestionThe tint on my window split at the bottom by the window. How can I fix it?
 Community AnswerIf you have a screen window on your tent, just sew it up. If you do not have a screen window, use hot glue or fabric glue to fix it.
 -
QuestionCan bubbles be fixed from all tinted windows?Community AnswerYes. Just use a small pin to poke holes in the bubbles, but be careful not to tear the window tint. Then, just use a squeegee or a sponge to press the bubbles and the tint smooth again. Make sure you mist the window with water before replacing the tint to the window.
-
QuestionHow do you get newly tinted windows to stop sticking?Community AnswerScotch tape.
Warnings
- If you accidentally tear your tint, there’s really no decent way to fix it. You’ll need to either live with the rip, or replace the tint.⧼thumbs_response⧽
Things You’ll Need
Smoothing Out Mistakes
- Plastic straight edge
- Heat gun
Replacing the Tint
- Glass cleaner
- Black plastic
- Dry cloth
- Metal straight edge (optional)
- Heat gun (optional)

References
- ↑ https://youtu.be/ymLMw9EJZX0?t=196
- ↑ https://youtu.be/UI26t70sJ6A?t=88
- ↑ https://youtu.be/UI26t70sJ6A?t=88
- ↑ https://youtu.be/ymLMw9EJZX0?t=223
- ↑ https://youtu.be/ymLMw9EJZX0?t=285
- ↑ https://youtu.be/ymLMw9EJZX0?t=223
- ↑ https://youtu.be/ymLMw9EJZX0?t=574
- ↑ https://youtu.be/nSRxgLPPTeY?t=40
- ↑ https://youtu.be/nSRxgLPPTeY?t=55
About This Article