This article was co-authored by Allen Lee. Allen Lee is a Home Improvement Specialist and the Owner of Honest Lee Handyman Services, a licensed and insured handyman business servicing Sacramento, California, and surrounding areas. Working with homeowners and businesses to get their small repairs done in a timely and efficient manner, Honest Lee Handyman Services provides gutter and dryer vent cleaning along with fixture, fence, drywall, and toilet repairs.
There are 9 references cited in this article, which can be found at the bottom of the page.
This article has been viewed 498,621 times.
Is there anything more terrifying than a toilet about to overflow? A creaking, burbling, malfunctioning monster of a commode is the fear of any homeowner. Fortunately, most common toilet problems can be easily and quickly fixed by diagnosing the correct problem and making a few simple adjustments.
Steps
Fixing a Clogged Toilet
-
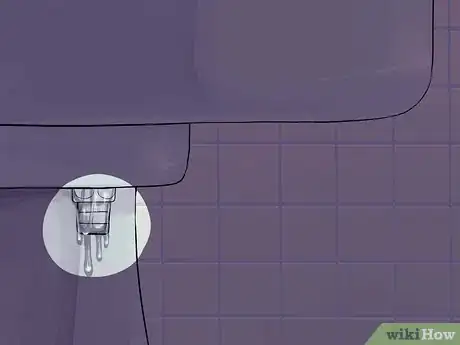
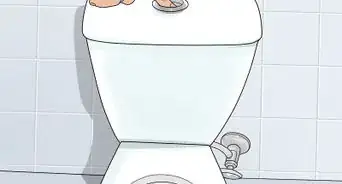
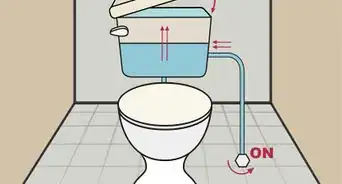
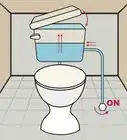
1Shut the water off. If your toilet has become clogged, don't try to flush it or you'll risk overflowing the toilet. Find the water valve on the wall that connects the waterline to the toilet and turn it clockwise until it stops. Water should stop coming into the tank.
- With any tank or flushing issue, you'll want to shut the water off first as a safety precaution. Cleaning up a toilet that's overflown is obviously the biggest of bummers.
-
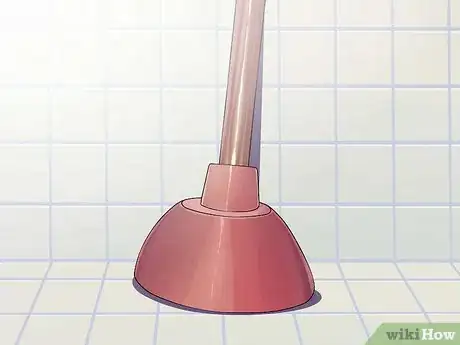
2Get a plunger. It's called the plumber's helper for a reason.[1] Some plungers have complicated bulb shapes and some are simple suction cups, but you just need to make sure your plunger is big enough to cover the opening at the bottom of the bowl.[2]
- Make sure there's enough water in the bowl to cover the cup of the plunger. It's easier to have some water to force the clog out with, but now that you've shut off the water you can't flush anymore in from the tank. Get a few cups of water from the sink to add to the bowl if you need to.
Advertisement -
3Fix the suction cup onto the opening at the bottom of the bowl. Pump it forcefully and evenly. You should start to hear a gurgling in the pipe and feel some pressure building if you've created a suction with the plunger. After 5-10 pumps with the plunger, break the seal and see if the clog comes loose. If not, try again.[3]
- If you can see the clog come up, you can try to flush the water down without turning the water back on. There should be enough water in the bowl to flush it.
- If the water all flushes down by itself after plunging, turn the water back on and let it run for a few minutes. When the water settles, try flushing it, but watch carefully and make sure it doesn't start to overflow. Shut off the water quickly if it does.
-
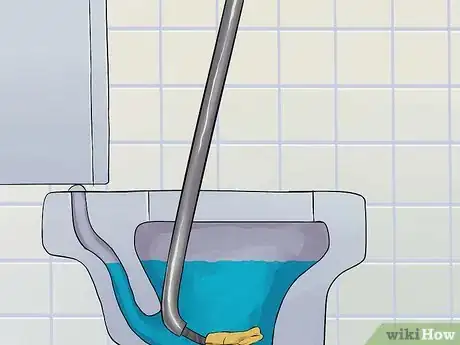
4Use a plumber's auger or a "snake." If the clog is close to the top, the plunger should get it. If it has worked its way down the pipe, however, you might need the heavy artillery. A plumber's auger, also called a "snake," is essentially a long wire that you can reel out and guide through the pipe to forcefully dislodge the clog and then reel back up.[4]
- Aim the tip of the auger into the bowl drain and reel it out. Be very careful not to force it and crank slowly and evenly.
- You don't want to bust a pipe fitting or get the auger stuck. When you've run the auger out, or feel that you've broken up the clog, reel it back in and try to plunge the toilet again or flush it and see if the clog has worked it's way through.
- If you don't want to buy an auger, you can fashion a simple device with a wire hanger to try to get at the clog.
Fixing a Toilet that Runs Constantly
-
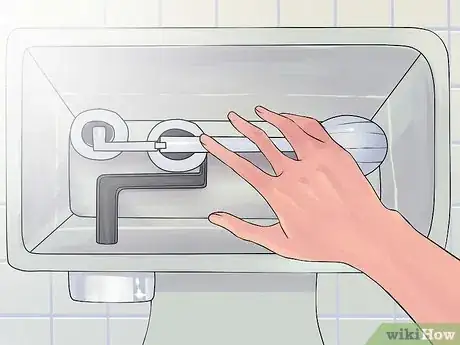
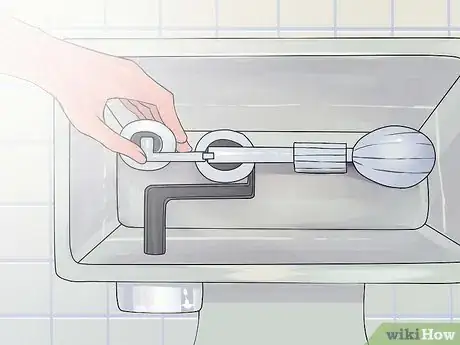
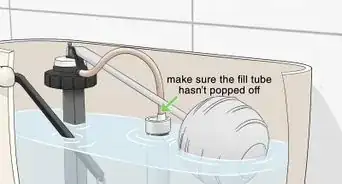
1Remove the top of the tank and lift up the floating arm. Find the rod attached to a ball that floats on the top of the water and controls the intake of water from the pipes into the tank. This is the floating arm. If you lift up on the arm and the water stops, then your problem is that the water in the tank isn't coming up high enough to turn off and the pipes are getting the message that more water needs to come in, so the toilet runs constantly, or often.[5]
- A running toilet can cost a fortune in wasted water. While it may seem like a minor inconvenience, a running toilet is a serious and usually easily fixable problem.
-
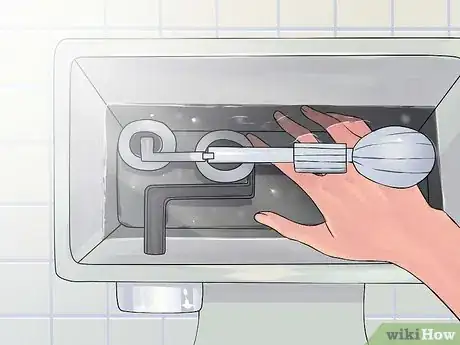
2Check the floating arm for misalignment. Sometimes, the floating arm will be bent so the ball will rub or catch on the side of the tank or the tank ball arm. Flush the toilet and see if the arm catches on anything. If it does, just bend the arm gently so it floats freely and can rise to the level it needs to.
-
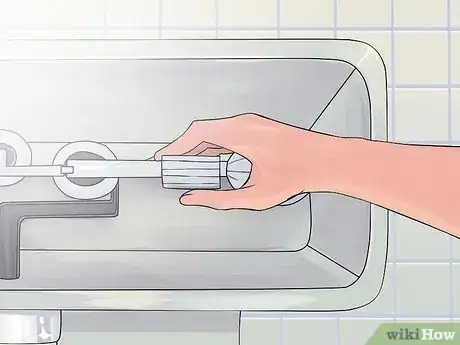
3If it doesn't seem to be caught on anything, unscrew the ball from the arm by twisting it counter-clockwise. Sometimes, water will get trapped in the ball, weighing it down and keeping the water from rising as it should. If this happens, dump the water out and replace the ball by screwing it back on.
- If the ball is cracked or otherwise damaged and allows water in freely, replace it with a new one.
-
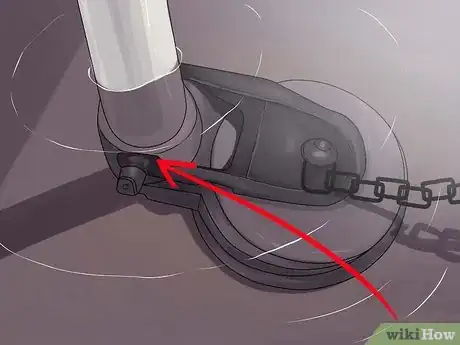
4Check the flapper seal. If lifting up on the arm doesn't halt the running water and adjusting the floating arm doesn't seem to help, the problem is probably with the flapper assembly, which creates the seal at the bottom of the tank leading to the bowl and connects to the toilet handle by a rod.[6]
- Shut off the water and flush the toilet to empty the tank of water. Examine the flapper for signs of wear or corrosion. If you find build-up from the water or other gunk, scour it off with a kitchen pad or a pocketknife and see if you can get the flapper to create a good seal. Also check the opening for the same corrosion issues and clean it.
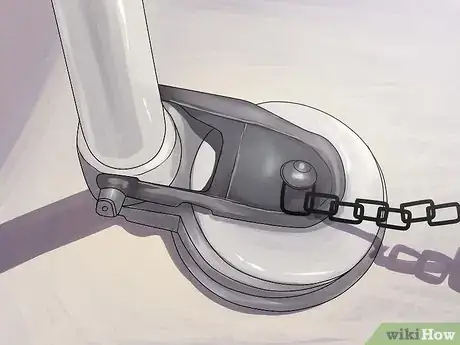
- If water still gets through the opening, examine the wire rod that connects to the toilet handle and make sure it's aligned and allowing the flapper to fall freely and plug the hole. Like the floating rod, you should be able to bend it back into place relatively gently, or replace it with a new one. Some are connected with a chain that can become tangled or loose and may need replaced as well.
- If none of this seems to stop the toilet from running, you'll probably need to replace the ballcock assembly.
Fixing the Ballcock Assembly
-
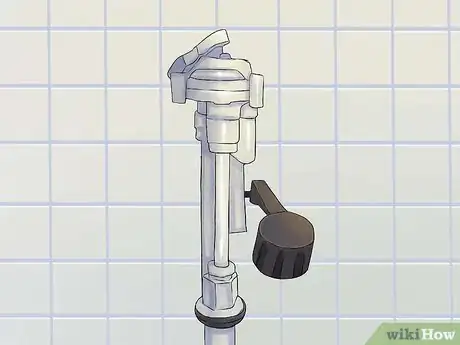
1Determine if you have a sealed plastic ballcock assembly or a metal one. Many newer ballcock assemblies, which control the water as it flows into the tank from the water pipes and connects the floating arm and flapper assembly together, are sealed, making it difficult or impossible to take apart and repair. These models will just need replaced by removing the threaded screws and replacing it with a similar model.
- Unscrew the floating arm from the assembly after turning off the water and flushing the tank. Then remove the entire assembly from the overfill tube (the tall tube that keeps water from overflowing the tank).
- The perk of a plastic assembly is that it won't corrode and it costs less, but you can't fix it if something goes wrong. A metal assembly is sturdier and you can try to repair it. Choose what works best for you if the assembly needs replacing.
-
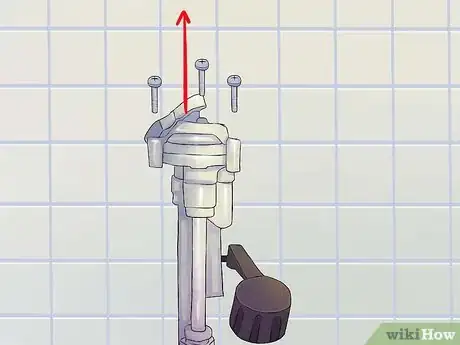
2To fix a metal assembly, remove the thumbscrews. On most older metal models, a couple of thumbscrews will hold the valve together. Unscrew them, revealing the washers or gaskets in between the valve parts.
- Examine them. If any of these is worn out or broken, it will allow water to seep through and could be the cause of the toilet running. If that seems to be the problem, simply replace the gaskets and reassemble the ballcock assembly. If not, you'll need to remove the entire assembly.
-
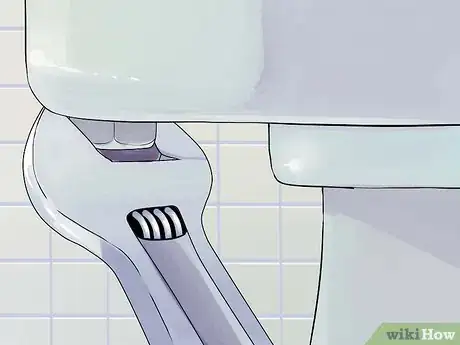
3Look for a locknut assembly at the bottom of the tank on the inside and on the outside of the tank. This should be what's keeping the assembly in the tank. You'll need to unscrew it from both sides with an adjustable wrench and lift the assembly free.[7]
- At this point, you should tighten the arms of the ballcock assembly, testing to make sure the arm functions and nothing seems to be broken, missing, or misaligned. If you don't see anything wrong but the toilet is still running and none of the other maintenance options have helped, you'll just need to replace the assembly with a new one. Typically, they'll cost anywhere between $10-$30.
-
4Screw the new ballcock assembly in place. Follow the reverse of the steps you followed in removing the assembly, screwing it in tightly and re-affixing the floating arm (though, it'll probably come with a new float arm and possibly a new flapper). Turn the water back on and let the toilet run for a few minutes before attempting to flush it.[8]
Fixing a Weak Flush
-
1Check the water level in the tank. If there isn't enough water coming into the bowl to thoroughly clean it out, it probably means that not enough water is getting into the tank in the first place. Find the floating arm and try bending it up slightly to allow more water to fill into the tank.[9]
- Be careful not to raise it too far past the overflow tube, or the tank will run constantly.
-
2Check the flush valve at the bottom of the tank. After shutting off the water and flushing the tank, check to make sure the valve isn't closing too soon, shutting off more water from getting into the bowl. If it is, adjust the rod arm or the chain.[10]
- There should be three or four different height settings to allow the assembly to customize to your toilet. Try different settings until enough water flows into the toilet.
-
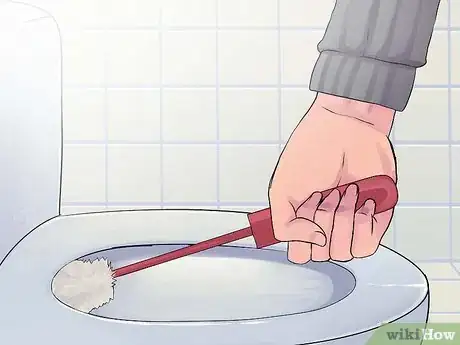
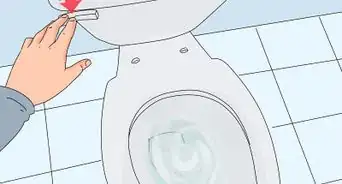
3Check the water ports on the underside of the toilet bowl rim. These will often become clogged with mildew or rust because it's a difficult area of the toilet to clean. Take a toilet brush with toilet cleaner to the underside of the rim to make sure enough water can get through the ports.
- To see if they're clogged without sticking your head in the toilet, use a small mirror and check them out in the reflection.
- You can also use a wire hanger to clean the ports out if there's anything lodged in there you can't get out with a brush.
-
4Check to see if the joint that connects the tank to the toilet bowl is leaking. Generally, a pipe connects them. Look at the base of the tank and check the nuts to see if they need tightening, replacing, or new washers.
- If part of the tank or bowl is cracked or leaking, this may result in a weak flush or other problems and you may need to replace the toilet completely.
Replacing the Seat
-
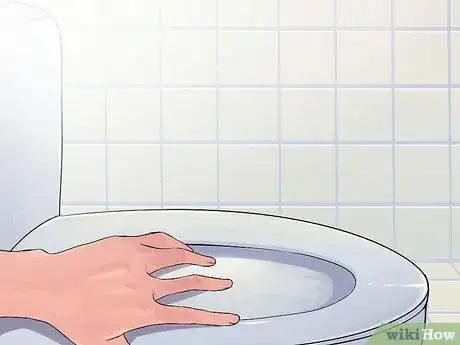
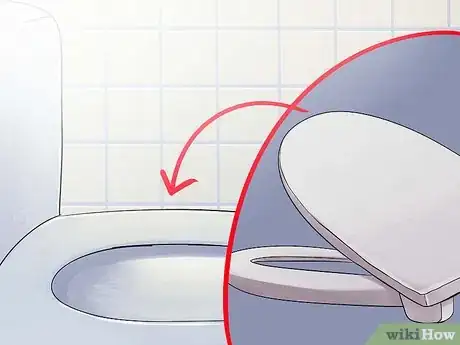
1Remove the old seat. One of the most common and easily fixable issues with a toilet is a broken or otherwise malfunctioning seat that needs replacing. First, you'll need to remove the old seat and dispose of it by removing the nut from the mounting bolts under the rim of the toilet and pulling the seat and lid off.[11]
- Look under the lip of the toilet rim where the seat and lid connect to the bowl. You should see the nut and washer holding the seat on. Unscrew it with an adjustable crescent wrench and remove the washer and nut. The bolts should easily slide free from the top and you can remove the seat.
- If the nut is stuck or rusty, spray some WD-40 on it to help it come loose. Be careful not to struggle with the wrench too much and risk cracking the bowl of the toilet with your wrench or smacking your hand on something.
-
2Get a new seat. Typically, most toilets are manufactured in two sizes, so make sure you've got the right size to match your particular toilet. Measure the width and length of bowl from the mounting bolt to the lip and take your measurements to the hardware or housewares store to make sure you've got the right size for your toilet.
- While you're at the hardware store, you'll probably want to buy replacement washers, nuts, and bolts unless the seat comes with them. Make sure they fit your toilet. Take in the old ones to have on hand for comparison.
-
3Install the new seat. Fix the bolts through the holes in the toilet rim and screw the nut onto the bowl. Be careful not to use too much force when tightening, but make sure the seat is secure.[12]
Expert Q&A
Did you know you can get expert answers for this article?
Unlock expert answers by supporting wikiHow
-
QuestionHow do I clear a clogged toilet?
 Allen LeeAllen Lee is a Home Improvement Specialist and the Owner of Honest Lee Handyman Services, a licensed and insured handyman business servicing Sacramento, California, and surrounding areas. Working with homeowners and businesses to get their small repairs done in a timely and efficient manner, Honest Lee Handyman Services provides gutter and dryer vent cleaning along with fixture, fence, drywall, and toilet repairs.
Home Improvement Specialist
Warnings
- Wash your hands thoroughly when working on your toilet. Wash them often.⧼thumbs_response⧽
- If something breaks, be extremely careful not to get cut. The edges will be very sharp.⧼thumbs_response⧽
Things You'll Need
- Wrench
- Screwdriver
- Pliers
- New ballcock assembly or replacement parts
- Replacement seat
- Bolts, washers, and nuts
- Floating arm assembly
- Flapper assembly
References
- ↑ Allen Lee. Home Improvement Specialist. Expert Interview. 10 July 2020.
- ↑ https://www.familyhandyman.com/plumbing/toilet-repair/how-to-fix-a-clogged-toilet/
- ↑ https://www.familyhandyman.com/plumbing/toilet-repair/how-to-fix-a-clogged-toilet/
- ↑ Allen Lee. Home Improvement Specialist. Expert Interview. 10 July 2020.
- ↑ http://home.howstuffworks.com/home-improvement/plumbing/how-to-repair-a-toilet3.htm
- ↑ http://www.thisoldhouse.com/toh/photos/0,,20260513,00.html
- ↑ https://home.howstuffworks.com/home-improvement/plumbing/how-to-repair-a-toilet4.htm
- ↑ https://www.youtube.com/watch?v=Pvj9QJDy1MQ
- ↑ https://www.youtube.com/watch?v=Ksj_gawUhgQ
About This Article
To fix a toilet that runs constantly, start by taking the top off of the tank and locating the rod with the floating ball attached to it. If the rod is bent and the ball is rubbing against the side of the tank, try straightening it out and seeing if that fixes the problem. If it's not bent, try unscrewing the ball and emptying out any water inside of it, which could be weighing it down and causing problems. Finally, check the seal at the bottom of the tank to see if it's damaged or not plugging the drain correctly. To learn how to fix a toilet that's not flushing properly, scroll down!

