This article was co-authored by wikiHow staff writer, Amber Crain. Amber Crain has been a member of wikiHow’s writing staff for the last six years. She graduated from the University of Houston where she majored in Classical Studies and minored in Painting. Before coming to wikiHow, she worked in a variety of industries including marketing, education, and music journalism. She's been a radio DJ for 10+ years and currently DJs a biweekly music program on the award-winning internet radio station DKFM. Her work at wikiHow supports her lifelong passion for learning and her belief that knowledge belongs to anyone who desires to seek it.
This article has been viewed 20,893 times.
Learn more...
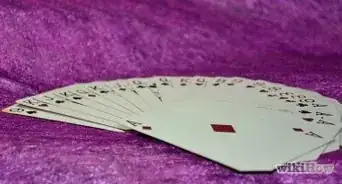
Card flourishing is a performance art that uses a regular deck of playing cards to create visually impressive tricks. These tricks are meant to look difficult and wow an audience. One of the fundamental skills for a beginner to master is the straddle grip, which is the basic starting position for many flourishes. Once you’ve nailed the straddle grip, you can learn the Charlier Cut and the Revolution Cut, which are two basic flourishes perfect for beginners.
Steps
Mastering the Basic Straddle Grip
-
1Hold your left hand in front of you with the palm facing up. Position your left hand comfortably in front of you at approximately chest level. Your palm should be face up and your fingers loose. The fingertips should be reaching up slightly.
- In cardistry, the straddle grip is usually done with the left hand, whether that’s your dominant hand or not.
- You’ll eventually learn to do tricks with both hands using straddle grip, so if you want to learn with your dominant hand first, that’s totally fine!
-
2Curl your fingers into a starfish position. With your palm facing the ceiling, gently curl your fingers up, as if you were going to pluck an apple from a tree. All fingertips are slightly bent and facing up. Your palm now looks like a cradle and your fingers are in a claw-like position, technically known as the starfish position.Advertisement
-
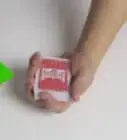
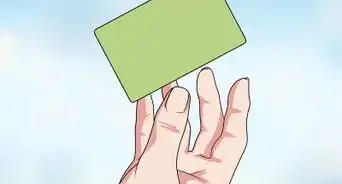
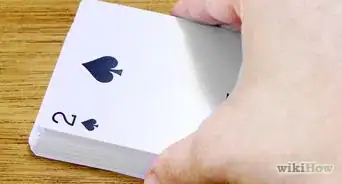
3Use your right hand to place the deck in your left hand. Use a standard 52 card deck. All of the cards should be face down in a single stack, with only the backside of the top card visible. Position the deck vertically (short side up) in your left hand and wrap your fingertips around the edges. The deck should be cradled comfortably in your left hand.
-
4Grip one end with your index finger and the other with your pinkie. As you place the deck into your left hand, curl your index fingertip around the top end at 12 o’clock. Use your pinkie fingertip to grasp the bottom end at 6 o’clock.
- These fingers are grasping the short-sided horizontal edges of the deck.
-
5Wrap your thumb and remaining fingers around the deck. Curl your left thumb around the long side of the deck at 9 o’clock. Use your middle and ring fingers to grasp the opposite side at approximately 3 o’clock.
- These fingers are grasping the longer vertical sides of the deck.
-
6Cradle the deck right beneath your fingertips. Position the deck right under your fingertips, just low enough so your fingertips can curl around the edges. The deck should occupy the space between the top and middle joints of all five fingers.
- You are now using the straddle grip!


Doing a Charlier Cut
-
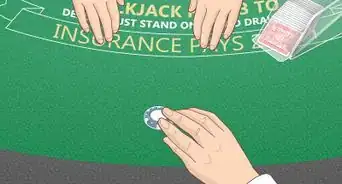
1Hold a standard 52 card deck in the straddle grip. Your index finger should be grasping one end, and your pinkie finger will be grasping the other end. Curl your thumb around one side and use your other two fingers to cradle the opposite side.[1]
- The Charlier Cut is performed with only one hand.
-
2Hold the deck with your palm facing up. To do the Charlier Cut, your palm needs to be facing up as you hold the deck. With your fingers in straddle position, your hand will look almost like a claw, with the deck cradled between them. The deck should be face down, so that only the backside of the top card is visible.[2]
-
3Release pressure on the cards with your thumb. The straddle position is a very secure one. To move into a flourish, you’ll need to loosen your grip so you can manipulate the cards. Release pressure with your thumb and curl it so that you have a good grasp on the top half of the deck.
-
4Let the bottom half of the deck fall into your palm. It doesn’t have to be exactly half, just eyeball it. Let the bottom half the deck fall into your palm. Push your thumb up slightly so the top half of the deck separates further. Curl it around so you’ve got a good grip on the top half.[3]
- The deck is now cut into two fairly equal stacks.
-
5Push your index finger against the bottom half of the deck. Keep your thumb, pinkie and other two fingers in place. Curl your index finger under slightly and push the bottom half of the deck up until it hits the other side of your palm, right against the lower portion of your thumb.[4]
- At this point, the top half of the deck is still in the same position. The bottom half is flipped on its side, resting against the lower part of your thumb. The edges of the top and bottom decks now perpendicular.
-
6Pop the bottom deck into the top position with your index finger. Give the bottom deck a little nudge as you loosen your grip with your other fingers. Pop the edges of the bottom deck from the lower position into the top position. The edges of both decks are still perpendicular, but the edges of both decks have switched positions.
-
7Loosen your grip on the top deck and allow it to drop into your palm. As the top deck falls into your palm, use your thumb to nudge the bottom deck directly on top of it. Now the two decks are parallel, with the bottom deck now on top.[5]
-
8Let both decks fall back into a single stack. Use your pinkie to hold everything in position. Loosen your grip slightly with your other fingers so that the cards return to a single stack. You are now grasping the deck in the straddle position, exactly the way you started.[6]
- Keep practicing until you can perform the cut in one continuous and fluid motion.


Performing a Revolution Cut
-
1Hold a standard deck in your left hand in the straddle grip. Your index finger is grasping one end, and your pinkie finger is at the other end. Curl your thumb around one side and use your other two fingers (middle and ring fingers) to cradle the opposite side. Your palm is face up and the deck is face down, cradled in your fingers.
- The Revolution Cut is performed with only one hand. It’s an advanced variation of the Charlier Cut.
-
2Release pressure on the cards with your thumb. Release pressure with your thumb and curl it so that you have a good grasp on the top half of the deck.
-
3Let the bottom half of the deck fall into your palm. Don't worry about making it exactly half, just estimate. As the bottom half of the deck falls into your palm, keep the top half still and in its original position.
-
4Move your index finger from the top edge to the right edge. Shift your index finger over to the right so that it’s next to your middle and ring fingers on the long side. Grip the side of the deck with all three fingers. Keep your thumb and pinkie in place.
-
5Drop the ring, middle and pinkie fingers from the top deck. Loosen your grip and drop those three fingers from gripping the top half of the deck. The top half is now being gripped by your index finger and thumb. The bottom half is in your palm.
-
6Use your thumb to push the top deck toward your pinkie. Drop the pinkie and push with your thumb so the top deck begins to turn in a counterclockwise motion. Keep pushing until the bottom left edge of the top deck reaches your ring finger.
-
7Stop the top deck right past your ring finger. Your thumb and ring finger are now holding the long side of the deck. The bottom left corner of the deck is nestled between to middle joints of your ring finger and your middle finger. Your middle finger should be grasping the bottom (short) side of the deck.
-
8Drop your thumb from the grip. Now you’re holding the top deck with only your ring finger and index finger. The middle finger is bracing but not gripping the edge.
-
9Push the top deck counterclockwise with your ring finger. Rotate the top deck until it’s in a horizontal position. The bottom deck still vertical.
-
10Push down the top left edge of the bottom deck with your thumb. As you push that edge down, the bottom deck will pivot upwards on its side. Now your index finger is wedged between both decks.
-
11Continue pushing the top deck counterclockwise until it’s vertical. The bottom deck is turned on its side, so now the decks are positioned perpendicularly to one another. Your index finger is beneath the top deck and the bottom deck is propped against it sideways.
-
12Drop your index finger. As you lower it, allow the deck to drop down into your palm. Curl your middle, ring and pinkie fingers around the right side of that deck. Use your thumb to push bottom deck on top. Clasp your fingers and slowly bring the deck back into a single stack.
- You are now grasping the deck in the straddle position, exactly the way you started.


References
About This Article