This article was co-authored by Peter Salerno. Peter Salerno is the owner of Hook it Up Installation, a professional installation company, which has been hanging art and other objects around Chicago, Illinois for over 10 years. Peter also has over 20 years of experience installing art and other mountable objects in residential, commercial, healthcare and hospitality contexts.
There are 12 references cited in this article, which can be found at the bottom of the page.
This article has been viewed 62,383 times.
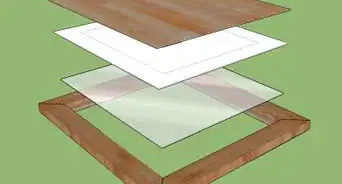
Frame your art so you can hang it on your walls and preserve the image. For paper prints, mount your artwork with a mat board, or float it inside of your frame. You can frame a canvas using canvas frame clips or offset clips. Line up your art inside your frame, clip the frame into place, and your artwork is ready to hang!
Steps
Mounting Your Artwork on a Mat
-
1Use pre-cut mat board for an easy option. Purchase individual pre-cut mats or use the mat that came with your frame. Lay the mat over top of your artwork to make sure the size is correct. If you need to adjust the size, you can cut the mat as needed.[1]
- Most store-bought frames will include a mat and a sample photo. Take off your frame’s backing, and remove the mat so you can mount your artwork to it.
-
2Use a custom-sized mat board for an individual, unique matting option. You can either get a custom mat cut for you at a frame shop or craft store, or you can cut your own.[2]
- If you want a professional framer to cut your mat, bring your frame and your artwork with you to the store. Ask the employees to help you cut a mat to a particular size.
Advertisement -
3Cut your mat board so it is the same size as your frame. You can lay your frame on top of your mat to use it as a stencil. Trace the size of your frame onto your mat board, and use an X-ACTO knife to cut out all 4 sides.[3]
- If you do not cut all the way through with 1 motion, make 2 cuts with your blade for clean, thorough cuts.
-
4Measure your art to determine how large of a window to cut. You will need to cut a window into your mat board, if it isn't already pre-cut. Use a ruler to measure to the closest 1⁄4 inch (0.64 cm).[4]
-
5Trace the measurements of your art onto the back of your mat board. Make light but clear marks with a pencil. You will hide any pencil marks left over after you make your cuts by tracing onto the back.[5]
- Extend your lines beyond just your artwork area if you need help seeing where to end your measurements.
- You can also add a little room to the bottom of your mat for a more professional look. This is referred to as “weighing the bottom,” a matting technique where you leave 1⁄4 to 1⁄2 in (0.64 to 1.27 cm) at the bottom so it is your thickest side.[6]
-
6Use a metal ruler and an X-acto knife to cut your mat board. Make sure your ruler is straight and completely parallel to your line. Cut all 4 lines using steady, firm pressure to create a window in your mat board.[7]
- Metal rulers tend to cut the most smooth and accurate lines.
- When you are approaching the end of your measurement line, cut with care so you don’t cut too much of your mat board. Repeat for all 4 sides of your mat board.
-
7Check the alignment of your mat board and artwork. Flip over your mat board so it faces the front, and line it up with your artwork. Are the edges of your mat board straight? Is your image cropped correctly? If not, make adjustments as needed. You can cut more of your mat to display more of your art or to even out your edges.[8]
- Be careful to not over-trim your mat. You want your mat board to slightly overlap your artwork so the matting looks seamless and professional.
-
8Place a piece of tape on the back of your artwork and put your artwork face up. In order to make sure everything aligns properly, you will want to place the mat board over the artwork. Use enough tape so that your artwork will be properly secured.
- If you want to preserve your artwork long-term, use acid-free tape. Acid-free tape will not cause damage or decay to your artwork.
-
9Lay your mat board over your artwork and press down. Press down firmly over where the tape is located to adhere the artwork to the mat board. If you only used one piece of tape, flip them aboard over and secure the top edge of the artwork to the mat board.
- You will only have to tape the top edge.
-
10Attach your matted art to a backing mat if you’d like. You can insert your matted art directly into your frame, or you can attach it to a backing mat for extra security. Use double sided tape to attach your matted art to a backing mat, or create "homemade" double sided tape by sticking 2 piece of tape together to create a crossed "X" shape.
- You can use the backing mat that came with your frame or another piece of mat board.
- A backing mat will keep your art in place and prevent it from potentially moving inside your frame.
-
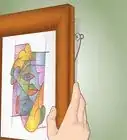
11Move the hinges on the back of your frame out of the way. There are small metal or plastic hinges along your frame, holding the backing inside the frame. Move these to the side to unlock the frame using your fingers or a dull knife.
- You can also take off the frame backing and remove any artwork or mat board that came with it.
-
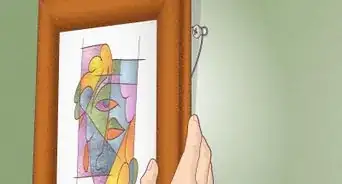
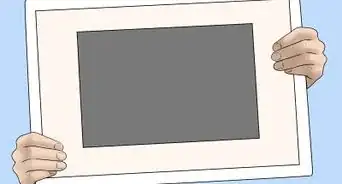
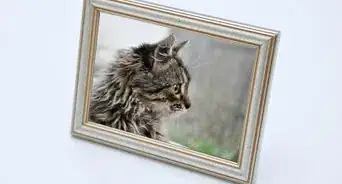
12Lay your matted artwork inside the frame and replace the hinges. There is an internal ledge inside your frame where you can place your art. Using your fingers or a tool, move the hinges back into place to secure the backing to the frame. Your frame is now ready to hang!
- If your frame came with a separate backing piece, place that inside the frame before you close up the frame.


Floating Your Artwork
-
1Cut a piece of matboard to the size of your frame. You can use the backboard of your frame as a template. Use an X-acto knife and a metal ruler to make clean, crisp lines.[9]
-
2Cut a piece of foam core .25 inches (0.64 cm) smaller than your art. Use a ruler to make your lines, and cut the foam core using a straight-edge razor.[10]
-
3Mount your art to the foam core using acid-free artist's tape. Take 1 piece of tape stick it to another piece of tape facing the opposite direction, to create a crossed “X” shape. Stick this to your foam board, so one end of the “X” sticks to the board and the other’s adhesive side is facing upwards. Place your artwork over top, sticking it to the other side of the “X”.[11]
- Make sure you cannot see any of the foam core after you place your art on top!
- Acid-free tape will keep your artwork in good condition for years to come.
-
4Tape your foam core in the center of your mat board. You can attach it with another “X” of tape. Measure your matboard from corner to corner to help you center it, if you need to. Place your art and foam core in the middle of your mat board, and smooth over the surfaces so the tape adheres to the matboard.[12]
-
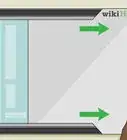
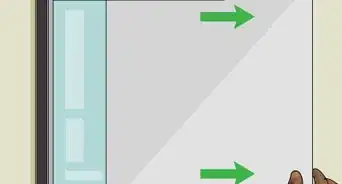
5Measure and cut acrylic spacers to the size of your frame. Line up your acrylic spacers inside your frame’s inner edge, and cut the spacers using wire cutters. Then, simply unpeel the covering from the adhesive side of your spacers and adhere your spacers directly to the glass of your frame.[13]
- Your spacers will help your art fit tightly inside your frame.
- You should have 4 acrylic spacers, 1 for each side.
-
6Put your floating artwork inside of your frame. You should be able to easily place the art inside of the frame. Then, place the backing to the frame over your artwork, and replace the back hinges using your fingers or a dull side of a knife.[14]
- Your artwork should appear to be “floating” above your mat board.


Framing Canvases
-
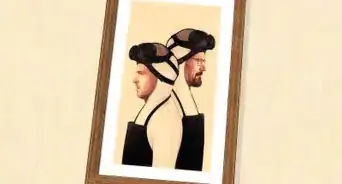
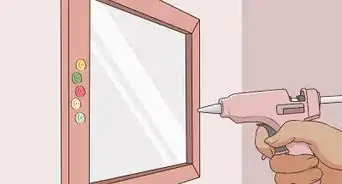
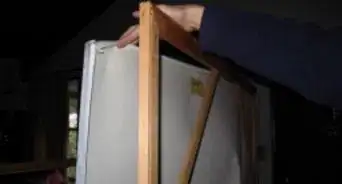
1Use a thick, solid frame that matches the size of your canvas. Choose a thick, solid bordered frames that complement the style of art.[15]
- If you are hanging a classical painting, go with a traditional style frame, like dark wood or gold leaf.
- Other paintings will good best in sleek, clean frames. Choose a solid color that won’t distract from the painting.
-
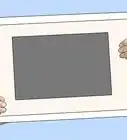
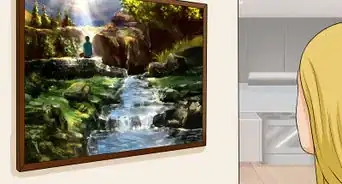
2Place your canvas inside of the frame face down. Your canvas should easily slide inside of your frame since they are the same size.[16]
-
3Use frame clips if your stretcher bar is 1.5–1.75 inches (3.8–4.4 cm). To install canvas clips, push the double-pointed end between the canvas’ stretcher and the frame, and then push the clip down so it clips over top of the stretcher.[17]
- Use 1 clip for each side of your frame.
-
4Use offset clips if your stretcher bar is larger than 1.75 inches (4.4 cm). There are two small holes where you can add screws. Align the offset clip so 1 of these holes is on top of your canvas and the other is on your frame. Screw them in using a drill or screwdriver.[18]
- Use at least 1 offset clip for each side of your frame.
- Add more offset clips for extra support, especially for larger canvases.


Expert Q&A
-
QuestionHow do you frame non-standard sizes?
 Peter SalernoPeter Salerno is the owner of Hook it Up Installation, a professional installation company, which has been hanging art and other objects around Chicago, Illinois for over 10 years. Peter also has over 20 years of experience installing art and other mountable objects in residential, commercial, healthcare and hospitality contexts.
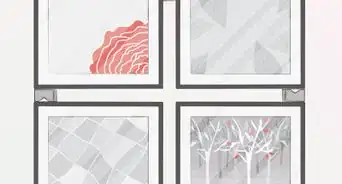
Installation ExpertTry a custom frame! Highlight your favorite artwork with a custom frame. Ready-made frames work well for almost all art pieces and are very cost-effective, but custom frames are great when you really want to accentuate a particular piece. You can pick different colors, designs, and materials and tailor the frame to be perfect for your piece and its location in the space.
Things You'll Need
Mounting Your Artwork on a Mat
- Mat board
- Metal ruler
- X-acto knife
- Acid-free artist's tape
- Backing mat
- Frame
Floating Your Artwork
- Foamcore
- Metal ruler
- X-acto knife
- Acid-free artist's tape
- Mat board
- Backing mat
- Acrylic spacers
- Frame
Framing Canvasses
- Frame clips
- Offset clips
- Frame

References
- ↑ https://youtu.be/Q_S4kmPPK4k?t=1m34s
- ↑ https://www.apartmenttherapy.com/how-to-cut-a-mat-for-framing-artwork-176545
- ↑ https://www.prettyhandygirl.com/cut-art-mat-like-pro/
- ↑ https://www.prettyhandygirl.com/cut-art-mat-like-pro/
- ↑ https://www.prettyhandygirl.com/cut-art-mat-like-pro/
- ↑ https://www.prettyhandygirl.com/cut-art-mat-like-pro/
- ↑ https://www.prettyhandygirl.com/cut-art-mat-like-pro/
- ↑ https://www.prettyhandygirl.com/cut-art-mat-like-pro/
- ↑ https://youtu.be/nI1_AlavLV0?t=31s
- ↑ https://youtu.be/nI1_AlavLV0?t=56s
- ↑ https://youtu.be/nI1_AlavLV0?t=1m26s
- ↑ https://youtu.be/nI1_AlavLV0?t=1m38s
- ↑ https://youtu.be/nI1_AlavLV0?t=1m55s
- ↑ https://youtu.be/nI1_AlavLV0?t=2m26s
- ↑ https://www.artistsnetwork.com/art-techniques/how-to-choose-the-best-frame-to-present-and-protect-your-artwork/
- ↑ https://youtu.be/yUYMjsv7GYs?t=33s
- ↑ https://www.americanframe.com/blogs/ask-mike/June-2014/canvas-clips-and-offset-clips.aspx
- ↑ https://www.americanframe.com/blogs/ask-mike/June-2014/canvas-clips-and-offset-clips.aspx
About This Article