This article was co-authored by Bianca Cox. Bianca Cox is a Hair Stylist, Licensed Cosmetologist, Owner of The Hair Throne, and Co-Owner of Bianchi Salon. Her salons pride themselves on their modernity, individuality, art, and professional services. You can check out The Hair Throne and more of Bianca's hairstyling on Instagram @hairthrone and on her personal Instagram @biancajcox.
There are 18 references cited in this article, which can be found at the bottom of the page.
This article has been viewed 23,711 times.
Create more defined curls in your afro by using Bantu knots or flexi rods overnight! Both options are simple processes that shouldn’t take you more than 10 minutes. Once the knots or rods are in place, simply wrap your hair in a silk scarf until you wake the next morning. As you undo each section, run your fingers through them to separate your curls and finish your style for the day. You’ll enjoy the volume and definition in your hair while experiencing fewer tangles.
Steps
Washing and Sectioning Your Hair
-
1Wash and condition your locks so you’re starting with clean hair. Use sulfate-free products if you can—they will help reduce frizz.[1] If you don’t have sulfate-free products, just use whatever you normally do in the shower.[2]
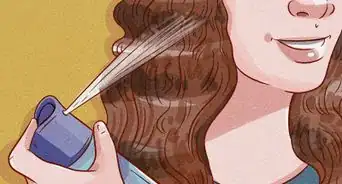
- If you don’t have time to wash your hair, spray it down with a water bottle. Damp hair will produce better curls than dry hair.
-
2Towel-dry your hair so it is damp instead of soaking wet.[3] If you do Bantu knots or flexi rods with super wet hair, chances are it won’t be completely dry by the morning. Use your best judgment—thick hair takes longer to dry than thin hair, so you may want to spend more or less time on this step.[4]
- To continue reducing the risk of frizz, consider using a soft cotton T-shirt to towel-dry your hair.
Advertisement -
3Section your hair into squares, securing each section with a hair clip. Using either your fingers or a comb, separate your hair into multiple sections. For tighter curls, create more sections; for looser curls, do fewer sections.[5]
- For example, create sections that are 1 to 2 inches (2.5 to 5.1 cm) wide for really defined curls. Use 2 to 3 in (5.1 to 7.6 cm) sections for wavier curls.
- It’s okay if the parts aren’t perfect—when you take the style out in the morning, the parts won’t be noticeable anymore.
-
4Apply a moisturizing conditioner and detangle one section at a time. Choose a light product that won’t weigh down your hair. Use your fingers or a wide-tooth comb to work through any knots.[6]
- Products made with Moroccan oil, coconut oil, shea butter, grapeseed oil, or argan oil will condition your hair and leave it with a healthy shine.


Using Bantu Knots
-
1Choose Bantu knots for a quick, no-equipment-needed curl. When Bantu knots are taken out, it’s called a Bantu knot-out. These curls are really defined and are easy to create. It’s a great style to know how to do, especially if you find yourself out and away from home for the night.[7]
- Bobby pins help keep the knots in place, but you can still put in Bantu knots even if you don’t have them.
-
2Grasp one section of hair at a time and twist it until it gets tight. Start twisting about 1 inch (2.5 cm) away from your scalp. Keep twisting, moving your hand down to the end of the section until the strand starts to naturally coil around itself.[8]
- If you start twisting too close to your scalp, it’ll end up being too tight and painful.
-
3Coil each section around itself into a knot as you continue twisting. Follow the natural coil and wrap the section of hair around itself until the entire thing is in a knot. Don’t worry about making each section of hair look identical to the others—a little bit of variety will just enhance the look of your curls the next day.[9]
- For a variation on your curls, you could tie each section into a ponytail at your scalp, and separate the ponytail into 2 strands. Twist those 2 strands together and continue to twist them until the ponytail coils around itself and creates a knot.
-
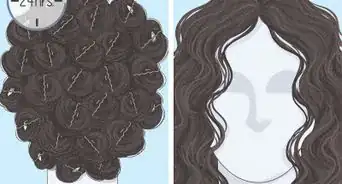
4Secure each Bantu knot with a bobby pin or elastic. Once you’ve finished coiling a section, take a bobby pin and tuck it into the knot, securing the end of the hair in place. You could also wrap an elastic around the knot. This will help keep them from falling out overnight.[10]
- You may even be able to simply tuck the end of your hair up into the knot, though that increases the risk of it coming loose during the night.
-
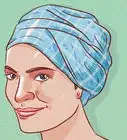
5Wrap your head in a silk scarf to keep your hair safe while you sleep. The silk scarf not only will help keep your knots from coming loose, but it will also reduce frizziness. If you don’t have a scarf, you could wrap your hair in a cotton T-shirt or even wear a shower cap to bed.[11]
- A satin bonnet also works just as well as a silk scarf.
Tip: Use a silk pillowcase in conjunction with your silk scarf. The silk pillowcase won’t pull or catch at the scarf like other materials might.


Installing Flexi Rods
-
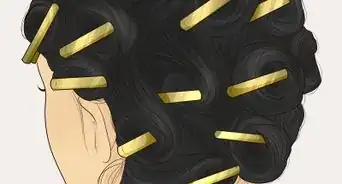
1Use small flexi rods for tight curls and bigger flexi rods for looser curls. Flexi rods are long, flexible rollers that can curl your hair without using a heat source. They’re also fairly comfortable to sleep in, which makes them a great choice when you’re trying to get curls overnight.[12]
- You can buy flexi rods at many drug stores or online.
-
2Roll and twist each section of hair onto a flexi rod. Take a rod in one hand and wrap the end of a section of hair around one end of the rod. Twist the rod so your hair curls around it, bringing the rod closer and closer to your scalp.[13]
- Wrap your hair tightly around the rod. If it’s too loose, your curls won’t be as defined and the sections could get tangled.
-
3Fold the rod under itself once it has reached your scalp. Tuck one end of the flexi rod underneath the other to keep it in place. If your hair feels like it is pulling too much at your scalp, you probably twisted it a little too close. Simply untwist it once or twice and then secure the ends.[14]
- It’s okay if sections of your hair end up close to each other after you’ve twisted them.
-
4Wrap your hair in a silk scarf or simply let it air dry overnight. The silk scarf will help your flexi rods stay in place and will also reduce frizz. If you don’t have a silk scarf, you can let your hair air dry—just keep in mind that your hair might be a little frizzy if you toss and turn a lot while you sleep.[15]
- Your hair must dry completely overnight. If it doesn’t the curls will just fall out when you remove the rods in the morning.


Styling Your Curls the Next Day
-
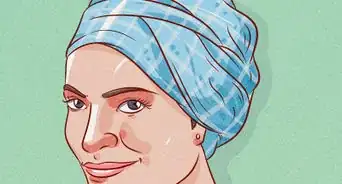
1Remove the silk scarf in the morning once you’re ready to style your hair. Keep the scarf in place while you do the rest of your morning routine. That way, if any curls did come loose during the night, they’ll still be held in place by the scarf.
- This can also be helpful if you use any kind of powder during your morning routine. You won’t accidentally get any in your hair!
-
2Untwist each Bantu knot or flexi rod one by one. Remove the bobby pins, elastics, or rods from each section and gently unwrap them. Twist them in the opposite direction from what you did when creating them.[16]
- Make sure to fully untwist each section so that you can separate the curls easily later on. If you don’t, your fingers will get caught in your hair and you could create big tangles.
-
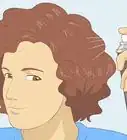
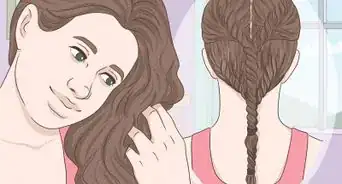
3Separate each curl with your fingers to release multiple waves. Focus on the ends and middle sections of each curl at this stage. Take your fingers and run them through each section so that they are no longer wound together.[17]
- You can use a wide-tooth comb to help if you need to, but doing so may flatten out the curls a bit. If possible, it’s best to just use your fingers.
-
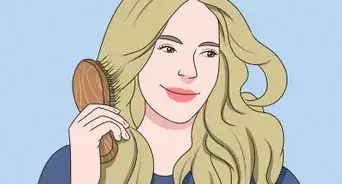
4Use a hair pick along your scalp to create more volume. Pick up a section of your hair and comb downwards with a hair pick starting about 2 inches (5.1 cm) from your scalp. Repeat this all over your head.[18]
- Flip your hair upside down to shake it out and create extra volume, too.
-
5
-
6Retwist your hair every night to prolong your style until your next wash. By retwisting your hair and wearing a silk scarf every night, you can make your afro curls last 1-2 weeks. If you don’t retwist your curls, they’ll last 2-3 days.[20]
- Feel free to experiment with different sizes of curls and different types of twists until you find your favorite style!
Tip: If your roots start to look a little greasy, spritz your hair with dry shampoo before you retwist it for the night.


Things You’ll Need
- Shampoo
- Conditioner
- Moisturizing conditioner
- Towel or T-shirt
- Wide-tooth comb
- Hair pick
- Bobby pins
- Hair elastics (optional)
- Flexi rods (optional)
- Silk scarf
- Hair clips
-Step-12-Version-4.webp)


References
- ↑ Bianca Cox. Professional Hair Stylist. Expert Interview.9 May 2019.
- ↑ https://www.curlcentric.com/flexi-rods/
- ↑ Bianca Cox. Professional Hair Stylist. Expert Interview.9 May 2019.
- ↑ https://youtu.be/i1iD759oruA?t=61
- ↑ https://youtu.be/IbNDMvE9CM8?t=34
- ↑ https://youtu.be/IbNDMvE9CM8?t=49
- ↑ https://www.curlcentric.com/natural-hairstyles-for-black-women/
- ↑ https://youtu.be/IbNDMvE9CM8?t=67
- ↑ https://youtu.be/IbNDMvE9CM8?t=71
- ↑ https://youtu.be/IbNDMvE9CM8?t=82
- ↑ https://youtu.be/LXvD3XQyuDo?t=197
- ↑ https://www.curlcentric.com/flexi-rods/
- ↑ https://youtu.be/AuVOaaXYXTE?t=36
- ↑ https://youtu.be/AuVOaaXYXTE?t=44
- ↑ https://youtu.be/AuVOaaXYXTE?t=61
- ↑ https://youtu.be/qSFAOw50Qu8?t=457
- ↑ https://youtu.be/IbNDMvE9CM8?t=171
- ↑ https://youtu.be/qSFAOw50Qu8
- ↑ https://youtu.be/IbNDMvE9CM8?t=188
- ↑ https://youtu.be/TqntV4zURdg?t=138
About This Article


-Step-12-Version-4.webp)