This article was co-authored by Yan Kandkhorov. Yan Kandkhorov is a Hair Stylist and Owner of K&S Salon, a hair salon based in New York City's Meatpacking District. Yan has over 20 years of experience in the hair industry, is best known for paving the way for iconic hair trends in the industry, and has operated his salon since 2017. His hair salon has been voted one of the Best Hair Salons in New York City in 2019 by Expertise. Yan and K&S Salon has collaborated with leading fashion magazines and celebrities such as Marie Clair USA, Lucy Magazine, and Resident Magazine.
There are 16 references cited in this article, which can be found at the bottom of the page.
This article has been viewed 143,803 times.
Whether you want curly hair for a special occasion or on a daily basis, the chemicals from perms can cause severe damage to your hair. Luckily, there are ways to get bouncy curls, soft waves, or gorgeous waves without causing any harm. If you've been wanting a head full of gorgeous curls without the damage, using rag curlers, foam curlers, a curling iron, or scrunching your hair could be the perfect options for you.
Steps
Using Rag Curlers
-
1Make your rag curlers. Rag curlers are an easy and affordable way to get those tight, bouncy curls that you've been wanting. Take an old t-shirt or sheet and cut it into strips. Each strip should be roughly 1 inch wide and 5 inches long.
- If you want extremely tight curls, you'll need to make more rag curlers (roughly 15-20). If you want looser, bouncier curls, you'll need fewer curlers (roughly 7-10).[1]
-
2Prepare your hair. Wash your hair to remove any excess oils that could potentially weigh your curls down. Your hair should be damp when you put it in rag curlers, so don't let it dry completely. If your hair tends to have problems holding curl, run a bit of gel or curl enhancing cream into your hair before you put it in curlers.[2]Advertisement
-
3Separate your hair into sections. It's easiest to put your hair into rag curlers when you're working on one section at a time. You should divide your hair into four sections: the top, the back, the right side, and the left side. Tie each section in place with a hair tie.
- Start with the section of hair on the top of your head. Once you've finished curling the top section of your head, take the next section you'd like to work on out of its hair tie. Proceed until each section of your hair is in rag curlers.
-
4Roll your hair in rag curlers. Hair Stylist Yan Kandkhorov recommends that you roll your hair in "a flow going away from your face versus towards your face" This will help the curls frame your face rather than getting in your way. Take a 1-inch piece of hair from the top section of your head. Hold your strip of fabric perpendicular to your hair, and wrap the ends of your hair around the rag 3-4 times. After wrapping the ends of your hair tightly around the rag curler, begin to roll the rag upwards towards your scalp.
- Once you've rolled your piece of hair all the way up to your scalp, tie a knot at the end of your rag curl. You'll only need to tie one knot, no need for a bow or double knot. Pull the ends of your fabric tight so that you curl will stay in place.
-
5Roll all of your hair in rag curlers until your entire head is covered. Make sure that each knot is pulled tightly to ensure your curlers will stay in place.
- Leave the rag curlers in your hair overnight.
- Tie a head scarf around your head to keep your hair from getting frizzy while you sleep.
-
6Take your curlers out the next morning. One by one, carefully unknot and unwind each piece of hair. Don't pull too hard on your curls, as you don't want to pull out any of their bounce. Start by taking down the curls by the nape of your neck and work upwards.[3]
- If you're having trouble unknotting any of your rag curlers, you can cut them off with a pair of scissors. Be extremely careful if you do this, as you don't want to cut any of your hair.
-
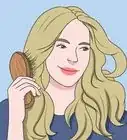
7Style your curls. Depending on what look you're going for, you will either brush your curls out, or let them remain in spirals. If you want a smooth, flowy look, brush your hair out. If you enjoy the messy, individual curls, lightly comb through your hair with your fingers. Hairspray to hold your hair in place. [4]


Using Foam Curlers
-
1Purchase your foam curlers. You may recognize these as the little pink curlers that you've seen in movies or your grandmother's house. They are super affordable and available at any beauty supply store. They come in many sizes, so get whatever size you want your curls to be.
- Not all foam curlers are pink, that is simply the most popular color. Any foam curlers will work just fine.
-
2Wash your hair. Your hair should be freshly washed and still damp when you roll your hair in foam curlers. Your hair is more likely to hold the curl if it dries in place. If your hair has difficulty holding curl, add some gel or curl enhancing product to your hair before rolling it in curlers.
-
3Divide your hair into sections. As with rag curlers, it's easiest to divide your hair into sections before putting it in curlers. There should be three sections of hair: the right side, and the left side, and the middle. Hold each section in place with a hair tie.[5]
- You will start with the middle section of hair, and then move on to the sides once you've finished.
-
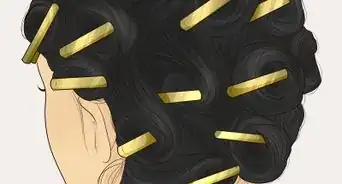
4Put your hair in foam rollers. Start by opening the hinge on the roller so that the plastic clip is sticking out to the side. Starting at your hairline, roll a 1-inch piece of hair around the roller, all the way to the root. Once you reach the root, close the hinge over the rolled hair, and click it into place.[6]
- Roll 1-inch pieces of hair into curlers all the way to the nape of your neck. This should take 4-8 curlers, depending on the size of the curlers and how much hair you have. At this point, you're curlers should be in a mohawk type shape.
- After you've finished the middle section of your hair, roll the side sections of your hair into curlers, starting at your temple and working your way back. Each section should use 3-8 curlers.
- The bigger the curlers, the fewer you'll need. The smaller the curlers, the more you'll need. If you have thin or short hair, you'll use fewer curlers. If you have long or thick hair, you'll use more curlers.
- Tie a scarf around your head to keep your curlers in place overnight.
-
5Take out your curlers the following morning. To undo your foam curlers, un-snap the hinge of each curler and gently unroll one at a time. Start with the curlers by the nape of your neck and work upwards until all of the curlers are out. Your curls will be bouncy and close to your head.[7]
-
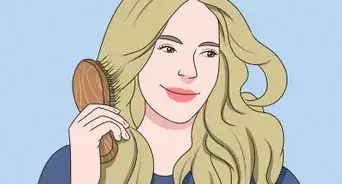
6Style your hair. If you want messy, tight curls, do not brush out your hair. Instead, toss your curls gently with your fingers until you get your desired look. If you want luxurious waves and volume, brush your curls out. They'll look big and bouncy. Finish your hairstyle with hairspray.[8]


Using a Curling Iron
-
1Choose your curling iron. The type of curls you want will determine what size curling iron you should use. Do you want tight bouncy curls, or do you want luxurious waves? Be sure to use the proper curling iron to get the results you want.
- For tight and bouncy curls, use either a 3/8" or 5/8" curling iron. These sized curling irons will give you tight spiral curls that will beautifully mimic the look of a perm.
- For springy, bouncy curls that are larger near your scalp and tighter near the ends, use a curling wand. A curling wand will give your hair a pretty spiral curl.
- For full curls or defined waves, use a 1" curling iron. This size is recommended for shorter hair, and is great for creating beach-inspired hair styles.
- For large, voluminous waves, use either a 1.25" or 1.5" curling iron. This is a must have curling iron for every day, body-filled waves.[9]
-
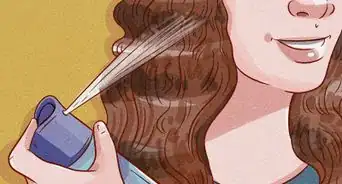
2Prepare your hair. Wash your hair to remove all excess dirt and oil that could potentially weigh your hair down. Use a volumizing shampoo and conditioner to give your hair more body. While your hair is still damp, add a curl enhancing product or a mousse. This will help your hair hold the curls.[10]
- How you dry your hair will depend on how you'd like your curls to look. If you want natural looking curls, let your hair air-dry before curling it. If you want full and voluminous curls, blow-dry your hair before curling it.
-
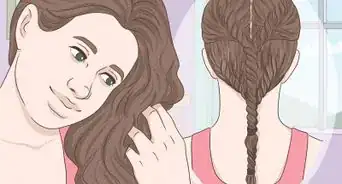
3Divide your hair into sections. Dividing your hair into sections will make curling your hair much easier. Pull the top half of your hair up and secure it with a clip or hair tie so that you're able to curl the bottom half of your hair first.[11]
- Before you divide your hair into sections, plug in your curling iron so that it has time to heat up.
-
4Curl your hair. Once your hair is completely dry, it is time to curl it. Hair Stylist Yan Kandkhorov explains two different ways to curl your hair: "if you want to have more curly, wavy hair [that is] looser on the bottom, [...] start from the middle, curling it and then letting the ends stay [...] out to make it looser. If you want to create stronger curls, you curl from the bottom up." Grab pieces of your hair one small section at a time. Do not curl your hair by clamping it in your curling iron and rolling upward. Instead, hold the curling iron in place and wrap your hair around it. Starting close to your roots, wind your hair around the curling iron away from your face. Hold the bottom 1/4 inch of your hair in place for 10 seconds. Then, let go of your hair and gently pull the iron away from your hair. Do this to each piece of hair until the bottom half of your hair is curled.[12]
- Unclip the top portion of your hair, and grab the first piece you'd like to curl. Curl the top of your hair the same way you curled the bottom. Starting near the roots, wind small pieces around your curling iron. Continue until you have curled all of your hair.
-
5Style your curls. If you want to keep your curls defined, lightly toss your hair with your fingers to give it a more natural look. If you want smooth yet big volume, comb your curls out with a wide-tooth comb.
- Let your hair set until it is cool to the touch before you touch or comb your curls. Touching it too soon after curling can cause the curls to fall out.[13]
- Finish your look by spraying your curls with hairspray.


Scrunching Your Hair
-
1Scrunch your hair. The scrunching method will create curls, bends, and volume in your hair, and doesn't take a lot of technique to master. Scrunching your hair is similar to crumpling up a piece of paper, and is done with damp hair.
- After you wash your hair, scrunch your hair while it is still damp. Squeeze small sections of your hair between your fingers, and crumple the ends up toward your roots. Look here for a more detailed guide about how to Scrunch Your Hair Overnight.[14]
-
2Apply hair product to enhance texture. Hair scrunching relies heavily on products like volumizing mousses, strong hold gels, and curl enhancing creams. Apply these products to your damp hair before scrunching into place to help your hair hold these bends and curls in place.[15]
- To apply these texturizing products, rub a dime sized amount into your palms, and scrunch the product into your hair. You can use a few products as long as you use small amounts of all of them.
-
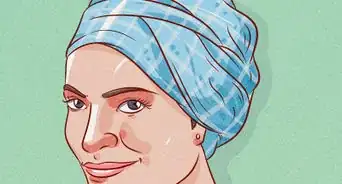
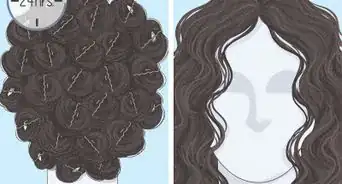
3Put your hair up overnight. This can be done by putting your hair in a scrunched bun (or buns if you have a lot of hair), or by plopping your scrunched hair into a head scarf or tied up t-shirt. Do not leave any pieces of hair out of your bun(s) or plop.[16]
-
4Take your hair down. If you have the time, allow your hair to scrunch overnight. This will allow it to dry in place and hold more shape. If you don't have all night, blow dry your hair while it's being held in place by your buns. Once you take your hair down, it should have a wavy, curly textured look.[17]


Community Q&A
-
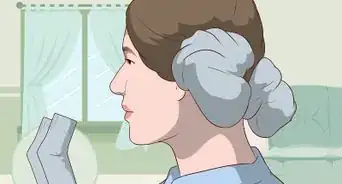
QuestionWhat can I do with permed short hair to achieve smoother curls?
 Community AnswerUse a thick conditioner and apply mousse or gel to your hair before styling it.

-Step-12-Version-4.webp)

References
- ↑ http://www.foodiewithfamily.com/how-to-rag-roll-your-hair-natural-looking-curls-that-dont-damage/
- ↑ http://www.allure.com/beauty-trends/blogs/daily-beauty-reporter/2013/11/five-major-hair-curling-mistakes.html
- ↑ http://justamumnz.com/2014/09/19/rag-curls-hair-tutorial/
- ↑ http://www.refinery29.com/retro-hairstyles
- ↑ http://www.xovain.com/hair/foam-rollers-tutorial
- ↑ http://bygumbygolly.com/2013/08/fast-basic-roller-set-everyday-vintage-hair/
- ↑ http://www.bustle.com/articles/48048-how-to-curl-straight-hair-overnight-without-using-any-damaging-heat-because-yes-you-can-have
- ↑ http://www.xovain.com/hair/foam-rollers-tutorial
- ↑ http://www.buzzfeed.com/alessiasantoro/curling-iron-wizard#.yo1l1ROo2
- ↑ http://www.totalbeauty.com/content/gallery/curling-iron-tips/p69772/page5
- ↑ http://www.totalbeauty.com/content/gallery/curling-iron-tips/p69792/page5
- ↑ http://stylecaster.com/three-types-of-curls/
- ↑ http://www.womenshealthmag.com/beauty/how-to-use-a-curling-iron
- ↑ http://www.hairboutique.com/tips/tip18011.htm
- ↑ http://www.totalbeauty.com/content/gallery/p_best_hair_gel/p17362/page2
- ↑ http://www.beautyzion.com/straight-hair/how-to-scrunch-straight-hair-thick-short-long-straight-hair-with-gel/
- ↑ http://growhairguru.com/how-to-scrunch-hair/
About This Article

There are a few ways you can make your hair curly without the harsh chemicals of a perm. Try making your own rag curlers by taking an old t-shirt and cutting it into strips. Brush your hair and separate it into sections and roll the rag curlers upwards to your scalp, tying a knot at the end to secure it. Foam curlers work the same way and come in different sizes so you can choose the size of your curls. You could also curl your hair with a curling iron. Starting with the bottom portion of your hair, grab pieces of your hair one small section at a time and wrap it around your curling iron for about 10 seconds. Remove your hair and move on to another section until all of your hair is curled. Another simple solution is to scrunch your hair, spray it with hairspray, and put it up overnight to let it curl on its own. For tips about how to style your curls, keep reading!


-Step-12-Version-4.webp)