X
wikiHow is a “wiki,” similar to Wikipedia, which means that many of our articles are co-written by multiple authors. To create this article, 76 people, some anonymous, worked to edit and improve it over time.
This article has been viewed 533,181 times.
Learn more...
The Wii game console from Nintendo can connect to the Internet over a broadband connection for a variety of experiences, including Web browsing, downloads, on-line chat and visiting virtually any on-line site including Flash 7 and 8 sites. The easiest way to connect to the Internet is to use your existing wireless high-speed connection.
Steps
Part 1
Part 1 of 2:
Configuring Your Console
-
1Be sure that your Internet connection is running smoothly and the green lights are all up. If you have a Nintendo Wi-Fi connector, you need to have the software installed and your computer connected to the Internet.
-
2Turn on your Wii.Advertisement
-
3Select Wii Options, which is located on the bottom left of the screen. This is the button with the Wii logo.
-
4Select Wii Settings.
-
5Click forward to the second menu screen using the blue arrow to the right.
-
6Select Internet.
-
7Select Connection Settings.
-
8Choose an open connection, indicated by the word: "none".
-
9Choose a wireless connection.
-
10Determine the best option for you: Manual configuration or Search for an Access Point.
-
11On Search for an Access Point, your Wii will search for a wireless network to connect to and will display a list of available networks. Networks identified with a closed padlock require authentication to join.
-
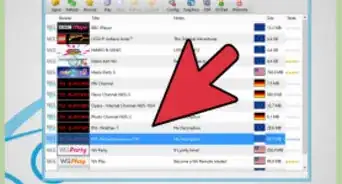
12Select your network.
- If your connection signal appears yellow or red, the stability or strength of the connection is not strong enough for the Wii's Internet needs. If possible, remove any obstacles between the Wii console and the Access Point or change the channel on your router to avoid interference.
- If your wireless access point does not show up when you choose, Search for An Access Point, your router may have Broadcasting set to "No" or "Disable." Some routers also refer to this security as "Stealth" mode. You can either change your broadcast setting to "Yes" or "Enable," or you can manually enter the SSID in the manual setup screen of your Wii console.
-
13Select Save and OK.
-
14Select OK on the next screen and the Wii will perform an automatic connection test.
-
15Wait for the Wii to connect and download any needed updates.


Advertisement
Part 2
Part 2 of 2:
Browsing the Internet


Community Q&A
-
QuestionDo I need to connect anything to the Wii to get internet?
 Abbey M.Community AnswerIf you have a wired connection, you will need a Wii LAN adapter. This works with the Wii and Wii U, and plugs in to the USB port at the back. If you have WiFi, you should be able to connect just using the steps in the article.
 -
QuestionDo you have to have a memory card to browse the internet?
 Community AnswerNo, a memory card is not required to browse the internet. You'll be able to open the Internet channel and visit any website you'd like.
 -
QuestionWhat can I do if my Wii still won't connect to the internet after completing these steps?Community AnswerThat means that either your Wii has a problem or your WiFi isn't working. Repair or replace your Wii and fix check your WiFi connection.
Advertisement
Things You'll Need
- Wi-Fi connection
- Nintendo Wii
- Television
- Internet connection
- Wii Remote
-Connection-Step-12-Version-5.webp)


References
About This Article
Advertisement


-Connection-Step-12-Version-5.webp)