This article was co-authored by Maggie Moran and by wikiHow staff writer, Sophia Latorre. Maggie Moran is a Professional Gardener in Pennsylvania.
There are 9 references cited in this article, which can be found at the bottom of the page.
This article has been viewed 107,450 times.
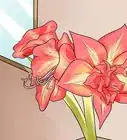
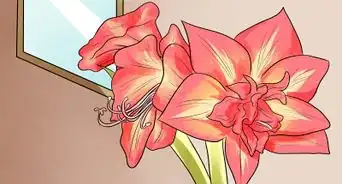
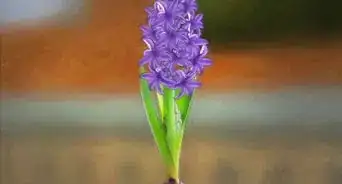
Alstroemeria is a perennial plant also known as Lily of the Incas or Peruvian lily. For best results, plant bulbs rather than seeds. You can plant bulbs in containers or directly in your garden. An alstroemeria plant may grow as tall as 48 inches (120 cm), and its flowers range in color from white, pink, and salmon to bright orange, red, and purple.
Steps
Choosing a Location
-
1Plant when temperatures do not exceed 68° F (20° C) daily. You can plant alstroemeria bulbs in the spring, early summer, or fall, depending on your climate. Alstroemeria grows best when temperatures do not exceed 68° F (20° C) daily and range from 40 and 50° F (4 to 10° C) at night.[1]
- If you plant alstroemeria indoors, you can do so any time of the year as long as you place the plant in a temperate location.
-
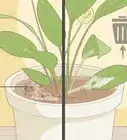
2Choose soil with good drainage. Alstroemeria plants need soil with good drainage so the roots don’t rot. You may want to mix your soil with peat moss, compost, ground bark, or decomposed manure to help it drain.[2] Alternatively, you could use a mix of 1:1 perlite and vermiculite or 1:1 organic and inorganic material if you plan to grow your alstroemeria in a container.[3]Advertisement
-
3


Planting Alstroemeria
-
1Soak your bulbs. Fill a bucket with water, and then place the alstroemeria bulbs into the water overnight. Soaking the bulbs for 24 hours will jump-start their germination process.[6]
-
2Dig holes in your soil or potting medium. Dig 6-8 inch (15-20 cm) holes in the potting medium.[7] If you’re planting outdoors, space the holes 24 inches (60 cm) apart to allow room for spreading. If you’re planting in containers, plant each bulb in a large container (1 gallon or 5 liters) with drainage holes.[8]
-
3Add the bulbs. Place 1 bulb into each hole, with the pointy side facing up. Cover the bulb gently with soil or potting medium. Lightly tamp down the soil or potting medium around the bulb.[9]
-
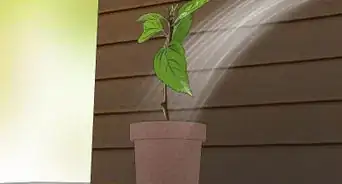
4Water frequently so the soil is consistently moist. Generously water your freshly planted bulbs. Monitor their moisture level daily until the plant pokes through the surface, keeping the soil consistently moist, but not sopping wet.[10]


Caring for Alstroemeria
-
1Water the alstroemeria when dry. Once your alstroemeria is established, it won’t need as much water. Lightly water when the top 1 inch (2.5 cm) of soil is dry. Too much water will lead to root rot, so take care not to overwater your alstroemeria.[11]
-
2Fertilize your alstroemeria when in bloom. You can feed alstroemeria with a high potash fertilizer each week during the growing season when your flowers are blooming. Potash fertilizer contains potassium to help your plants thrive. You should be able to find this type of fertilizer at your local garden shop or hardware store.[12]
-
3Mulch alstroemeria to protect it. Placing protective mulch around your alstroemeria can protect it from extreme temperatures. You can mulch with straw or bracken. Keep the mulch at least 2 inches (5 cm) from the alstroemeria stem to avoid rotting at the base of the plant.[13]
- If you live in an extremely hot climate, you may want to place mulch around your alstroemeria in the summer.
- If you live in a cold climate, you should place mulch around your alstroemeria in the winter.
-
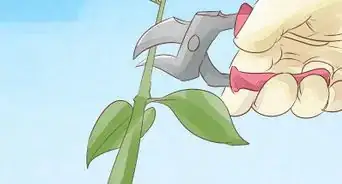
4Pick, rather than cut, the flowers. Whether you want to bring some alstroemerias inside to put in a vase, or you need to remove spent blooms, you’ll need to pick out each stem. Pull one or more entire stalks out of the soil or potting medium. Don’t cut the flowers, as the underground meristems will respond to the damage and die.[14]
- Each flower has its own stalk, so you won’t harm the entire plant by pulling a few stalks.
- In order to encourage growth, regularly deadhead spent blossoms.
-
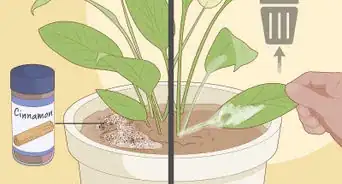
5Monitor for pests and diseases. Look out for aphids, spider mites, and whiteflies on your alstroemerias. If you find these pests, remove them with a strong stream of water then apply an insecticidal soap.[15] To avoid a disease called root rot, be sure to water only until moist, choose a well-draining soil, and leave room between your plants for air to reach your alstroemerias.[16]
-
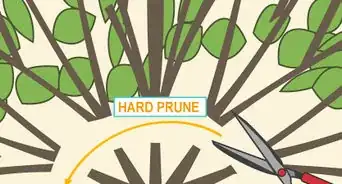
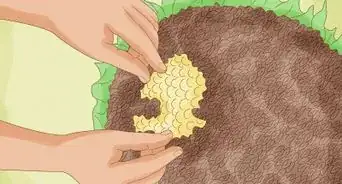
6Divide your alstroemeria by the rhizomes for propagation. If you want to get new plants from the ones you already have, cut the plant so that it’s within 6 inches (15 cm) of the ground.[17] Two weeks later, dig all the way around the plant. Dig up the plant’s rhizomes, or horizontally-running root networks, as well as all of the roots that branch off from them. Divide the rhizomes of the plant with a sharp knife and then replant the rhizomes 6 inches (15 cm) deep and 12 inches (30 cm) apart.
- Expect the newly planted rhizomes to flourish within 10 weeks of planting.
- Thin and transplant the rhizomes every 2-3 years during the spring.


Expert Q&A
Did you know you can get expert answers for this article?
Unlock expert answers by supporting wikiHow
-
QuestionHow long do freshly cut alstroemeria flowers last?
 Maggie MoranMaggie Moran is a Professional Gardener in Pennsylvania.
Home & Garden SpecialistThese are considered a long-lasting flower and can stay fresh for nearly 2 weeks.
Support wikiHow by unlocking this expert answer.
-
QuestionWhen can I split Alstroemeria?Maggie MoranMaggie Moran is a Professional Gardener in Pennsylvania.
Home & Garden SpecialistIt is best to divide the plant in the spring. Plan to split Alstroemeria at this time for best results.Support wikiHow by unlocking this expert answer.
-
QuestionIs Alstroemeria toxic?Maggie MoranMaggie Moran is a Professional Gardener in Pennsylvania.
Home & Garden SpecialistYes, the flower is mildly poisonous. Avoid ingesting any part of this plant.Support wikiHow by unlocking this expert answer.
Warnings
- Although all parts of the plant are poisonous and cause skin irritation, they are often grown for use as a colorful addition to cut flower arrangements. Wear gloves when handling alstroemeria to avoid skin irritation. Do not eat alstroemeria.⧼thumbs_response⧽


References
- ↑ http://www.pacificbulbsociety.org/pbswiki/index.php/Alstroemeria
- ↑ https://www.easytogrowbulbs.com/pages/alstroemeria-planting-guide
- ↑ http://www.pacificbulbsociety.org/pbswiki/index.php/Alstroemeria
- ↑ http://www.livetogarden.com/garden-flowers/alstroemeria.aspx
- ↑ https://www.easytogrowbulbs.com/pages/alstroemeria-planting-guide
- ↑ http://www.pacificbulbsociety.org/pbswiki/index.php/Alstroemeria
- ↑ http://www.thegardenhelper.com/alstroemeria.html
- ↑ https://www.sarahraven.com/articles/growing_alstroemeria.htm
- ↑ https://www.easytogrowbulbs.com/pages/alstroemeria-planting-guide
- ↑ https://www.saga.co.uk/magazine/home-garden/gardening/plants/perennials/how-to-grow-alstroemerias
- ↑ https://www.easytogrowbulbs.com/pages/alstroemeria-planting-guide
- ↑ https://www.saga.co.uk/magazine/home-garden/gardening/plants/perennials/how-to-grow-alstroemerias
- ↑ https://www.saga.co.uk/magazine/home-garden/gardening/plants/perennials/how-to-grow-alstroemerias
- ↑ https://www.saga.co.uk/magazine/home-garden/gardening/plants/perennials/how-to-grow-alstroemerias
- ↑ https://www.maximumyield.com/how-do-i-get-rid-of-white-flies-aphids-and-spider-mites-in-my-garden/7/1817
- ↑ http://www.epicgardening.com/peruvian-lily-alstroemeria/#tab-con-13
- ↑ https://www.epicgardening.com/peruvian-lily-alstroemeria/
About This Article

To grow alstroemeria, start by soaking the bulbs in water for 24 hours to jump-start germination. Next, dig holes that are 6-8 inches deep in well-draining soil and plant the bulbs with the pointy side facing up. Then, make sure the bulbs get partial to full sun every day and water them frequently so the soil stays moist. Finally, fertilize your plants every week during the growing season to encourage lots of colorful blooms! For tips on monitoring for pests, read on!