This article was co-authored by Lauren Kurtz. Lauren Kurtz is a Naturalist and Horticultural Specialist. Lauren has worked for Aurora, Colorado managing the Water-Wise Garden at Aurora Municipal Center for the Water Conservation Department. She earned a BA in Environmental and Sustainability Studies from Western Michigan University in 2014.
This article has been viewed 42,867 times.
Artichokes make an impressive addition to any garden, but you might be surprised that they're actually not that difficult to care for. Our guide has all the tips you need to plant, care for, and harvest your very own artichokes.
Steps
Considering Climate and Season
-
1Identify your growing zone. You’ll want to choose a type of plant and growing methods according to how cold it gets where you live. In short, if you live in a climate that has consistent winter temperatures between 10 °F (−12 °C) and 20 °F (−7 °C), plan to plant artichokes annually. If you live in a relatively warmer climate, you may be able to grow a perennial artichoke variety.[1]
- If you live in the U.S., see the maps provided by the USDA’s Agricultural Research Service to determine what zone you live in. If you live in Zone 8 or higher—which corresponds with the temperatures cited above—go with an annual plant varietal.
- These USDA maps also contain information on the temperatures used to assess an area’s zone, which you can compare to temperatures in your area.
-
2Choose a type of artichoke. There are several artichokes varieties, generally classified as either green or purple. Among the green varietals, go with “Imperial Star” artichokes for an annual plant and “Green Globe” for a high-producing perennial. Among purple artichoke options, “Violetta” may prove especially hardy, and “Opera” will mature especially quickly.[2]Advertisement
-
3Ensure adequate soil. Rich, fertile, moist soil is best for artichoke growth. That said, artichokes are hardy plants capable of growing in most soil as long as they are fed and the soil can drain. Consider building raised beds to assist in drainage if you live in an area with heavy rainfall. Plan to prepare soil with at least 6 inches (15 cm) of compost tilled into the ground before planting.[3]


Starting Your Artichokes
-
1Sow seeds indoors. You can maximize the growing season in your area by getting a head start with your artichokes indoors. Start your seeds in individual 4 in (10 cm) containers and leave them under fluorescent lights or in a heated greenhouse. In normal indoor temperatures, seeds will likely germinate in a week or so. Increase the size of planters as needed.[4]
- To harden off the artichokes, begin exposing seedlings to temporary outdoor sessions 6 weeks before the anticipated last frost date in your area.
-
2Transfer seedlings outdoors. Move seedlings outdoors 3 to 4 weeks before the anticipated final frost. You actually want to expose the plants to a temperature below 45 °F (7 °C) to trigger flowering. They should be about as tall as your hand. Plant the seedlings so that the crown, or top, of the plant is just above the soil line.[5]
- Cull weak seedlings. After 8-10 weeks, healthy artichoke seedlings will have stocky stems and two sets of leaves. Remove any that do not.
-
3Use transplants in especially cold climates. If you live in a place that only has 90-100 days a year without frost, you’ll likely need to start your plants with transplants. Plan to start growing your transplants indoors late in the winter or in early spring. Harvest will occur in late summer or early fall.
- Acquiring rooted shoots from a year-round greenhouse or online plant distributor is a great way to establish transplants quickly.
- If acquiring them yourself, use a serrated knife to begin cutting an offshoot under 10 inches (25 cm) tall that’s growing from the base of the plant. Dig around the offshoot to ensure roots come with the offshoot as you remove it.
-
4Plant artichokes at least 3 feet (0.9 m) apart. If possible, 4 feet (1.2 m)-6 feet (1.8 m) between individual plants is even better. These plants have large, aggressive wingspans and require substantial room to grow. If using raised beds, artichokes don’t necessarily need their own beds, but do need ample space to spread their leaves.


Fertilizing and Watering
-
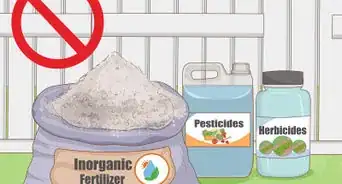
1Fertilize the soil before planting. Condition soil with nutrients your plants can begin eating as soon as they’re in the ground. For each plant, work at least 1 shovel full of compost or aged manure into the soil. Alternatively, you can use 1 cup (240 ml) of high-nitrogen fertilizer. Add these food sources to the soil right before planting.
- Consider adding 1⁄2 cup (120 ml) of feather or blood meal as well as 1⁄2 cup (120 ml) of bone meal to the soil as well, for added nutrients.
-
2Fertilize your plants as they grow. Artichokes depend on a high-nitrogen diet in order to grow to their full potential. Use a water-soluble organic fertilizer, and mix it according to the package instructions. Follow the package instructions on how much to provide.[6]
- Side-dress each plant with 1–2 pounds (0.45–0.91 kg) of aged manure just before you expect them to bud.[7]
-
3Water your artichokes. Your plants require 1 to 1.5 inches (2.5 to 3.8 cm) of water per week. If this amount of water is naturally provided by rain, make sure you’re watering them accordingly. Water extra in the spring and summer to encourage the growth of larger, thicker buds.[8]
- Make sure the soil around your plants is able to drain excess water. If the ground around the plant becomes waterlogged, consider replanting in a raised bed.


Harvesting and Propagating Artichokes
-
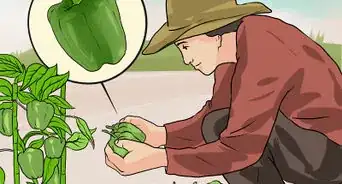
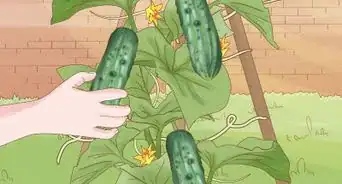
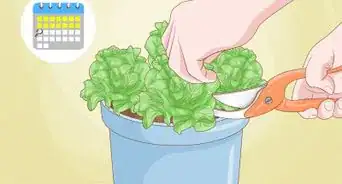
1Harvest the flower buds. Watch out for upright flowering stems that are topped with flower buds. Most stalks will produce 3 to 5 buds. These will arrive in mid-to-late-summer. Remove the buds when the lowest scales (called bracts) on the bud begin to open. The bracts at the top of the bud will still be tight.[9]
- Use a sharp knife to cut off the artichoke, leaving around 3 inches (7.6 cm) of the stem.
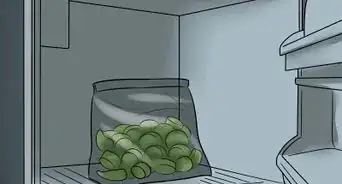
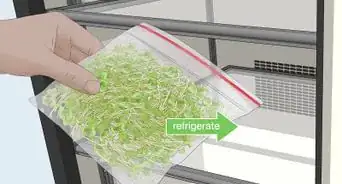
- Wait for more buds. Put freshly cut buds in the fridge until you’re ready to cook them. Plan to harvest another crop of smaller buds if the growing season allows it.
-
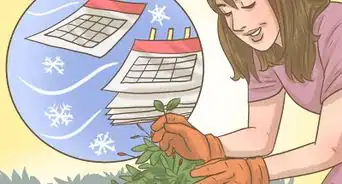
2Prep perennials to survive. If you’re growing a perennial and hoping your plants will survive the winter, take steps to protect them. Cut the plant’s leaves back after it’s flowered and the season has concluded. Mulch heavily around and above the plant to keep the roots alive.[10]
- Make sure the plants are covered by at least 6 inches (15 cm) of mulch. Cover the mulch with 6 inches (15 cm) of straw or leaves for added protection.[11]
- Perennials can usually be expected to stay productive for about 4 years.
-
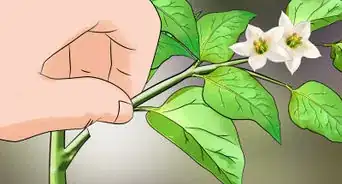
3Cut and share prime specimens. If you have a plant that’s especially hardy and returns year after year with quality buds, consider propagating it. The best way to propagate a perennial is to splice off 1 of the small offshoots as the plant first emerges in the spring. Establish the shoot as its own plant.[12]
-
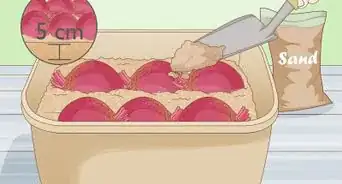
4Save a good plant’s seeds. Another way to propagate a particular plant is to collect its seeds. A long season, however, is necessary to allow seeds to ripen. If you live in a place with long summers, allow a large bud on your favorite plant to bloom, shrivel, and turn brown. Remove this dried flower and place it in a paper bag. Keep the bag indoors for 2 weeks, then shatter it and collect the seeds it disperses.[13]
- Seeds regularly last for as long as 6 years if they’re stored correctly.


Community Q&A
-
QuestionHow do I get a big artichoke?
 NinoxTop AnswererPlants produce always smaller artichokes the first year. If you wait two or more years, the artichokes will be bigger.
 -
QuestionI've been given the roots. There are a lot of tubers growing off one. Do I break these up to smaller pieces, or plant as one? When would l start them off? I do have a greenhouse.NinoxTop AnswererYou need to break up the tubers and replant them 1 m (40") apart. If you don't do this, it won't produce many artichokes.


References
- ↑ http://planthardiness.ars.usda.gov/PHZMWeb/Default.aspx
- ↑ http://www.motherearthnews.com/organic-gardening/vegetables/growing-artichokes-zw0z1312zsto.aspx
- ↑ http://extension.usu.edu/files/publications/factsheet/HG-2003-03.pdf
- ↑ http://www.motherearthnews.com/organic-gardening/vegetables/growing-artichokes-zw0z1312zsto.aspx
- ↑ http://www.motherearthnews.com/organic-gardening/vegetables/growing-artichokes-zw0z1312zsto.aspx
- ↑ http://extension.usu.edu/files/publications/factsheet/HG-2003-03.pdf
- ↑ http://www.grow-it-organically.com/growing-artichokes.html
- ↑ http://www.grow-it-organically.com/growing-artichokes.html
- ↑ http://www.motherearthnews.com/organic-gardening/vegetables/growing-artichokes-zw0z1312zsto.aspx
- ↑ http://www.grow-it-organically.com/growing-artichokes.html
- ↑ http://extension.usu.edu/files/publications/factsheet/HG-2003-03.pdf
- ↑ http://www.motherearthnews.com/organic-gardening/vegetables/growing-artichokes-zw0z1312zsto.aspx?PageId=2#ArticleContent
- ↑ http://www.motherearthnews.com/organic-gardening/vegetables/growing-artichokes-zw0z1312zsto.aspx?PageId=2#ArticleContent
About This Article

To plant artichokes, till the soil 6 inches deep with compost and fertilizer, and sow the seeds indoors to germinate before planting outside. About 3-4 weeks before the last anticipated frost, move the plants outside and plant them so that the crown or top is just above the soil line. Be sure to leave at least 3 feet in between plants, and feed them regularly with high-nitrogen fertilizer. Water the plants with 1 to 1.25 of water each week, and harvest the buds in mid-summer. For more tips from our Horticulturist reviewer, including how to harvest your artichokes when they're ready, read on!