This article was co-authored by wikiHow staff writer, Hunter Rising. Hunter Rising is a wikiHow Staff Writer based in Los Angeles. He has more than three years of experience writing for and working with wikiHow. Hunter holds a BFA in Entertainment Design from the University of Wisconsin - Stout and a Minor in English Writing.
There are 19 references cited in this article, which can be found at the bottom of the page.
This article has been viewed 7,796 times.
Learn more...
Bottle gourds, also known as calabash or birdhouse gourds, are an easy annual plant to keep in your garden. While you eat or decorate with other gourds, these plants are unique since you can dry them out and turn them into hard containers. If you want to try your hand at growing these gourds, we’ve got you covered! Keep reading for a full breakdown of taking care of bottle gourds right up until they’re ready to harvest.
Steps
Prepping Your Planting Area
-
1Choose a planting area that gets 6 hours of sun each day. Bottle gourds thrive in warm and bright spots since it helps them develop large leaves and vines. Find a place in your yard that gets sunlight for most of the day to keep your gourds healthy.[1]
- Shady areas prevent water from evaporating, which could cool down the soil or cause your gourds to rot.
-
2Check the spot for well-draining soil. Since gourds can easily get waterlogged in dense soil, check if it drains well too. Dig a hole that’s 1 ft (30 cm) deep and 1 ft (30 cm) wide and fill it with water. After it drains, fill it again and wait 1 hour. If the level goes down between 1–6 inches (2.5–15.2 cm), then the soil is perfect for gourds.[2]
- Adding compost helps improve drainage on clayey or dense soils.[3]
Advertisement -
3Test the soil for a pH between 6.5–7.5. Bottle gourds prefer a relatively neutral soil, so run a soil test to see if it’s within a good range.[4] If the pH is too high, add peat moss or aluminum sulfate. To raise the pH, add some limestone into the soil.[5]
-
4Turn compost or manure into the soil to depth of 12 in (30 cm). You can buy compost or manure from your local garden center. Spread a 2 in (5.1 cm) layer of the compost over your soil and use a rake or hoe to mix it in.[6] [7]
- This helps add nutrients to the soil as well as prevents weeds and insects from getting to your plants as easily.
-
5Form mounds of soil that are 6 in (15 cm) tall. Use your hoe to build up the soil in your planting area. Make sure the mound is at least 6 inches (15 cm) above the rest of the soil and about 12 inches (30 cm) wide to help the roots establish better.[8]
- If you’re planting multiple gourds, space your mounds about 9 feet (2.7 m) apart so the vines have room to spread out.[9]
-
6Install a trellis near the mounds if you want to train the vines to climb. Trellises help keep your vines under control and they help your bottle gourd dry out at the end of the growing season. Use a wooden or PVC trellis with your bottle gourds since it needs to support the weight of the fruits when they reach full size. Make sure one of the posts is next to the mound so you can easily tie the vines to it.[10]
- You don’t need to use a trellis if you don’t want to. Just spread a 2–3 in (5.1–7.6 cm) layer of mulch around the base of the mound to protect the gourds since they’ll be on the ground.[11]
- Trellises also free up some space around your gourds since the ground isn’t covered with the vines.


Germinating Bottle Gourd Seeds
-
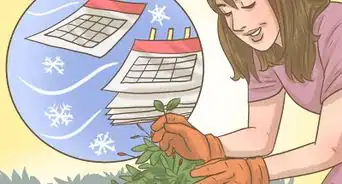
1Plant bottle gourd seeds in the spring after the last frost. Since the seedlings are sensitive to freezing temperatures, late spring is the best for your bottle gourds. Check the last expected frost date in your area so you can get an estimate of how long you need to wait.[12]
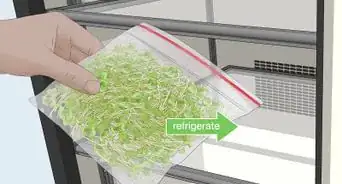
- You can always start your gourd seeds in peat pots or seed trays up to 4 weeks before the last frost in spring. Just be sure to keep them in an area that’s at least 60 °F (16 °C) and has consistent sunlight throughout the day.[13]
-
2Snip the tip of the seed’s shell with nail clippers. Since gourd seeds have a tough outer shell, they’re more likely to germinate if you expose their insides. Use your clippers to cut off the pointed tip of each shell so it exposes the seed inside.[14]
-
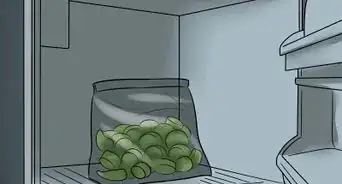
3Soak the seeds for 1 day. Fill a small bowl with cold water and drop your seeds in. After a day, take them out and plant them immediately. This helps soften the seed’s outer shell so it’s more likely to sprout.[15]
- Leaving seeds in water for more than 24 hours can cause them to rot.
-
4Push seeds 1⁄2–1 in (1.3–2.5 cm) into the top of each mound. Plant 4 seeds per mound with about 3 inches (7.6 cm) between them so you’re more likely to have a healthy plant come in. Use your finger to push the pointed ends of each seed down into the soil. Cover the top of the seed with soil and pat it down firmly.[16]
- Avoid laying the seed flat on its side since it’s more likely to rot before it germinates.
-
5Water the soil immediately after planting and once a week. Use a watering can and cool water to lightly moisten the soil. Stick your finger into the soil and see if it feels wet about 1 inch (2.5 cm) down. If it’s still dry, add a little bit more water before checking again. Be sure to water your seeds again with 1 inch (2.5 cm) of water each week.[17]
- Set up a rain meter by your gourds so you can easily see how much water they’ve gotten.
- Install a drip irrigation system if you don’t want to worry about watering since it will keep the soil moist without using too much water.
-
6Thin down to 2 seedlings per mound after 2 sets of leaves form. Bottle gourds usually start germinating and forming leaves within 1–2 weeks after planting them. As soon as you see 2 sets of large leaves growing on 2 of the stems, cut back the weaker growths so your plants get enough water and nutrients from the soil.[18]
- If one of your gourd vines is overtaking all the others, remove the other 3 completely.


Caring for Your Bottle Gourds
-
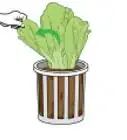
1Pick weeds whenever you see them. Weeds compete with your gourds for water and resources, so they could prevent the vines from growing. Check your garden at least once a week to see if any new weeds have come in. Put on a pair of gardening gloves and pull the weeds and roots out from the soil.[19]
- Try to catch weeds when they’re small since they’re easier to remove and won’t disturb your gourd’s roots.
-
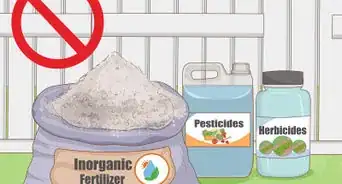
2Spread 10-10-10 fertilizer after 6–8 weeks of growing. A 10-10-10 fertilizer adds equal amounts of nitrogen, phosphorus, and potassium to your soil to help plants grow. You can either use a liquid or granular fertilizer for your gourds. Follow the directions on the packaging and dress the sides of the mounds with the fertilizer. Immediately water the soil so the fertilizer soaks in and gets absorbed by the roots.[20]
- Too much nitrogen in the soil could cause leafy growth on your vines, but prevent fruit from coming in.
-
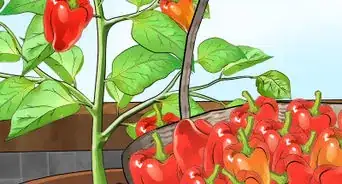
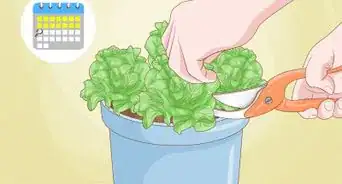
3Prune vines when they’re 8 feet (2.4 m) long to encourage fruiting. Measure the length of the vines throughout the growing season to see if they’re to size. Use a pair of pruning shears to take 2–3 inches (5.1–7.6 cm) off of the end of the vine to keep it from growing further. This helps the vines lower on the stem grow and form flowers.[21]
- You should also trim off any vines that look broken or damaged.
-
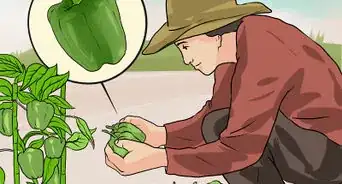
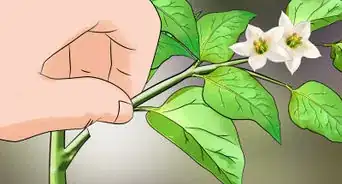
4Pollinate the flowers by hand to help ensure fruiting. While bees and moths will naturally pollinate your plants, they may not do the best job with bottle gourds. Wait until the early evening when the flowers open. Look for the white male flowers on long stalks and pluck one or two off the vine. Turn the flower inside-out to expose the pollen and use a small paintbrush to transfer the pollen inside the female flowers on the shorter vines.[22]
- If bottle gourds aren’t pollinated, they won’t form any fruits.
- The female and male flowers look similar, but the female flowers have a small fruit at the base of the petals.[23]
-
5Apply insecticides if you notice cucumber beetles or aphids. Both of these pests attack the vines and roots of your gourds, which could kill the entire plant. Thoroughly cover the leaves of your gourd with an insecticidal spray so the pests die out and stay away from your plants.[24]
- Common signs of pests include holes and spots on leaves as well as yellow stems.
- Insecticides can kill beneficial insects like bees, so wait until the late afternoon or evening when they’re dormant to apply them.
-
6Spray fungicides if you see powdery mildew on the leaves. If you notice blotchy spots or a powdery substance on the leaves, you may be dealing with a fungus. Use your pruning shears to cut off any damaged or infected parts of the plant first. Then, apply a liquid fungicide onto all of the leaves to prevent it from spreading to the rest of your plant.[25]


Harvesting Your Bottle Gourds
-
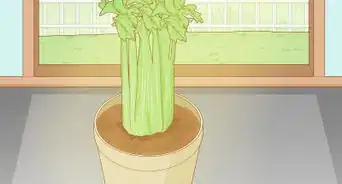
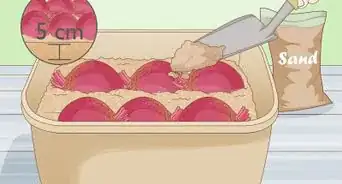
1Harvest your gourds after their stems turn brown and vines wither. It usually takes around 90–120 days for bottle gourds to reach their full size. Even when the vine starts to wither and die off, leave the gourd attached. When your gourd has a light tan or white color, then it’s ready to pick.[26]
- Bottle gourds can survive a few light frosts, but pick them before a hard freeze.
- You can harvest bottle gourds when they still have tender green skin if you want to boil and eat them.
-
2Cut the gourd and 6 in (15 cm) of vine off the plant. Find a spot on the vine 6 inches (15 cm) up from the stem of the gourd. If the gourd is hanging from a trellis, support the gourd’s weight before cutting the vine. Otherwise, just snip the vine and collect the fruits.[27]
- Hold onto the base of the gourd instead of the stem to keep it from breaking off.
-
3Wash the gourd with vinegar to clean it. Wet a cloth with some white distilled vinegar and wipe the outside of the gourd. This helps kill any mold or bacteria that are still on the surface and gets rid of any dirt. Use a separate soft cloth to dry the gourd off when you’re finished.[28]
- If you can’t get all of the dirt off, scrub the gourd with warm soapy water before drying it off.
-
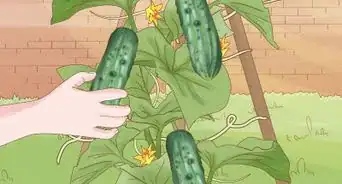
4Hang the gourd in a well-ventilated area for 4–6 months to dry out. Find a spot that’s outside or away from people just in case the gourd forms mold. Tie the gourd onto a support and let it hang up to dry. After a few months, check the gourd to see if it feels lightweight and if the seeds rattle around inside to know if it’s ready.[29]
- If your gourd forms mold on the surface, just wash it off with vinegar or soapy water again.
- You can use dried gourds as birdhouses, bowls, or bottles.


Warnings
- If you have any diseased gourd vines in your garden, remove them immediately to prevent bacteria from spreading to other plants.[32]⧼thumbs_response⧽
Things You’ll Need
Prepping Your Planting Area
- Shovel or hoe
- Soil test kit
- Compost or manure
Germinating Bottle Gourd Seeds
- Nail clippers
- Watering can
- Pruning shears
Caring for Your Bottle Gourds
- Watering can or drip irrigation
- Gardening gloves
- 10-10-10 fertilizer
- Pruning shears
- Paintbrush
- Insecticidal spray
- Fungicidal spray
Harvesting Your Bottle Gourds
- Pruning shears


References
- ↑ https://extension.unh.edu/resource/how-grow-birdhouse-gourds-lagenaria-siceraria
- ↑ https://marinmg.ucanr.edu/BASICS/SOIL_813/evaluate/
- ↑ https://extension.umd.edu/resource/soil-health-drainage-and-improving-soil
- ↑ https://plantvillage.psu.edu/topics/gourd/infos
- ↑ https://hortnews.extension.iastate.edu/1994/4-6-1994/ph.html
- ↑ https://ag.purdue.edu/hla/pubs/HO/HO-8.pdf
- ↑ https://ucanr.edu/sites/uc_master_gardeners/files/139130.pdf
- ↑ https://gardenerspath.com/plants/annuals/grow-birdhouse-gourds/
- ↑ https://edis.ifas.ufl.edu/publication/MV069
- ↑ https://extension.uga.edu/publications/detail.html?number=B1180&title=Commercial%20Production%20and%20Management%20of%20Pumpkins%20and%20Gourds
- ↑ https://edis.ifas.ufl.edu/publication/MV069
- ↑ https://ag.purdue.edu/hla/pubs/HO/HO-8.pdf
- ↑ https://plantvillage.psu.edu/topics/gourd/infos
- ↑ https://ucanr.edu/sites/uc_master_gardeners/files/139130.pdf
- ↑ https://ucanr.edu/sites/uc_master_gardeners/files/139130.pdf
- ↑ https://gardeningsolutions.ifas.ufl.edu/plants/ornamentals/bottle-gourds.html
- ↑ https://plantvillage.psu.edu/topics/gourd/infos
- ↑ https://gardenerspath.com/plants/annuals/grow-birdhouse-gourds/
- ↑ https://extension.uga.edu/publications/detail.html?number=B1180&title=Commercial%20Production%20and%20Management%20of%20Pumpkins%20and%20Gourds
- ↑ https://ucanr.edu/sites/uc_master_gardeners/files/139130.pdf
- ↑ https://gardeningsolutions.ifas.ufl.edu/plants/ornamentals/bottle-gourds.html
- ↑ https://ucanr.edu/sites/uc_master_gardeners/files/139130.pdf
- ↑ https://edis.ifas.ufl.edu/publication/MV069
- ↑ https://extension.uga.edu/publications/detail.html?number=B1180&title=Commercial%20Production%20and%20Management%20of%20Pumpkins%20and%20Gourds
- ↑ https://extension.uga.edu/publications/detail.html?number=B1180&title=Commercial%20Production%20and%20Management%20of%20Pumpkins%20and%20Gourds
- ↑ https://gardeningsolutions.ifas.ufl.edu/plants/ornamentals/bottle-gourds.html
- ↑ https://ucanr.edu/sites/uc_master_gardeners/files/139130.pdf
- ↑ https://extension.uga.edu/publications/detail.html?number=B1180&title=Commercial%20Production%20and%20Management%20of%20Pumpkins%20and%20Gourds
- ↑ https://gardeningsolutions.ifas.ufl.edu/plants/ornamentals/bottle-gourds.html
- ↑ https://plantvillage.psu.edu/topics/gourd/infos
- ↑ https://edis.ifas.ufl.edu/publication/MV069
- ↑ https://extension.umn.edu/diseases/downy-mildew-cucurbits
About This Article