This article was co-authored by wikiHow Staff. Our trained team of editors and researchers validate articles for accuracy and comprehensiveness. wikiHow's Content Management Team carefully monitors the work from our editorial staff to ensure that each article is backed by trusted research and meets our high quality standards.
This article has been viewed 49,416 times.
Learn more...
Conker trees, or horse chestnut trees, are ornamental trees that commonly grow in the UK, Ireland, Canada, and Norway. "Conkers" are the brown chestnut-like nuts that grow on these trees inside of spiky husks. You can collect fallen conkers and plant the nuts to grow horse chestnut trees of your very own! Conker trees can be a wonderful addition to a home garden because they provide dappled shade and produce nectar and pollen for bees and other insects.
Steps
Collecting Conkers
-
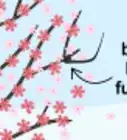
1Pick up fallen conkers during autumn. Search your local parks, gardens, streets, and green areas for horse chestnut trees. Inspect the ground around the trees during autumn for the green spiky husks that contain the brown conker nuts and collect some.[1]
- Horse chestnut trees are native to the Balkans, but were introduced to the UK in the 16th century. Due to widespread planting as an ornamental tree, horse chestnut trees can now be found commonly throughout the UK and North America.
Tip: If you find a horse chestnut tree on private property, make sure to ask the property owner for permission to collect some conkers.
-
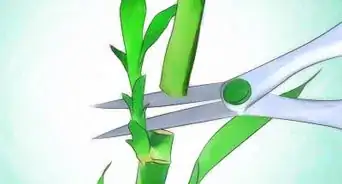
2Pry the spiky husks open and remove the small brown nuts inside. Conker nuts grow inside a spiky green outer husk that holds several of them inside. Use your fingers to pry open the husk if it is still closed and pull out the brown, hard nuts from inside the outer husks.[2]
- If the conkers have been on the ground for a while, they might already be separated from the husks. Either way, what you need to plant and grow are just the brown nuts. You can discard any husks back onto the ground or into a compost pile.
Advertisement -
3Fill a bucket with water and drop your conkers into the water. Fill up a bucket or other container with enough water to submerge your conkers. Put all the brown conker nuts you collected into the container of water.[3]
-
4Discard any conkers that float to the top of the water. Conkers that float are dried out and dead, so they won’t grow. You can throw these conkers outside for animals to eat or use them in your compost pile. Take out the conkers resting at the bottom of the bucket and put them aside to plant.[4]


Germinating the Seeds
-
1Plant your seeds in late autumn before the first frost. Conkers will only germinate after they pass through several cold periods. Plant them between the end of October and the beginning of December to get them started before the frosty winter weather arrives.[5]
- The conker nuts will germinate and grow the next spring after you plant them.
-
2Fill a small pot with a mixture of soil and compost. Choose a small pot that is about 0.5 gallons (1.9 L) (1.89 L) or so. Fill it to just below the rim with a mixture of about 50-70% rich potting soil and 30-50% compost. Level out and pack down the top of the soil using your hands.[6]
- A good rich potting soil for conkers is a loamy soil, which is composed mainly of sand, silt, and clay.
-
3Make a 2 cm (0.79 in) deep hole for each conker. Scoop out a small hole in the middle of the pot with your fingertips. Press the conker down into the hole until it is about 2 cm (0.79 in) below the surface of the soil, then cover it up with soil.[7]
- It’s possible to start growing multiple conkers in 1 pot, but you’ll just have to transplant them sooner. Plant conkers individually to save yourself the trouble.
-
4Place the pot outside where it will get at least 4 hours of sunlight a day. Pick a sheltered, partially-shaded spot in your yard or garden, or on a patio or balcony. Try to choose an area that doesn’t get too frosty during the cold winter months.[8]
- If you live somewhere that gets a lot of hard frosts during the winter, you can put potted conkers inside a cold frame to protect them.
-
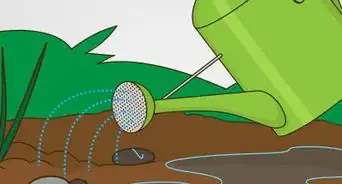
5Water the soil regularly to keep it consistently moist. Check on the soil frequently and water it whenever it starts to dry out. Don’t ever allow the soil to dry out completely.[9]
- If you ever check on the soil and it doesn’t feel any drier than the last time you checked it, don’t water it right now to avoid overwatering.


Tending to the Seedlings
-
1Wait for the seeds to sprout in the spring after you plant them. The conker seeds take about 2-3 months of cold weather to germinate. After that they will begin to sprout.[10]
- Don’t change anything about the water or light conditions while you wait for the seeds to sprout.
-
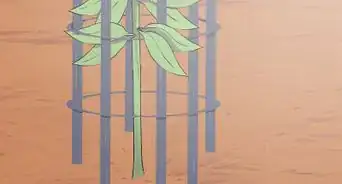
2Move the seedlings to a safe place to protect them from deer, if needed. Keep the seedlings in an enclosed area if deer come onto your property to forage. Deer love conkers and can demolish a crop of seedlings before they have a chance to mature.[11]
- For example, surround individual seedlings with wire fencing if your property is open, or keep them in a fenced area such as a backyard.
-
3Transplant the seedling when it grows to at least 0.3 m (0.98 ft) tall. Keep watering and watching your potted conker the following spring, summer, and fall after you plant it until it gets to be at least 0.3 m (0.98 ft) tall. This usually takes about a year from when you planted it.[12]
- If you want to keep growing the conker in a pot for longer before you plant it in a permanent location, you can just transplant it to a larger pot.
-
4Dig a hole and replant the tree in a wide open spot. Pick a large, sunny spot in your backyard, garden, or a field to permanently plant your conker tree. Dig a hole about as deep as the pot it is currently in and 2-3 times wider. Remove the tree and its root ball from the pot, stick it upright in the hole, and pack dirt in around it.[13]
- Once the tree is planted out in the open, your job is done. Nature will take care of the rest!
Tip: Keep in mind that conkers have a large spread of about 25 m (82 ft) when they are fully grown. If you don’t have room on your property for a conker tree, you can ask landowners with more space if it’s OK to plant the conker on their property.


Warnings
- Conkers are toxic and should never be consumed.⧼thumbs_response⧽
Things You’ll Need
- Conkers
- Container
- Pots
- Potting soil
- Compost
- Water
- Cold frame (optional)
- Shovel


References
- ↑ https://www.woodlandtrust.org.uk/trees-woods-and-wildlife/british-trees/a-z-of-british-trees/horse-chestnut/
- ↑ https://www.youtube.com/watch?v=CQFBSe5klgU&feature=youtu.be&t=38
- ↑ https://gardeningwithchildrenblog.co.uk/2013/11/15/plant-a-conker-and-grow-a-horse-chestnut-tree-for-the-future/
- ↑ https://gardeningwithchildrenblog.co.uk/2013/11/15/plant-a-conker-and-grow-a-horse-chestnut-tree-for-the-future/
- ↑ https://gardeningwithchildrenblog.co.uk/2013/11/15/plant-a-conker-and-grow-a-horse-chestnut-tree-for-the-future/
- ↑ https://www.youtube.com/watch?v=CQFBSe5klgU&feature=youtu.be&t=45
- ↑ https://gardeningwithchildrenblog.co.uk/2013/11/15/plant-a-conker-and-grow-a-horse-chestnut-tree-for-the-future/
- ↑ https://gardeningwithchildrenblog.co.uk/2013/11/15/plant-a-conker-and-grow-a-horse-chestnut-tree-for-the-future/
- ↑ https://gardeningwithchildrenblog.co.uk/2013/11/15/plant-a-conker-and-grow-a-horse-chestnut-tree-for-the-future/
- ↑ https://www.garden-network.co.uk/listing/horse-chestnut
- ↑ https://gardeningwithchildrenblog.co.uk/2013/11/15/plant-a-conker-and-grow-a-horse-chestnut-tree-for-the-future/
- ↑ https://www.bbc.co.uk/blogs/gardening/2010/11/a-load-of-old-chestnuts.shtml
- ↑ https://www.garden-network.co.uk/listing/horse-chestnut
About This Article