X
This article was co-authored by Maggie Moran and by wikiHow staff writer, Hunter Rising. Maggie Moran is a Professional Gardener in Pennsylvania.
There are 14 references cited in this article, which can be found at the bottom of the page.
This article has been viewed 33,564 times.
So you love the flavor of fresh dill and want to keep a plant of your own, but is it possible to grow dill inside? Even if you don't have a garden, dill can thrive indoors as long as you provide the right growing conditions. In this article, we'll walk you through everything you need to know about growing dill indoors, from planting seeds to harvesting leaves. Read on for our complete guide!
Steps
Part 1
Part 1 of 3:
Planting Dill Seeds
-
1Choose a pot that’s 12 in (30 cm) deep with drainage holes. Dill grows a long taproot to absorb the water in the soil, so a deep pot works best. Make sure you buy a pot with drainage holes so the soil doesn’t get waterlogged and cause your herbs to rot.[1]
- Transplanting dill can stress it out, so choose pots that you can keep your dill in throughout the entire season.
-
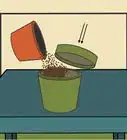
2Fill your pot with a well-draining potting mix containing compost. You can use any potting mix that has compost premixed in so your dill weed gets the nutrients it needs. Fill your pot up so there’s 1–2 in (2.5–5.1 cm) of space between the topsoil and rim.[2]
- Look for a potting mix that has a slightly acidic pH between 5.8 and 6.5 to help your dill thrive even more.
- Avoid using soil from your garden when you grow dill in pots since it won’t have proper drainage or aeration.[3]
Advertisement -
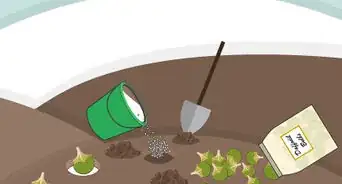
3Plant your dill seeds 1⁄4 in (0.64 cm) deep in the soil. Sprinkle a few of dill seeds on the top soil and push them into the soil with your fingers. Lightly cover the seeds with a layer of soil so they’re just below the surface.[4]
- Fernleaf and Compatto are compact varieties of dill that works best for planting in pots.
-
4Keep the soil warm and moist until seedlings germinate in 1–3 weeks. Dill seeds germinate best if the soil stays between 60–70 °F (16–21 °C), so maintain that temp inside your home. Use a watering can to wet the soil until it feels damp to the touch without forming puddles. When the soil feels dry 1 inch (2.5 cm) below the surface, water your seeds again.[5]
- Put a humidity dome on top of your pot to help keep the soil warm and moist while the seeds germinate.
- Dill seeds don’t need bright light to germinate as long as the soil stays warm.
-
5Thin out the seedlings when they’re 2–4 in (5.1–10.2 cm) tall. Look for the dill that’s growing the tallest and has full growth to keep in your pot. Use a pair of pruning scissors to cut the stems of smaller, weaker seedlings just above the soil. Leave around 10–12 inches (25–30 cm) between seedlings so they can grow in fully.[6]
- Leaving all of your seedlings in the pot could overcrowd the roots and prevent the dill from growing in.
- Keep multiple pots or use a long planter container if you want to grow more than 1 or 2 dill plants.


Advertisement
Part 2
Part 2 of 3:
Caring for Dill in Pots
-
1Set the pot where it gets 5–6 hours of sunlight per day. Keep the pot near a south- or west-facing window so your dill gets enough light throughout the day. You can even move the pot outside onto a porch or patio during the day so it’s in direct sunlight.[7]
- If you can’t find a spot inside that gets enough light, put your dill under grow lights for 12 hours during the day.
-
2Maintain a soil temperature around 70 °F (21 °C). While dill weed can tolerate temperatures as cold as 25 °F (−4 °C), it grows best in slightly warmer temperatures. Adjust your thermostat closer to 70 °F (21 °C) so your dill thrives in the pot.[8]
- Dill left in high temperatures could bolt early, meaning they stop growing leaves and start producing flowers.[9]
-
3Water the soil when it feels dry to the touch. Check the top of the soil with your finger to see if it’s dry. If you don’t feel any moisture, pour water into the soil until it drains out the holes in the bottom of the pot.[10]
- If you overwater your dill weed, the roots could start to rot.
-
4Stake dill when it’s 1 ft (30 cm) to help it grow straight. Dill grown indoors doesn’t get as much light, so it may grow so tall and spindly that it can’t support its own weight. Stick a planting stake into the soil next to the main stem. The dill starts to wrap around the stake as it keeps growing.[11]
-
5Apply liquid 5-10-5 fertilizer to the soil every 4–6 weeks. A little fertilizer will give your dill more nutrients in the middle of the growing season. Get a 5-10-5 liquid fertilizer and use half the strength recommended on the label. Spread the fertilizer over the soil in the pot and let it soak in.[12]
- Avoid applying fertilizer right away when you’re seeding your dill since it won’t grow properly.[13]


Advertisement
Part 3
Part 3 of 3:
Harvesting and Storing Dill
-
1Harvest dill 90 days after planting when there are at least 4–5 leaves. Dill is mature once it has 4–5 leaves, so you can start harvesting it at any time afterward. However, dill tastes more flavorful right before it produces flowers, which is after about 90 days.[14]
- You can cut flowers off of dill grown in pots to encourage it to produce more leaves.[15]
-
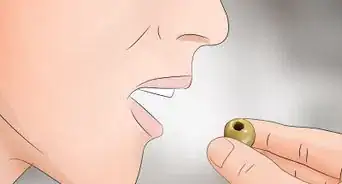
2Cut fresh dill leaves off of the stem as you need them for cooking. When a recipe calls for fresh dill, harvest the leaves with a pair of pruning scissors. Cut the leaves right next to the stem to remove them individually, or cut the entire stem 1–2 inches (2.5–5.1 cm) from the soil. Just get rid of the tough, thick stems since they’re not edible.[16]
- Use the dill leaves to add flavor to your dish.
- Only harvest as much dill as you need since it won’t regrow after you cut it.
- Rinse dill leaves off in cool water before you use them to ensure they’re clean.[17]
-
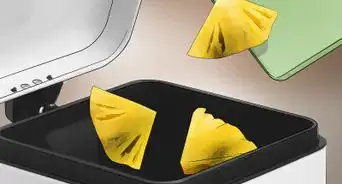
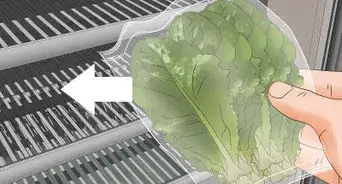
3Keep fresh dill refrigerated in a plastic bag for up to 2 days. If you want to keep your dill fresh, wrap the leftover leaves in a damp paper towel and put them into a resealable plastic bag. Use the dill within 2 days for the strongest flavors.[18]
- Toss your dill out if it’s wilted or has a bad odor.
-
4Freeze fresh dill to preserve its flavor for 4–6 months. Take the fresh sprigs of dill and put them in a resealable plastic bag. Label the bag with the date and set it in your freezer.[19] Use your dill within 4–6 months so it still has a strong flavor.[20]
- Whenever you need to add the dill to a recipe, just take it out of the freezer and add it directly to the pan.
-
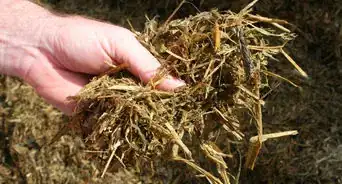
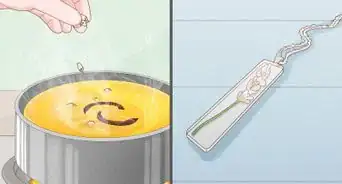
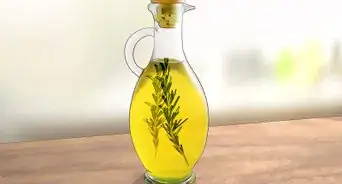
5Dry the dill leaves for long-term storage. Put the stems in water for 2 hours right after you cut them off the plant. Then, tie the stems together with a string and hand the dill upside down in a dark, warm room with good air circulation. Dry the dill for 1–2 weeks, or until you can easily crumble the leaves between your fingers.[21]
- You could instead dry the dill in the oven by setting it to the lowest temperature and cooking the leaves on a baking sheet until the leaves are crispy.
-
6Collect dill seeds 2–3 weeks after the flowers blossom. If you leave the flowers on your dill, they’ll dry out and drop seeds you can replant. Cut the flower stalks with pruning scissors right as the flower pods turn tan. Hang the stalks upside down out of the sun to dry out for a few weeks. Put a paper bag with a few holes poked into the sides over the flowers so the seeds drop and collect inside.[22]
- You may not get as many seeds from dill grown indoors as you would from dill grown outside.
- Keep dried dill seeds sealed in an airtight container. Plant them within 1 year to grow new plants.


Advertisement
Expert Q&A
-
QuestionIs it easy to grow dill?
 Maggie MoranMaggie Moran is a Professional Gardener in Pennsylvania.
Home & Garden SpecialistYes, it is a very easy plant to reseed itself. It can be started indoors and easily moved outside in about 4-6 weeks, but it is best grown in one place. -
QuestionHow do you cut fresh dill from the plant?Maggie MoranMaggie Moran is a Professional Gardener in Pennsylvania.
Home & Garden SpecialistIt is best to use kitchen shears to cut off the leaves of the plant. After seeding, it is suggested to give it a few weeks to stabilize and grow. -
QuestionIs dill an annual or a perennial?Maggie MoranMaggie Moran is a Professional Gardener in Pennsylvania.
Home & Garden SpecialistIt is a warm season herb, and is a biennial, as a single plant only lives 2 years.
Advertisement
Things You’ll Need


References
- ↑ https://sonomamg.ucanr.edu/Food_Gardening/Feature_Vegetables/Growing_Dill/
- ↑ https://agrilifeextension.tamu.edu/library/gardening/dill/
- ↑ https://extension.umn.edu/vegetables/growing-dill-home-gardens#soil-testing-and-fertilizer-935510
- ↑ https://www.rhs.org.uk/herbs/dill/grow-your-own
- ↑ https://gardenculturemagazine.com/dill-how-to-grow-this-powerful-herb/
- ↑ https://sonomamg.ucanr.edu/Food_Gardening/Feature_Vegetables/Growing_Dill/
- ↑ https://extension.umn.edu/vegetables/growing-dill-home-gardens#growing-indoors-935761
- ↑ https://agrilifeextension.tamu.edu/library/gardening/dill/
- ↑ https://sonomamg.ucanr.edu/Food_Gardening/Feature_Vegetables/Growing_Dill/
- ↑ https://sonomamg.ucanr.edu/Food_Gardening/Feature_Vegetables/Growing_Dill/
- ↑ https://extension.umn.edu/vegetables/growing-dill-home-gardens#growing-indoors-935761
- ↑ https://extension.umn.edu/vegetables/growing-dill-home-gardens#soil-testing-and-fertilizer-935510
- ↑ https://agrilifeextension.tamu.edu/library/gardening/dill/
- ↑ https://plantvillage.psu.edu/topics/dill/infos
- ↑ https://sonomamg.ucanr.edu/Food_Gardening/Feature_Vegetables/Growing_Dill/
- ↑ https://extension.usu.edu/yardandgarden/research/dill-in-the-garden
- ↑ https://extension.purdue.edu/foodlink/food.php?food=dill
- ↑ https://extension.purdue.edu/foodlink/food.php?food=dill
- ↑ https://extension.usu.edu/yardandgarden/research/dill-in-the-garden
- ↑ https://www.stilltasty.com/fooditems/index/17096
- ↑ https://sonomamg.ucanr.edu/Food_Gardening/Additional_KG_Articles/Harvesting_and_Preserving_Dill/
- ↑ https://extension.umn.edu/vegetables/growing-dill-home-gardens#dill-seed-936111
- ↑ https://extension.umn.edu/vegetables/growing-dill-home-gardens#dill-seed-936111
- ↑ https://sonomamg.ucanr.edu/Food_Gardening/Feature_Vegetables/Growing_Dill/
About This Article

Maggie Moran
Home & Garden Specialist
This article was co-authored by Maggie Moran and by wikiHow staff writer, Hunter Rising. Maggie Moran is a Professional Gardener in Pennsylvania. This article has been viewed 33,564 times.
How helpful is this?
Co-authors: 3
Updated: November 11, 2022
Views: 33,564
Categories: Harvest and Storage
Advertisement