This article was co-authored by Lauren Kurtz. Lauren Kurtz is a Naturalist and Horticultural Specialist. Lauren has worked for Aurora, Colorado managing the Water-Wise Garden at Aurora Municipal Center for the Water Conservation Department. She earned a BA in Environmental and Sustainability Studies from Western Michigan University in 2014.
This article has been viewed 17,818 times.
Although it looks and tastes like garlic, elephant garlic is actually more closely related to leeks. It is much larger than ordinary garlic; a single clove on elephant garlic can be as large as an entire garlic bulb! Because of this, elephant garlic has some specific growing requirements. Fortunately, it is easy to grow, and the results are delicious, especially if roasted.[1]
Steps
Planting the Garlic
-
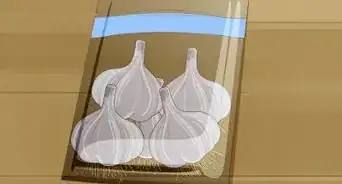
1Purchase elephant garlic bulbs at a nursery or farmer's market. The bulbs are essentially the "seed," and once separated into cloves, can yield several garlic plants. You can use grocery store garlic as long as it is labeled as "organic."[2]
- Make sure that the bulbs are firm, with dry, papery wrappers. Avoid any that contain bruised, rotten, or loose cloves.
- Bulbs can also be purchased online if your local nursery or market doesn’t carry them.
-
2Separate the cloves from the stem, but leave the casings on. Gently separate the cloves from the base of the bulb. You will have to remove some of the papery wrapping in order to do this. Don't peel the cloves themselves, however; you won't be eating the garlic after all.[3]
- Double-check your cloves and discard any that look bruised, damaged, or diseased.
Advertisement -
3Find a plot that receives full sunlight and fill it with well-draining soil. For best results, use soil that has a pH between 6.0 and 7.0. Consider adding some well-rotted compost or manure as well. This will make the soil more fertile, which will help boost your harvest.
- You don't have to plant the garlic at the same time you prepare the plot; you will be planting in the fall, however.
- Consider building a planting bed that's 6 to 8 inches (15 to 20 cm) tall. This will help keep the planting area free of rocks and weeds.[4]
-
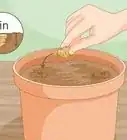
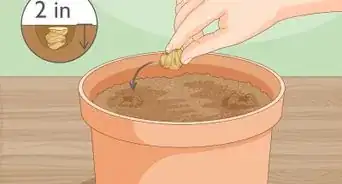
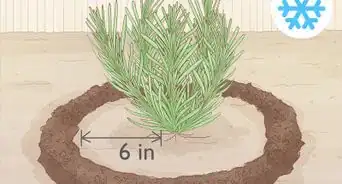
4Plant the garlic 4 to 6 inches (10 to 15 cm) deep in the fall. Dig a 4 to 6 in (10 to 15 cm) deep hole, then insert 1 clove, bottom-first. Brush your hand over the hole to cover it. Repeat this process for each clove that you wish to plant. Keep the holes at least 12 inches (30 cm) apart so that the garlic has room to grow.[5]
- If you are planting a lot of garlic, consider creating several rows. Keep the rows about 3 feet (0.91 m) apart. This will make harvesting easier.
- The bottom end of a garlic clove is smooth and blunt. The top is pointy and sharp.
-
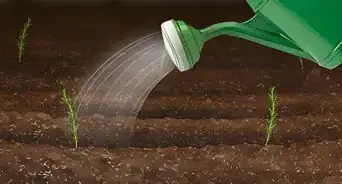
5Water the soil until it feels damp. The soil should feel spongy and stick to your finger if you touch it. It shouldn't start to puddle if you press down on it. Using too much water is not a good thing for garlic as it can cause the bulbs to rot.[6]
-
6Add some mulch if you live in a cool climate. Straw makes great mulch because it will protect the garlic from the cold and frost. About 1 to 3 inches (2.5 to 7.6 cm) of mulch will be plenty.
- You don't need to use mulch if you live in a warmer climate since the goal here is to keep the soil warm, not wet.


Caring for the Garlic
-
1Water the soil whenever it feels dry during the growing season. Again, you want the soil to feel damp and spongy, but not soggy. How often you do this depends on how hot and dry it is where you live. Expect to water it at least once per week, however.[7]
- Near harvest time, stop watering the garlic once the leaves start to dry out, otherwise the bulbs will rot.[8]
-
2Apply fertilizer once or twice during the growing season. A fertilizer that is rich in nitrogen will work just fine, but use it sparingly. Once the cloves start to multiply and form bulbs, stop using the fertilizer completely, as this may affect the bulbs' development.[9]
-
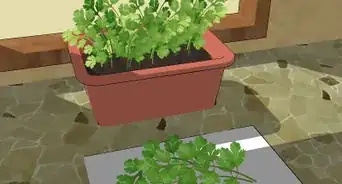
3Remove any flowers. You should be able to just pinch them off with your fingers, but you can cut them off with clean scissors or pruning shears too. If you leave the flowers on the garlic, they will soak up the energy that could otherwise go to the developing bulb.[10]
-
4Remove weeds as soon as you see them. This should not be an issue if you built a planting bed, but it would still be a good idea to check. If you leave the weeds, they will use up all of the nutrients that the garlic needs to grow.
- If you added mulch, you may have to check under it for weeds.
- Adding well-rotted compost to the mulch will help reduce weeds. Do this in the spring.
- If the weeds are starting to become an issue, consider an herbicide suitable for food plants.[11]
-
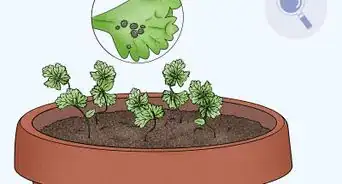
5Watch out for pests and diseases, and treat them as soon as possible. Since garlic is grown in the winter in warm climates, pests aren't a huge issue, but they can still pop up in the spring when the weather turns warm. Bacterial and fungal diseases are a bigger problem due to the damp, humid conditions. Use sprays and chemicals specifically formulated for crops to treat these.[12]
- Elephant garlic is susceptible to rust and white rot.
- Onion flies and stem and bulb eelworms are common elephant garlic pests.


Harvesting the Garlic
-
1Check the bulbs around mid- to late summer. By this point, the stalk will have turned yellow and started to dry out. Dig through the soil, find 1 or 2 bulbs, and inspect the papery wrappers. If the wrappers are 3 to 5 layers thick, the garlic is ready for harvesting.[13]
- It will take about 180 to 210 days for the garlic to fully mature.
- Keep in mind that the stalks may not turn brown and dry in wet climates.
- Don't wait too long to harvest the garlic, otherwise it will split in the ground and spoil.
-
2Pull the garlic out of the soil. If the soil is dry and crumbly, you may be able to just grab the garlic by the stalk, and yank it out. If the garlic is firmly set into the soil, however, you should slide a trowel or potato fork under it, then lift it out.[14]
- Be gentle when lifting the garlic out of the soil so that you don't accidentally bruise or damage it.
-
3Remove the roots and stalks. Use scissors or shears to cut off the stalks until they are about 1 to 2 inches (2.5 to 5.1 cm) long. Next, trim the roots down as close to the base of the bulb as possible. You should be able to do this with scissors.
- Don't rip the roots or stalks off, or you'll ruin the garlic.
- Make sure that your scissors and shears are clean.
-
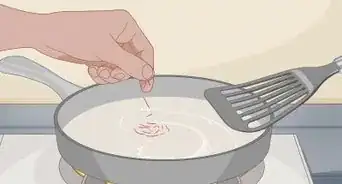
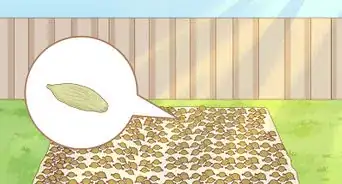
4Allow the garlic to dry before removing the dirty wrappers. Set the garlic out in the sun to dry; this can take 1 to 2 hours. Once the garlic has dried, peel off the outer 1 or 2 wrappers until it looks clean again.[15]
- Don't remove all of the papery wrappers—just the dirty ones.
-
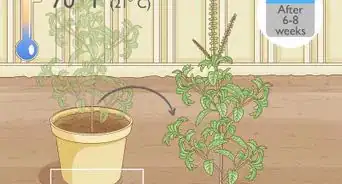
5Cure the garlic in a shady area for 2 to 3 weeks. Once harvested, elephant garlic can be treated like any other garlic. Cut off the roots and stalks, then spread them out in a shady spot for 2 to 3 weeks to dry and cure.
- After curing the garlic, store it in a cool, dry place.


Things You'll Need
- Elephant garlic bulb
- Well-draining soil
- Nitrogen-rich fertilizer
- Straw mulching (optional, for cool climates)


References
- ↑ https://www.theguardian.com/lifeandstyle/2014/nov/29/alys-fowler-how-to-grow-elephant-garlic
- ↑ https://www.sproutabl.com/elephant-garlic/
- ↑ https://www.sproutabl.com/elephant-garlic/
- ↑ https://www.sproutabl.com/elephant-garlic/
- ↑ https://irisheyesgardenseeds.com/elephant-garlic-growing-guide/
- ↑ https://www.sproutabl.com/elephant-garlic/
- ↑ https://irisheyesgardenseeds.com/elephant-garlic-growing-guide/
- ↑ https://www.sproutabl.com/elephant-garlic/
- ↑ https://www.sproutabl.com/elephant-garlic/
- ↑ https://www.sproutabl.com/elephant-garlic/
- ↑ http://extension.uga.edu/publications/detail.html?number=C852&title=Production%20and%20Management%20of%20Garlic,%20Elephant%20Garlic%20and%20Leek
- ↑ http://extension.uga.edu/publications/detail.html?number=C852&title=Production%20and%20Management%20of%20Garlic,%20Elephant%20Garlic%20and%20Leek
- ↑ http://extension.uga.edu/publications/detail.html?number=C852&title=Production%20and%20Management%20of%20Garlic,%20Elephant%20Garlic%20and%20Leek
- ↑ https://www.sproutabl.com/elephant-garlic/
- ↑ https://www.sproutabl.com/elephant-garlic/
About This Article