This article was co-authored by Steve Masley. Steve Masley has been designing and maintaining organic vegetable gardens in the San Francisco Bay Area for over 30 years. He is an Organic Gardening Consultant and Founder of Grow-It-Organically, a website that teaches clients and students the ins and outs of organic vegetable gardening. In 2007 and 2008, Steve taught the Local Sustainable Agriculture Field Practicum at Stanford University.
This article has been viewed 27,347 times.
Lavender is one of the easiest plants to grow from cuttings. When selecting your cutting, look for a stem that has both old and new growth, cutting it near the bottom of the plant. You'll remove the lower sets of leaves and situate the cutting in soil so that it's sitting upright. Care for your cuttings by keeping the soil moist and giving the plant lots of indirect sunlight. In 3-6 weeks, your cuttings will be ready to transfer to their own pots!
Steps
Taking the Cuttings
-
1Look for a stem with both old and new growth. This means the stem should have a green upper portion and a brown lower portion, with the green section being the newer growth and the brown part being the older growth. Avoid taking a cutting from a lavender plant that is super young and opt for one that’s mature.[1]
- A young lavender plant will be made up of entirely green sections.
- It's important to have old and new growth so that stable roots are able to grow out of the younger plant.
-
2Avoid stems that have already flowered. Look for stems that have leaves on them but no flower buds. It takes a lot of energy for the plant to make flowers, and you want the plant to put all of its effort into creating new roots, not new flowers.[2]Advertisement
-
3Make sure the cutting is at least 3 in (7.6 cm) long. How long you make the cutting is up to you, but be sure it has at least 3-5 leaf nodes on the stem. Remember that the longer you make the cutting, the deeper down into the soil it will need to be placed.[3]
- Having 3-5 leaf nodes is important so that the cutting is mature enough to grow strong roots.
-
4Use a knife to take the cutting at the base of the stem. Cut the stem at the bottom of the plant, using the knife to remove the cutting. Try to keep the cut as clean as possible by using slow, precise movements with the knife and holding the stem steady as you cut.[4]
- Avoid using scissors as they can damage the plant and partially close up the stem making it hard for the roots to grow properly.


Rooting the Cuttings
-
1Remove the bottom few sets of leaves on the cutting. You can do this using your fingers or with sharp clippers. Keep a pair or two of leaves at the top of the plant while removing the lower portion of leaves, which will likely be roughly 3-5 sets.[5]
- Remove the bottom section of leaves easily by taking the stem between your fingers and pulling down on it gently.
- Removing the bottom leaves lets you put this section of the stem into the soil.
-
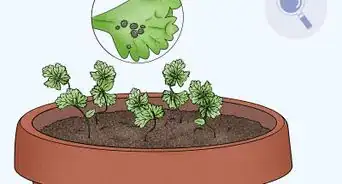
2Clip off any flower growth using a sharp knife. If you see any budding flowers, snip those off using a knife or cutting shears. It’s important to remove the flowers so that the lavender cutting can focus all of its energy on growing new roots.[6]
- The lavender buds will start off green and turn purple as they continue to grow.
-
3Dip the bottom of the stem in a rooting hormone. This is optional, but it’s likely to help your lavender cutting take root much faster. Take the cutting and gently dip the end of the cut portion into a rooting hormone so that roughly 1 in (2.5 cm) of the stem is covered.[7]
- Purchase a rooting hormone from your local gardening center, big box store, or online.
-
4Fill a pot with compost or potting soil. What kind of soil you use is up to you—some people like to mix ⅓ vermiculite, ⅓ peat moss, and ⅓ potting soil together to use, while others use a regular compost or airy potting soil. Fill your pot mostly full of soil, making sure the pot is big enough to hold the cutting.[8]
- Try using terracotta pots instead of plastic ones as they breathe better.
- Lavender cuttings do well in soil that’s airy.
- Make sure the cuttings will have at least 2 in (5.1 cm) of space around them in the pot.
-
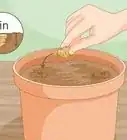
5Make a hole in the soil using a stick or pencil. This is where the cutting will be positioned. If you don’t have a pencil or stick handy, simply use your finger to make a hole in the soil where you’d like the cutting to go. Make the hole deep enough for your cutting depending on how long or short you cut the stem.[9]
- For example, if your cutting is only 3–4 in (7.6–10.2 cm) tall, your hole only needs to be about 1 in (2.5 cm) deep so that it's roughly 1/4 the length of the stem.
- Making the hole is important so that the rooting hormone doesn’t rub off when you’re sticking the cutting into the soil.
-
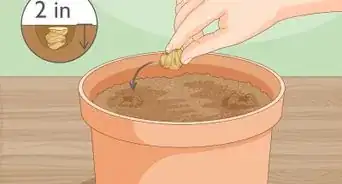
6Place the cutting in the pot while keeping the leaves above ground. Gently stick the cutting in the hole you’ve made, placing it in so that the rooting hormone doesn’t come off. Make sure none of the leaves on the top of the cutting touch the soil, as this can cause rot and ruin your plant.[10]
- You can place several different cuttings in one large pot, but make sure they’re not touching.
-
7Press the soil in around the cutting. Pat the soil in around the cutting carefully until the cutting stands upright on its own. If the cutting isn’t able to stand upright, it may need to be pushed farther into the soil.[11]


Protecting and Nourishing the Plants
-
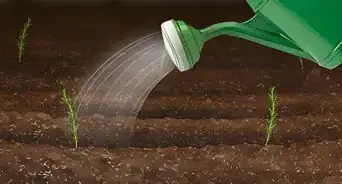
1Mist the cuttings with water so the soil is moist. Use a spray bottle full of water to moisten the soil once the cuttings are in place. If you don’t have a spray bottle, drizzle water from a cup into the soil, making sure the soil remains constantly moist.[12]
- Check the soil every couple of days to be sure the soil is still moist but not soaked through.
-
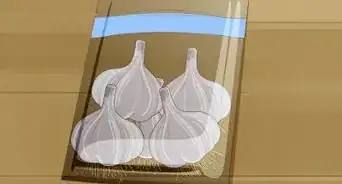
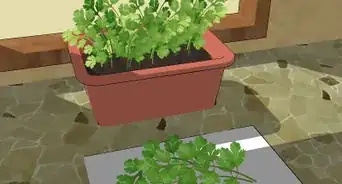
2Place the pot in a warm spot out of direct sunlight or wind. This could be in a greenhouse, on a window sill, or in a conservatory. It’s important that the cuttings are in a warm place out of direct sunlight. If they’re placed outside, keep them out of the wind and any heavy rain.[13]
- Lavender cuttings do well in humid environments as opposed to dry ones.
- Consider putting a clear plastic bag over the pot to create a greenhouse effect, if desired.
-
3Wait 3-6 weeks for the roots to develop. Continue keeping the cuttings warm and moist while the new roots grow. You’ll know the roots have developed when you see new growth on the plant, or the roots begin growing out through the holes in the bottom of the pot.[14]
- How fast the cuttings take root depends on the temperature and humidity of their environment.
-
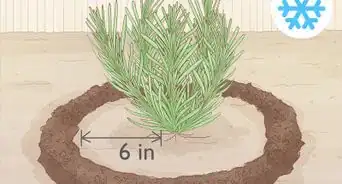
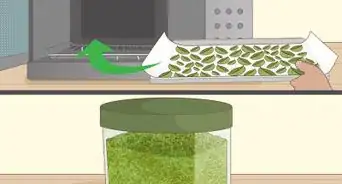
4Replant the cuttings in individual pots once their roots are strong. Once you see the roots have expanded, gently remove the cutting and its soil clump from the pot, moving it into a bigger pot with additional soil. Use a free-draining potting soil to ensure your lavender grows well.[15]
- If you planted several cuttings, move each of them into their own pot.
- Giving each cutting their own pot will allow their roots to flourish and grow.
-
5Move the plant to the sunlight and let the soil dry out between waterings. With your cuttings replanted, situate the pot in a space that gets plenty of sunlight while still avoiding super windy or rainy spots. Instead of keeping the soil constantly moist, water it thoroughly and then let it dry out before watering it again.[16]
- If you want your cutting to continue growing faster, snip off any flower buds that pop up. Otherwise, let the lavender flowers grow.


Expert Q&A
-
QuestionWhy do my lavender cuttings keep dying?
 Steve MasleySteve Masley has been designing and maintaining organic vegetable gardens in the San Francisco Bay Area for over 30 years. He is an Organic Gardening Consultant and Founder of Grow-It-Organically, a website that teaches clients and students the ins and outs of organic vegetable gardening. In 2007 and 2008, Steve taught the Local Sustainable Agriculture Field Practicum at Stanford University.
Home & Garden SpecialistCheck your soil mixture. Lavender likes really good drainage. When making soil, try mixing equal parts of compost, coarse builder sand, lava rocks, and a coarse material like coconut husks.


References
- ↑ https://www.youtube.com/watch?v=M03tfDEAijc#t=39s
- ↑ https://getbusygardening.com/propagate-lavender-plants/
- ↑ https://getbusygardening.com/propagate-lavender-plants/
- ↑ https://getbusygardening.com/propagate-lavender-plants/
- ↑ https://getbusygardening.com/propagate-lavender-plants/
- ↑ https://getbusygardening.com/propagate-lavender-plants/
- ↑ https://www.youtube.com/watch?v=99naO8uCHlo#t=37s
- ↑ https://www.youtube.com/watch?v=M03tfDEAijc#t=1m19s
- ↑ https://getbusygardening.com/propagate-lavender-plants/
- ↑ https://getbusygardening.com/propagate-lavender-plants/
- ↑ https://getbusygardening.com/propagate-lavender-plants/
- ↑ https://www.youtube.com/watch?v=M03tfDEAijc#t=3m
- ↑ https://getbusygardening.com/propagate-lavender-plants/
- ↑ https://getbusygardening.com/propagate-lavender-plants/
- ↑ https://getbusygardening.com/propagate-lavender-plants/
- ↑ https://getbusygardening.com/propagate-lavender-plants/
About This Article