This article was co-authored by wikiHow Staff. Our trained team of editors and researchers validate articles for accuracy and comprehensiveness. wikiHow's Content Management Team carefully monitors the work from our editorial staff to ensure that each article is backed by trusted research and meets our high quality standards.
wikiHow marks an article as reader-approved once it receives enough positive feedback. In this case, 89% of readers who voted found the article helpful, earning it our reader-approved status.
This article has been viewed 162,034 times.
Learn more...
Snow peas, which are also called sugar snap peas, are a delightful treat that always taste best fresh off the vine. These peas are relatively simple to grow because they don’t require a lot of extra attention or care, but it is important to start them early because they only grow in cooler weather. It’s also important that you sow the seeds directly into the ground, because sensitive seedlings don’t transplant well. Snow peas are annual plants, meaning they complete their life cycle within a year, so you'll have to save some seeds if you want to grow more next year.
Steps
Planting Snow Peas
-
1Choose a sunny location for the peas. Snow peas grow best when they get full sun exposure, and won’t thrive anywhere that gets more than partial shade. Look for a location that gets at least six hours of sun every day.[1]
-
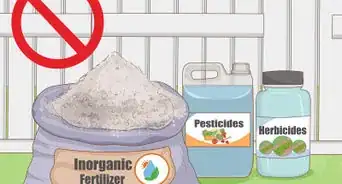
2Prepare the seed bed in mid to late fall. Peas love fertile and well-draining soil with a pH between 6.0 and 7.0. To achieve this, till the soil to a depth of 1 foot (30 cm), and work plenty of aged compost into the soil. To increase the acidity, potassium, and phosphorus levels, work some wood ash or bone meal into the soil as well.[2]
- Snow peas need an environment rich in potassium and phosphorus in order to grow and produce peas.
- Snow peas are typically planted when it’s still cold out, so preparing the soil in fall will give you a good head start.[3]
Advertisement -
3Aim to plant in late winter or early spring. Snow peas are a cool-season crop that will not grow or produce peas once the temperature reaches about 80 F (27 C), so it’s very important to get an early start as soon as the ground can be worked. Ideally, you want to plant the peas four to six weeks before the last expected frost, when the soil temperature reaches about 40 F (4 C), and when the daytime temperatures are between 60 and 65 F (16 and 18 C).[4]
- In warmer climates with milder winters, you can plant your snow peas in the fall and grow them over the winter.
-
4Inoculate the seeds. Peas and legumes thrive best when the seeds are inoculated with a nitrogen-fixing soil bacterium before planting. The day before planting, place the seeds in water and let them soak for 24 hours. Right before planting, roll the seeds through the inoculant powder to coat them with the bacterium.[5]
- Inoculant can be purchased at most garden centers, seed catalogs, or online.
-
5Plant the seeds in rows of two. When it’s time to plant, use a pencil or your finger to poke double rows of shallow holes in the soil. The holes should be 4 inches (10 cm) apart and 1 inch (2.5 cm) deep, and the rows should be spaced 2 feet (61 cm) apart. Place a seed in each hole and cover the seed with additional soil.
- Planting the peas in double rows will make it easier to stake them.
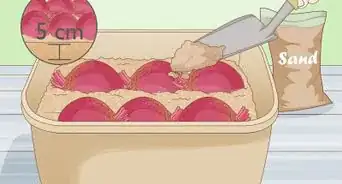
- In sandier soil, make each hole 2 inches (5 cm) deep.[6]


Caring for Snow Pea Plants
-
1Water thoroughly after planting and weekly thereafter. Right after planting, water the seeds well to help them settle into the soil. Because peas are prone to rot, don’t water them again for another 10 days, until they germinate. After 10 days, water the peas deeply once a week until they start to flower.[7]
- Check the soil every couple of days to make sure it hasn’t dried out. When the soil starts to dry out, water immediately.
-
2Place a trellis or stake between the rows. Peas like to climb, and even with low-growing varieties, harvesting will be easier if the vines are supported on a trellis or stake structure. There are a few options you can choose, including placing stakes between the rows, building or buying a pre-made trellis and planting it between the rows, or even placing tomato cages between the rows.
-
3Apply a layer of mulch to the soil when the plants are established. When the pea plants reach a height of 2 inches (5 cm), spread a layer of straw or chopped leaves over the soil. This will keep the soil moist and cool, and prevent weeds from growing in the garden bed.[8]
- As the plants continue to grow, you can add more mulch if necessary.
-
4Weed the area by hand. Any weeds that do happen to spring up in the area should be removed carefully by hand. Pea roots are fairly delicate, so you want to avoid digging in the garden bed. Instead, grasp the weeds by the base and pull them from the soil, roots and all, to eliminate competition.
-
5Water the peas more often when they start to flower. As soon as the peas start to blossom, keep a close eye on the soil and water daily if necessary. The peas will need more water at this stage to produce flowers and pods, especially if the weather is starting to get warmer.[9]


Harvesting and Storing Snow Peas
-
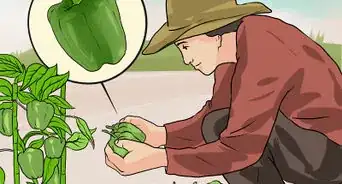
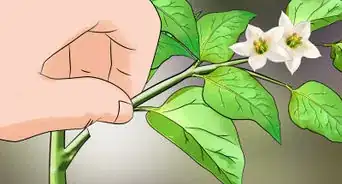
1Start picking as soon as the pods form. The pods will start to form after the flowers start to die back. When the pods are young, tender, and just starting to fill out, start harvesting. The more you harvest, the more pods the plant will produce. To harvest pods, hold the vine gently with one hand and delicately pinch the pod from the vine with the other hand. Don’t tug on the vine or it may snap.
- To protect the plant, harvest pods in the morning rather than in the afternoon when the sun is hotter.
- It’s important to harvest early if you want edible pods (and not just peas), because older pods will eventually become tough and inedible.
- Different snow pea varieties mature at different rates, but your plant will start to bear pods anywhere from 50 to 70 days after planting.
-
2Let the pods fill out if you want just the peas. Pods that are left on the vine will become tougher and harder, but the peas inside will become full and plump. If you want the peas more than the pods, leave the pods on the vine and wait for them to become full with peas. Harvest the pods when the peas are plump.
-
3Enjoy the peas raw or cooked. Peas and pods can be eaten fresh off the vine, but you can cook them as well. To get the peas out of mature pods, split open the pods along the seams and remove the peas with your finger. Snow peas and pods are delicious raw, boiled, stir fried, or steamed.[10]
-
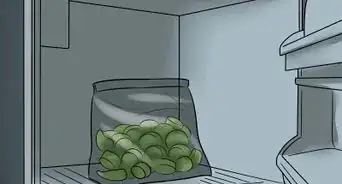
4Refrigerate snow peas you want to eat within a few days. Snow peas will stay fresh in the refrigerator for up to five days.[11] After picking, rinse the snow peas under fresh water to remove dirt. Pat the peas dry and transfer them to an airtight container before refrigerating.
-
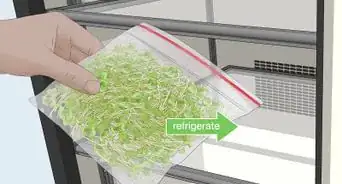
5Blanch and freeze snow peas for an extended shelf life. Fill a large pot with water and bring it to a boil over medium-high heat. When the water is boiling, add the snow peas that you wish to preserve. Boil the peas for two minutes. Remove the peas from the water and plunge them into a bowl filled with ice water for two minutes. Drain and dry the peas before transferring them to freezer bags and freezing them.[12]
- Blanching before freezing will help the peas retain their color and flavor.
- Frozen snow peas will last for up to nine months in the freezer.
-
6Save some seeds for next year. Snow pea plants die after a single season, but you can save seeds from the harvest to plant again next year. Choose a strong and healthy plant from the crop. Allow some of the pods to dry on the vine. When the pods go brown, harvest them from the vine. Remove the seeds from the pods and dry them on a towel or rack for a week.
- Transfer the seeds to an airtight container and store the seeds in a cool, dry, and dark location until you're ready to plant.[13]


Community Q&A
-
QuestionDoes too much sun kill a snow pea plant?
 Community AnswerToo much sunlight won't kill peas, but it can if the days get too hot.
 -
QuestionHow would I pick snow peas?
 Community AnswerGrasp the stem with your left hand and the pod with your right hand, in the middle of the pod. Tug with your right hand while holding firm with the left.
 -
QuestionShouldn't one count back 70 from first frost (not last) to find last planting date?
 DonaganTop AnswererYes.


References
- ↑ http://www.1millionwomen.com.au/blog/how-grow-snow-peas/
- ↑ http://www.vegetable-gardening-online.com/growing-snow-peas.html
- ↑ https://www.almanac.com/plant/peas
- ↑ http://www.vegetable-gardening-online.com/growing-snow-peas.html
- ↑ http://www.vegetable-gardening-online.com/growing-snow-peas.html
- ↑ http://www.vegetable-gardening-online.com/growing-snow-peas.html
- ↑ http://www.burpee.com/gardenadvicecenter/vegetables/peas/all-about-peas/article10250.html
- ↑ http://www.burpee.com/gardenadvicecenter/vegetables/peas/all-about-peas/article10250.html
- ↑ http://www.burpee.com/gardenadvicecenter/vegetables/peas/all-about-peas/article10250.html
About This Article