This article was co-authored by wikiHow Staff. Our trained team of editors and researchers validate articles for accuracy and comprehensiveness. wikiHow's Content Management Team carefully monitors the work from our editorial staff to ensure that each article is backed by trusted research and meets our high quality standards.
There are 8 references cited in this article, which can be found at the bottom of the page.
This article has been viewed 27,700 times.
Learn more...
Sewers and crafters everywhere love the hand-appliqué method of attaching pieces of fabric to backgrounds. It's especially popular in the quilting world, but it can be used for lots of different types of projects. It's a simple way to craft once you get the hang of it, and you don't need to use a sewing machine, glue, or freezer paper! Take your time learning how to hand appliqué, and you'll be impressed at how much dimension it can add to your next sewing project.
Steps
Prepping the Fabric and Creating the Applique Object
-
1Pick out fabrics for the appliqué and the background and wash them. You can hand appliqué almost anything: jeans, pillows, blankets, quilts, shirts, fabric purses—the list goes on and on. Pick a color or pattern for each part, and then wash the fabrics (unless they come pre-washed) before you cut them.[1]
- Washing the fabrics beforehand will prevent any unfortunate shrinkage from happening in the future. The worst thing would be to finish your beautiful project only to have all or part of it shrink in the wash and become misshapen!
-
2Choose a design for your project or draw one yourself. This is a great way for you to express your creativity and make something unique if you so desire. Hearts, stars, flowers, leaves, animals, letters, birds, and other images can really personalize an item. You can find images online that you can print off to use if you don't want to draw them yourself.[2]
- One benefit of drawing your own image is that you can make it as simple or as complex as you'd like, and you can also make it the perfect size for your specific project.
Advertisement -
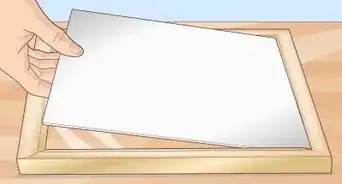
3Copy your appliqué image onto a sheet of plastic and cut it out. Quilter's plastic or heavy-duty plastic template sheets are perfect for this task. Be as careful and precise as you can when tracing the image and cutting it out, as this is the template you'll use to trace the image onto the actual appliqué and background fabric.[3]
- You may be wondering why you can't just trace the appliqué image directly onto the fabric itself. Using a thicker plastic template will ensure that the image is perfectly copied—a thin piece of paper could easily get wrinkled or misshapen as you try to hold it in place and trace around it.
- You can find all the supplies you need at your local craft store or online.
-
4Trace the plastic template onto your appliqué fabric. Use a chalk pencil or an erasable marker for this process so that your trace lines will disappear. Otherwise, your lines might permanently be visible through the fabric.[4]
- If you want to make multiple copies of the same image, go ahead and prep as many of them as you will need. Just make sure to leave about 1⁄4 in (0.64 cm) between the edges of each image.
-
5Cut out the pattern from the appliqué fabric along with a seam allowance. Leave about 1⁄8 in (0.32 cm) around the border of the image for your seam allowance. Try your best to cut in a straight line along the edge so it's as neat as possible.[5]
- It's okay if there are some ragged edges when you're done. The seam allowance will be folded underneath the actual appliqué image and won't be visible when you're finished.


Pinning the Applique to the Background Fabric
-
1Position the template on the background fabric. Take your plastic template and get it into the position you want on the piece of background fabric. If you want it to be perfectly centered in the middle of a section, use a ruler to get it exactly right.[6]
- Use the template rather than the actual appliqué fabric since the fabric has a seam allowance, making it bigger than it'll actually be in the end.
-
2Trace the template onto the background fabric with pencil chalk. Pencil chalk or an erasable marker is the best choice to trace the template so that the marks will disappear later on. Do your best to hold the template completely still while you trace it.[7]
Tip: Remove pencil chalk or erasable marker with a few spritzes of water once your project is finished.
-
3Align the appliqué fabric overtop of the tracing and pin it in place. Use short, thin pins, which you can find at any crafting store. Place the pins slightly inside of where the seam allowance ends, so that you won't have to move them out of the way once you actually start to sew.[8]
- Put a pin in every corner if your image has corners. Otherwise putting one pin in every 1 in (2.5 cm) or so should be enough to hold the fabric in place while you work.


Sewing the Applique
-
1Thread a straw needle with thread in the color of your choice. Use either silk thread or embroidery thread. Silk thread will be basically invisible, while embroidery thread will create a thicker outline around the appliqué fabric. Use about 1 foot (12 in) of thread, and tie a knot at the end so that you end up sewing with a double-layer of thread.[9]
- A straw needle is a really thin, extra-long needle. It makes this type of sewing-by-hand task much easier.
Tip: If you really want your thread to blend in with the fabric, choose a thread that matches the appliqué fabric rather than the background fabric.
-
2Use your needle to fold the seam allowance underneath in one section. You'll do this repeatedly as you sew the fabric together. Use the pointed end of the needle to gently tuck the appliqué fabric underneath so the folded edge lines up with the chalk tracing you did earlier.[10]
- Doing this helps create the dimensional look of the appliqué.
-
3Make your first stitch by coming through the back of the fabric. Gently hold your two pieces of fabric together, taking care to not lose the section you just folded underneath. Bring the needle and thread underneath of the background fabric and insert the needle tip so that it is coming through at the absolute very edge where the background fabric and appliqué fabric intersect.[11]
- This is the only stitch you will do through the back of the fabric, and it's done that way so that the knot at the end of the thread is on the backside.
-
4Use the needle-turn method to sew along the line of the appliqué. After making your first stitch through the back of the fabric, you'll start stitching from the top side. Sew along the absolute edge of the appliqué fabric so that the stitches rest along the edge. As you sew, continue turning the seam allowance under with your needle so that it lines up with the chalk tracing.[12]
- Keep your stitches parallel with the edge of the appliqué fabric. You don't want them going off at an angle.
- When you make a stitch, you'll want to grasp just a few notches of the appliqué fabric and the background fabric so that each stitch is about 1⁄2 centimetre (0.20 in) wide.
Make a Point: Sew all the way to the edge of the point and do a double fold (on either side of the point). Then stitch down along the opposite side and keep turning the fabric as you go so you're sewing in a straight line.
-
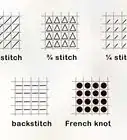
5Finish your sewing by adding a few back-stitches. Once you get back around to where you first started your stitching, make 2 to 3 stitches going back the other direction. Try your best to keep these in line with the stitches that are already there. At the last stitch, bring the needle all the way through the back of the fabric and cut the thread.[13]
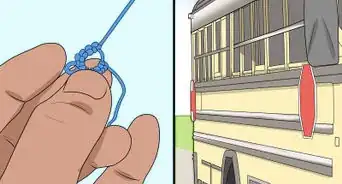
- If you want, tie another knot in the thread before you cut off the needle. Create a circle with the thread and pass the end of the needle through it so the knot will be as close to the fabric as possible. Then, trim the thread close to the knot to release the needle.
-
6Layer multiple pieces by starting with the bottom layer first. If you're creating a layered appliqué, plan out the placement of each piece of fabric before you start sewing anything. Always sew the bottom layer first, and then add each subsequent layer on top of that.[14]
- If it helps, label the back of each piece of appliqué fabric with a number so that you will remember the correct order in which to sew them.


Things You'll Need
- Fabric for appliqué
- Fabric for background
- Chalk pencil
- Sheet of plastic
- Sewing scissors
- Applique pins
- Straw needle (#9)
- Thread


References
- ↑ https://sewguide.com/hand-applique/
- ↑ https://sewguide.com/hand-applique/
- ↑ https://sewguide.com/hand-applique/
- ↑ https://youtu.be/axDBl7lJuJs?t=150
- ↑ https://youtu.be/axDBl7lJuJs?t=187
- ↑ https://sewguide.com/hand-applique/
- ↑ https://youtu.be/axDBl7lJuJs?t=114
- ↑ https://youtu.be/axDBl7lJuJs?t=259
- ↑ https://sewguide.com/hand-applique/
About This Article