This article was co-authored by wikiHow Staff. Our trained team of editors and researchers validate articles for accuracy and comprehensiveness. wikiHow's Content Management Team carefully monitors the work from our editorial staff to ensure that each article is backed by trusted research and meets our high quality standards.
wikiHow marks an article as reader-approved once it receives enough positive feedback. In this case, 91% of readers who voted found the article helpful, earning it our reader-approved status.
This article has been viewed 193,191 times.
Learn more...
Making your own cross stitch pattern is easier than you might think. If you want to create a custom cross stitch piece, you will need a custom pattern. Start by choosing your design, which can be a photograph or a drawing. Then, trace the design onto a piece of grid paper. Complete your pattern by filling in the grid to indicate the stitch placement, thread color, and stitch type.
Steps
Choosing a Design
-
1Use a photograph. You can use a photograph that you took or one you found in a magazine to create your cross stitch pattern.[1] Just make sure to choose a picture with well defined lines and some good contrast in the color scheme. This will make it easier to convert the photo into a cross stitch pattern.
- Use a photo of a flower, a tree, or clouds for a simple design.
- Opt for a photo of a person or landscape for something more advanced.
- It helps if the photo is already the desired size for your cross stitch. However, you could always photocopy or scan the image and resize it.
-
2Draw something. If you prefer, you can also draw your own design by hand or use a paint program on your computer.[2] Make sure your drawing is something that you can realistically cross stitch.
- For example, if you are new to cross stitch, you might draw a simple flower, some balloons, or a tree.
- If you want something more advanced, you might draw a puppy, a sunset, or a person.
- Drawing freehand is also a good way to form letters and words for your cross stitch.
Advertisement -
3Use a cross stitch pattern for inspiration. If you are not sure what type of image might make a good cross stitch design, then look at existing cross stitch patterns for inspiration. Look at cross stitch pattern books in your local craft supply store, or search for cross stitch patterns online.
- Look at patterns that reflect your skill level. Creating your cross stitch pattern based on an advanced pattern may not give you the desired results if you are new to cross stitch.


Tracing the Design onto Grid Paper
-
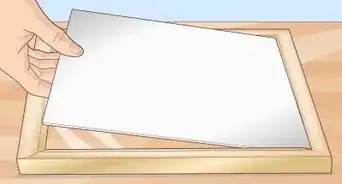
1Lay the image you want to use on a flat, backlit surface. Tracing an image is much easier when the image has light coming through it from behind. To backlight your image, use a light box or hold the image against a window on a sunny day.[3]
-
2Place a piece of grid paper over the image. Grid paper is perfect for creating a cross stitch pattern. Take a piece of grid paper that is large enough to completely cover the image and lay it over the image. Center the design under the grid paper so that it will be about the same distance from each of the edges.[4]
-
3Trace the edges of the design. Use a pencil to trace the edges of the image onto the graph paper. If your image features multiple shapes, then trace all of these onto the graph paper.
- For example, if your image is a flower, then trace the outer edges of the flower. If your image is a cluster of balloons, trace the outer edges of the balloon cluster.
-
4Outline the details of the design. After you have traced the basic design onto the graph paper, trace the finer details of your image. Depending on the level of detail you want your cross stitch to have, you can be as detailed or as basic as you would like to be for this part.
- For example, if you are planning to cross stitch a bouquet of flowers, then you may simply trace the borders of the flowers in the bouquet, or you may trace the petals of each flower.


Completing Your Cross Stitch Pattern
-
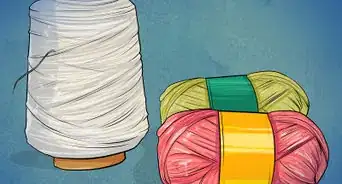
1Decide on a color scheme. You can use the same colors as the original image, or invent your own color scheme. Gather the colored pencils or markers that you will need to complete your cross stitch pattern.
- For example, if you want to fill in a rainbow design, then you would need red, orange, yellow, blue, green, and purple. For a cluster of balloons in primary colors, you could just use red, blue, and yellow.
-
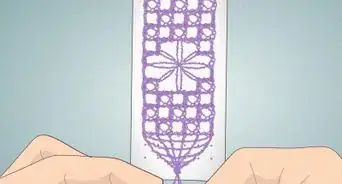
2Make X marks in the grid to indicate the borders and fill of the design. Once you have decided on a color scheme, fill in each square on the grid with an X mark to indicate where each stitch will go. Each X indicates 1 full cross stitch in your cross stitch pattern.[5]
-
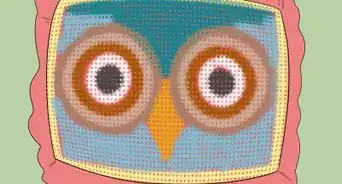
3Color code the pattern if desired. You can use color pencils or markers that correspond to the thread colors you want to use. Use the different colors to fill in the grid the way you want the finished design to look.
- If you do not have colored markers or pencils, then you may also create symbols to represent each color. For example, square marks could represent black thread, circles could indicate red thread, an asterisk (*) could indicate yellow, and so on.[6]
-
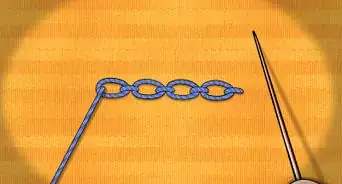
4Indicate where special stitches may be required. Depending on how advanced you want to get with your stitch work, you may include some special stitches. If you plan to use a special stitches, make sure to indicate them with the correct symbol on your pattern. Some special stitch symbols include:[7]
- slash mark: half stitch
- triangle: ¾ stitch
- slash mark coming halfway into center of grid square: ¼ stitch
- horizontal line across the center of the grid: backstitch
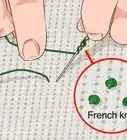
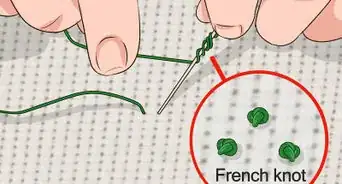
- solid dot: French knot


Things You'll Need
- Photo or drawing
- Grid paper
- Light box (optional)
- Pencil
- Colored pencils or markers (optional)
References
- ↑ https://www.thecrossstitchguild.com/cross-stitch-basics/stitchers-study/making-your-own-charts.aspx
- ↑ https://www.thecrossstitchguild.com/cross-stitch-basics/stitchers-study/making-your-own-charts.aspx
- ↑ https://www.thecrossstitchguild.com/cross-stitch-basics/stitchers-study/making-your-own-charts.aspx
- ↑ https://www.thecrossstitchguild.com/cross-stitch-basics/stitchers-study/making-your-own-charts.aspx
- ↑ https://www.dmc.com/us/p-tutorialshow-to-read-a-cross-stitch-chart.html
- ↑ https://www.embroidery.com/help.ec?docid=3044
- ↑ https://www.dmc.com/us/p-tutorialshow-to-read-a-cross-stitch-chart.html
About This Article

To make a cross stitch pattern, start by placing a piece of grid paper over the image you want to use and trace the outline with a pencil. If you can, use a backlit surface like a light box or a window on a sunny day to make the tracing easier. Once you've decided on a color scheme, make an X mark on each square so you know where your stitches have to go. Try using color-coded marks to fill in the grid so you know what thread to use. If you plan on using special stitches, such as a half stitch or a 3/4 stitch, mark them with a slash mark or triangle respectively. To learn more about how to choose a color scheme or get inspiration for your design, keep reading!