This article was co-authored by wikiHow Staff. Our trained team of editors and researchers validate articles for accuracy and comprehensiveness. wikiHow's Content Management Team carefully monitors the work from our editorial staff to ensure that each article is backed by trusted research and meets our high quality standards.
The wikiHow Video Team also followed the article's instructions and verified that they work.
This article has been viewed 363,555 times.
Learn more...
Appliqués are the perfect way to jazz up plain articles of clothing, or make old clothes into something fresh and fun. They can also be used to make personalized gifts like t-shirts, tote bags, or caps for friends or loved ones. You can make an applique out of any design you can think up, so the sky’s the limit! Once you know how to make a basic design, you can combine layers to create more intricate ones.
Steps
Preparing the Fabric and Template
-
1Pre-wash and iron all of your fabric. This includes the fabric that you will be using for your appliqué as well as the item you will be attaching the appliqué to. The only instances where you should not wash the fabric is if you are using a non-washable material, such as felt or silk.
- Wash the fabric first, then dry it. Iron it last to remove all wrinkles.
-
2Choose and create your design on a sheet of paper. You can draw the design by hand, or use a stencil. You can even print the design off of the computer. Simple designs work the best for appliqués, especially if this is your first time making one.
- Try to use a thick paper, such as cardstock. It will make tracing easier.
- If you are doing letters, words, or numbers, reverse your design; it will come out the right direction in the end.
Advertisement -
3Cut the design out. You are now ready to start tracing it onto your interfacing. If your design has multiple layers of colors, such as a target sign, you will need to trace each color separately.
-
4Buy iron-on adhesive meant for appliqués. There are lots of different types of iron-on, fusible interfacing. You must get the kind that has adhesive on both sides. When you buy it, one side will already have the adhesive visible; the other side will have paper on it.


Creating the Appliqué
-
1Trace your design onto the paper side of the interfacing. If you can't tell which side is the paper side, look for the smooth side. The rough side is the glue side.[1]
- Use a fabric pen or pencil for this step to reduce the risk of ink bleeding/transferring onto the fabric.
- You will eventually peel the paper side away, then iron the appliqué to your project.
-
2Cut the design out outside the lines you drew. Do not cut along the lines just yet. Instead, cut at least ¼ inch (0.64 centimeter) outside the lines. You will be trimming the interfacing down further once you iron it to the fabric.[2]
-
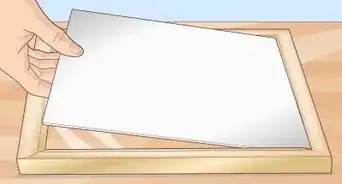
3Iron the interfacing to the wrong side of fabric. Turn the fabric so that the wrong side is facing up. Place the interfacing down on top, glue-side-down. Press the interfacing with a hot, dry iron for 5 to 8 seconds.[3]
- Double-check the instructions on your interfacing to find out what heat setting you should use.
- Some types of interfacing require that you cover it with an ironing cloth (ie: tea towel) first. Double-check the label!
-
4Cut the appliqué out. Allow the appliqué to cool first. Once it is cool to the touch, cut it out along the lines that you drew.[4]
-
5Peel away the paper backing. Don't worry if the paper backing tears. The adhesive part of the interfacing should already be stuck to the fabric. Once you have the backing removed, your appliqué is ready to use![5]
- If you are making a multicolored appliqué, now is the time to make the other shapes and colors.
Ironing and Sewing the Appliqué
-
1Place the appliqué onto the desired item. You can apply appliqués to anything that can be ironed, from t-shirts to backpacks to tablecloths. Try different arrangements to figure out what placement you like best.
-
2Iron the appliqué according to the instructions on the package. Each brand will be a little different, but in mot cases, you will have to cover the appliqué with an ironing cloth (ie: tea towel), then press it with a dry iron for 10 to 15 seconds.[6]
- If you have to use a damp ironing cloth, iron the appliqué again without the cloth to dry up any excess moisture.[7]
-
3Pin a sheet of stabilizer to the back of the fabric, if needed. If you will be doing a dense embroidery stitch, such as scalloped or satin, you should pin a sheet of stabilizer to the back of the project. If you will be doing a simple stitch, such as a straight, zigzag, or blanket, you do not need to add any stabilizer.[8]
-
4Sew around the appliqué using your sewing machine. A simple straight stitch will work for most designs, but you can also use a blanket stitch, a zigzag stitch, a decorative stitch, or even a satin stitch if you want to be fancier. Backstitch at the start and end of your sewing so that the stitches don't come undone.
- You can match the thread color to the appliqué, or you can use a contrasting color.
- If you are doing a zigzag stitch, match sure that you sew right up to the edge of the appliqué; don't sew over the edge.
- If you will be satin stitching, consider doing a zigzag stitch for the first round.[9]
-
5Add more layers, if needed you are sewing a multicolored appliqué. If you cut your design apart into individual shapes/colors, you will need to repeat the entire process for each color/layer. Iron and sew each color/layer separately. Remember to match the thread to the different colors.[10]
-
6Remove the stabilizer, if you added it. How you remove it depends on the type you used. Some are water-soluble and dissolve when you wash the garment. Other have to be torn away.[11]
-
7Trim off the excess threads. If you ant to, you can also iron the project for that final touch.


Community Q&A
-
QuestionWhat if my applique is two layered colors, like Superman's emblem?
 Community AnswerPersonally I would glue the fabric layers together with a small amount and then sew the layers. This is the method I use and it has never failed me!
 -
QuestionI see top designers are adding appliques to coats etc. Do they sew them on or iron them on?Community AnswerDepends on the cloth material, because many times stitching leads to the damage of cloth and of course an iron causes the applique to loosen after a particular time.
-
QuestionIf I intend to make a quilt with appliqued fabric, should I do the applique before I sew the pieces together or after?Community AnswerYou should always applique the quilt squares before you sew them together. The only exception is if an applique goes over more than one quilt square. In that case, you should attach the applique to only the quilt squares over which it goes. For instance, an octopus that covers almost all the quilt surface, should be sewn "in parts" on each square, making sure that the edges of the design match correctly at each quilt square edge.
Things You'll Need
- Fabric
- Cardstock
- Fabric pen or pencil
- Iron-on adhesive
- Iron
- Ironing cloth
- Scissors
- Thread
- Sewing pins
- Sewing machine


References
- ↑ http://www.wherethesmileshavebeen.com/how-to-cut-fabric-and-make-a-no-sew-applique/
- ↑ https://www.seasonedhomemaker.com/sewing-machine-applique/
- ↑ http://www.wherethesmileshavebeen.com/how-to-cut-fabric-and-make-a-no-sew-applique/
- ↑ https://www.seasonedhomemaker.com/sewing-machine-applique/
- ↑ https://www.seasonedhomemaker.com/sewing-machine-applique/
- ↑ http://www.wherethesmileshavebeen.com/how-to-cut-fabric-and-make-a-no-sew-applique/
- ↑ http://www.wherethesmileshavebeen.com/how-to-cut-fabric-and-make-a-no-sew-applique/
- ↑ http://www.mollyandmama.com.au/the-basics-of-applique/
- ↑ https://sew4home.com/tips-resources/sewing-tips-tricks/how-appliqu%C3%A9-pro
About This Article

To make an applique, start by drawing or printing your design on a sheet of paper and cutting it out. Then, get some iron-on adhesive and trace your design onto the paper side of it. Next, cut around the lines of your design, leaving about 1/4 inch of the iron-on paper around the edges. Once you have your iron-on design, iron it onto the back side of the fabric you want to use, holding the iron over it for 5-8 seconds. Finally, cut out your fabric applique and peel off the paper backing. To learn how to iron and sew on your new applique, scroll down!