This article was co-authored by Jason Phillip. Jason Phillip is a handyman specializing in mounting and hanging objects onto walls. With over five years of experience professionally mounting and installing objects through his company, Jason's Handyman Services, Jason's work includes working with mounting window AC units, designing art gallery walls, installing kitchen cabinets, and replacing light fixtures on drywall, brick, and plaster. He has been rated a "Top Pro" every year since 2016 by Thumbtack for being one of the highest-rated, most popular professionals on Thumbtack.
This article has been viewed 30,652 times.
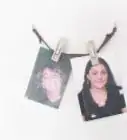
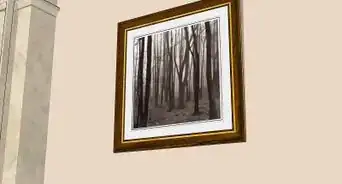
Aluminum prints are magical, colorful pieces of art printed on a shiny aluminum surface. There are many things you can use to hang your print, like metal frames, shadow mounts, or metal brackets. You may need tools, like a stud finder, nail, and level, to hang your print. Your aluminum print is a one-of-a-kind work of art, so be sure to show it off!
Steps
Selecting Your Mount or Frame Type
-
1Use a metal frame for your larger aluminum print. Metal frames are a great way to hang any metal prints sizes 20 in × 20 in (510 mm × 510 mm) and larger. The frame is typically 1.3 in (33 mm) deep. You can hang the frame to the wall using its wire hanger and a nail.[1]
-
2Purchase stand-out mounts to make your print a statement piece. Stand-outs are 3⁄4 inch (19 mm) thick, edge-banded foam board. They are mounting devices that make your print ready to hang. Stand-outs come in two sizes, either Reveal or Flush Cut. Both options come with metal hanging brackets and can be used with all sized prints.
- Reveal style stand-outs have rounded corners and are 1⁄8 inch (3.2 mm) smaller than your print. Use if your print has rounded corners.
- Flush cut stand-outs have sharp, square corners.
- You can select black edge banding for all sizes. White, silver, or maple edge banding is available for certain sizes.
- Purchase these stand-outs from a craft store, home supply store, or camera supply store.
Advertisement -
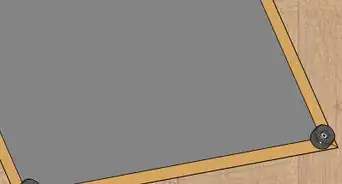
3Go with stainless steel posts to give your prints a modern look. Stainless steel posts are 3⁄4 in (19 mm) in diameter and hold your aluminum print 3⁄4 in (19 mm) off the wall. Attach the posts through 4 holes in the 4 corners of the metal print.
- To attach your print to the wall, screw the barrels of the posts to the walls, and then attach the threaded caps into the stainless steel barrels.
- You will have to select this mounting option when ordering your metal print so that your print will come with 4 holes pre-drilled for easy assembly.[2]
- Posts are available for mostly all sizing options, though they work best for sizes between 8 in × 8 in (200 mm × 200 mm) and 30 in × 40 in (760 mm × 1,020 mm).
-
4Hang your print with acrylic and metal posts for a gallery-quality look. Acrylic coverings with metal posts create a professional and finished frame, often used in art galleries. You can select plastic acrylic in 1⁄4 in (6.4 mm) or 1⁄2 in (13 mm) to protect the surface of your print.[3]
- The acrylic will arrive with pre-drilled holes for easy assembly, so be sure to select this mounting style when ordering your aluminum print.
- Acrylic and metal posts work great for metal prints 16 in × 16 in (410 mm × 410 mm) and larger, as well as panoramic sizes.


Creating a “Floating” Appearance
-
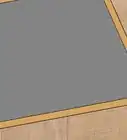
1Select float mounts to give your print a “floating” appearance. A float mount is a 5 in (130 mm) metal plate that has a hole for hanging purposes. Attach this to the back of your metal print. Your print will hang about 1⁄2 in (13 mm) away from the wall, appearing to be “floating” from it.
- Choose this if your aluminum print is 16 in × 16 in (410 mm × 410 mm) or smaller.
-
2Choose shadow mounts to create a “floating” look for large prints. Shadow mounts are larger wooden blocks that attach to the back of your aluminum print. These hold the prints flat and securely because of their larger surface. Your print will be mounted about 1⁄2 in (13 mm) from the wall to give it a “floating” effect.
- These mounts offer a finished black back, which is nice if you are viewing the print from the side.
- You can find shadow mounts at most craft stores, home supply stores, or camera supply stores.
-
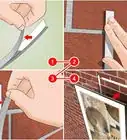
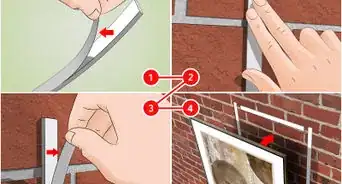
3Use metal brackets or Gatorboard Block for a floating appearance. Like the float and shadow mounts, metal brackets can be used to get a “floating” look. Metal brackets are small, flat pieces of metal used to install your print to the wall. You can use Gatorboard Block as well, which is a lightweight, black piece of foam core.[4]
- Metal brackets are recommended for prints between 12 in × 18 in (300 mm × 460 mm) and 16 in × 24 in (410 mm × 610 mm) in size, because they can support more weight.
- Gatorboard works best for metal prints between 8 in × 8 in (200 mm × 200 mm) and 20 in × 30 in (510 mm × 760 mm), though they are ideal for prints sized 12 in × 12 in (300 mm × 300 mm) and smaller. Foam core is lighter than metal, and as a result supports less weight than metal brackets.
- Purchase either metal brackets or Gatorboard at a camera supply or home supply store.
- Install the metal bracket or Gatorboard to the back of your print, then secure it to the wall with a nail or screw.


Positioning Your Aluminum Print
-
1Ensure your hanger selection is right for your print and your wall. Always make sure the mounting style you choose is appropriate for the size and weight of your aluminum print. Some mounting supplies only work for smaller, lighter prints.[5]
- Choosing the wrong mounting supplies can cause injuries to yourself, your walls, and your aluminum print
- Your metal print will often come with a hanger, which you will select when ordering your print.
- If your aluminum print does not come with a hanger, use picture wire or a metal bracket.
-
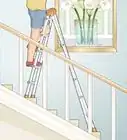
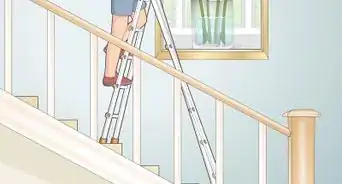
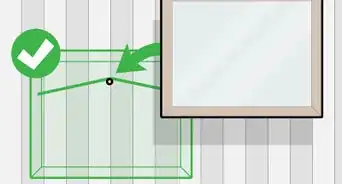
2Use a stud finder to locate a stud. Your aluminum print will weigh more than a canvas or paper print, so it is important to make sure your walls can support the weight.[6] Slide the stud finder across your wall horizontally, and look for the blinking light. When the light flashes, the stud finder has located a stud.[7]
- Hang your print from a stud in a flattering location. Position it a few inches above furniture and a few inches from the top of the wall. This will make your print look centered with your furniture.
-
3Mark the wall with a pencil after you locate a stud. This will help you easily find the stud when you are ready to install your nail. Select a spot as close to the stud’s location as possible, and make a small, light mark with a pencil. This mark indicates where you will be hanging your aluminum print.
- Make sure you can clearly see the mark.
-
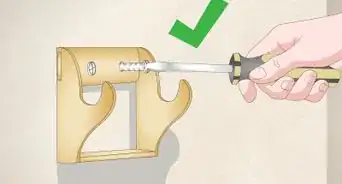
4Mount the hanger of your choice to the wall. Use either a drill or a screwdriver and secure your hanging hardware to the wall. Secure the screw in the wall so it has enough room to reach the stud deeply but also has enough room left over to hang your print.
- Most hangers will use regular wall screws. If your hanger came with separate instructions, double check them to be certain of what hardware to use.
- If you are hanging your print using metal posts, follow the installation instructions that came with your metal posts.
-
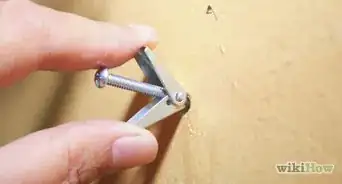
5Secure multiple screws, depending on your print. An extra screw will offer extra security to your print. You can put the screws immediately next to each other or spaced out across the location of your print.
- You can also use drywall screws or anchors for extra support. These provide a more stable hold, and you can purchase them at most hardware stores.
-
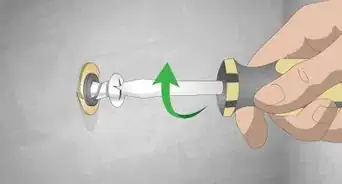
6Install your aluminum print onto the hanger. Hold the aluminum print in your hands, and slide your print either onto the nail or into the hanger you selected. Release the piece after you are sure it will fit on the hanger comfortably and securely.
- If you chose the metal posts, screw your print into the posts installed on the walls. Use your hands and twist the posts into place.
- If you used a metal bracket or Gatorboard, slide the nails into the designated hanging spots.
-
7
-
8Finished.


Expert Q&A
-
QuestionHow should I mount an aluminum print on my wall?
 Jason PhillipJason Phillip is a handyman specializing in mounting and hanging objects onto walls. With over five years of experience professionally mounting and installing objects through his company, Jason's Handyman Services, Jason's work includes working with mounting window AC units, designing art gallery walls, installing kitchen cabinets, and replacing light fixtures on drywall, brick, and plaster. He has been rated a "Top Pro" every year since 2016 by Thumbtack for being one of the highest-rated, most popular professionals on Thumbtack.
HandymanUsing a screw or nail attached to a wall stud will give the most support. but you may be able to use anchors made for the wall material.
Things You’ll Need
- Mounting supplies to fit your print
- Screwdriver or drill
- Hammer
- Wood screws or nails
- Level
- Stud finder
- Pencil


References
- ↑ http://try.whcc.com/metal-print-recommendations/
- ↑ http://try.whcc.com/metal-print-recommendations/
- ↑ http://try.whcc.com/metal-print-recommendations/
- ↑ http://try.whcc.com/metal-print-recommendations/
- ↑ https://photobox-en7.custhelp.com/app/answers/detail/a_id/1282
- ↑ Jason Phillip. Handyman. Expert Interview. 2 July 2020.
- ↑ http://www.popularmechanics.com/home/interior-projects/g15857034/how-to-hang-things-on-the-wall/
- ↑ Jason Phillip. Handyman. Expert Interview. 2 July 2020.
About This Article