This article was co-authored by David Julien. David Julien is a DIY Specialist and the Principal Owner at Nice DIY based in Quebec, Canada. David specializes in creating plans to make unique, affordable, and modern home furnishings. He holds a BA in Graphic Design from the University of Quebec Outaouais. Nice DIY uses sustainable and high-quality materials to create products that are simple to make for everyone.
This article has been viewed 101,122 times.
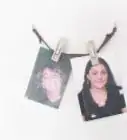
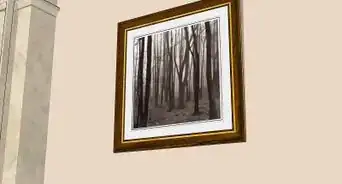
You just purchased a new painting and it’s lacking that handy hanging wire on the back of its frame. While using self-adhering strips may be a quick-fix solution, you risk the security and longevity of your artwork. Whether you are attaching a new wire to the back of a frame or trying to hang artwork from its existing wire, you can make sure to have a secure and centered hang within minutes.
Steps
Choosing the Best Hardware
-
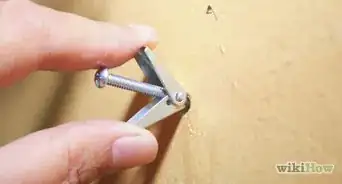
1Install steel plates to attach your hanging wire to your frame. Steel plates will provide you with the best grip on your artwork and allow you to have more flexibility when hanging heavier pieces.[1]
-
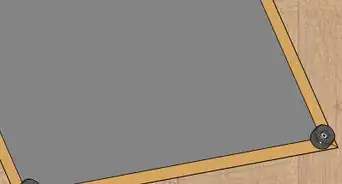
2Use a D-ring for heavy, wooden frames. D-rings are specifically constructed for the use of hanging wood frames. They are designed to rest flat against the wall giving you a more secure hook for larger, wooden frames.[4]
- When using a D-ring, you are not required to accompany it with a hanging wire.[5]
Advertisement -
3Avoid using a sawtooth hanger or screw eye, as these are unable to hold artwork securely. Although both types of hangers are popular, they have frames that are too soft to support the weight of heavier pieces.[6]
-
4Identify the break weight of the wire. Every wire available has a specific weight that it can hold without breaking and varies on the type of wire you choose. A braided, galvanized wire will be able to hold more weight than regular stainless steel wire.[7]
- Look for a wire with a break weight that's higher than the weight of your artwork.


Attaching Your Hardware
-
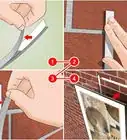
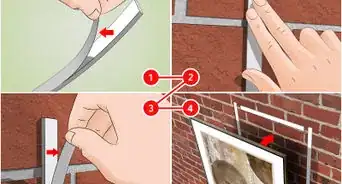
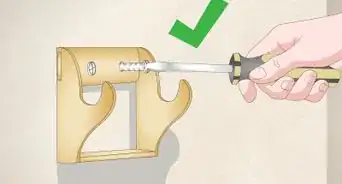
1Line up the steel plate a 1⁄2 inch (1.3 cm) from the edge of the frame. Make sure that you are lining this up with the center of the frame of either side. You will want to use either a #3 or #4 wood screw to secure the steel plate to the frame.[8]
- The size of the screw will vary depending on the thickness of the frame.
-
2Loop the wire through the middle hole of the steel plate. Make sure that you provide yourself with an even amount of excess wire on either side of the frame. You will need the excess wire to secure the two ends together.[9]
- Make sure you have left enough slack in the center of the wire to hang it with.
-
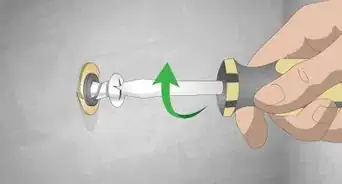
3Secure the wire using the ‘Loop and Tie’ method. Loop the middle of one wire and insert the other end in between the loop, pulling it back so that it forms another loop. Wrap, the exposed ends of the wire 3 times securely around itself within an 1 inch (2.5 cm).[10]


Hanging Your Artwork
-
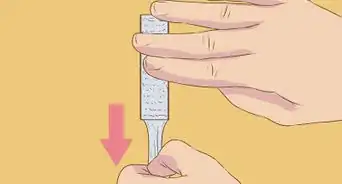
1Measure the distance from the top of your artwork to the top of the wire. Face the back of your frame and pull the center of the wire straight up so that the wire is tight. Use a tape measure to get the distance from the very top of the frame to the wire.[11] This will ensure that when you hang your artwork, it will rest in the place you want it to.[12]
- Write down this measurement for easy access to it later.
-
2Mark the place on the wall where you want the top of your artwork to sit. Hold the frame up to the wall and decide where you want to put it. Once you choose the spot, make a small mark on the wall at the top of the frame. Then, measure down from that spot the same distance that you measured on your frame.[13]
-
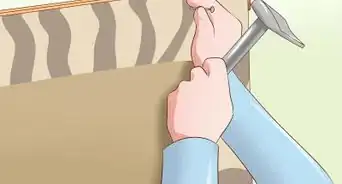
3Hammer the picture hook or nail into the wall. Make sure that the bottom of the picture hook or the tip of the nail is located directly at the top of your mark.[14] This will guarantee that once your artwork is hung, it will rest exactly where you want it.
- If the artwork is heavy, either nail it into a wall stud or place an anchor in the wall.[15]
-
4Place the wire over the edge of the hook or nail. When placing the wire on the hook or nail, make sure that it is centered. This will help to keep your artwork straight and you can always take a step back and adjust the placement as needed.[16]
- Try using a leveler to make sure the hanging artwork is straight. Put the leveler on top of the frame in order to do that. You will know it is straight when the bubble formation is directly centered on the leveler.


Expert Q&A
Did you know you can get expert answers for this article?
Unlock expert answers by supporting wikiHow
-
QuestionHow do I know where to put a nail for hanging artwork?
 David JulienDavid Julien is a DIY Specialist and the Principal Owner at Nice DIY based in Quebec, Canada. David specializes in creating plans to make unique, affordable, and modern home furnishings. He holds a BA in Graphic Design from the University of Quebec Outaouais. Nice DIY uses sustainable and high-quality materials to create products that are simple to make for everyone.
DIY SpecialistHold the artwork by the wire and measure with a tape measure from the top of the frame to the tensioned wire. Place the artwork in the desired location and mark the wall at the top center of the frame. Mark where to place your nail by starting from the mark you made, then measuring down the length of the last measurement you took.
Support wikiHow by unlocking this expert answer.


References
- ↑ https://www.artistsnetwork.com/art-techniques/framing-tips-hardware-facts/
- ↑ https://www.artistsnetwork.com/art-techniques/framing-tips-hardware-facts/
- ↑ https://www.artistsnetwork.com/art-techniques/framing-tips-hardware-facts/
- ↑ https://www.artistsnetwork.com/art-techniques/framing-tips-hardware-facts/
- ↑ https://www.artistsnetwork.com/art-techniques/framing-tips-hardware-facts/
- ↑ https://www.artistsnetwork.com/art-techniques/framing-tips-hardware-facts/
- ↑ https://www.artistsnetwork.com/art-techniques/framing-tips-hardware-facts/
- ↑ https://www.artistsnetwork.com/art-techniques/framing-tips-hardware-facts/
- ↑ https://www.artistsnetwork.com/art-techniques/framing-tips-hardware-facts/
- ↑ http://www.usg.com/content/dam/USG_Marketing_Communications/united_states/product_promotional_materials/finished_assets/seismic-technical-guide-hanger-wire-attachment-en-SC2522.pdf
- ↑ David Julien. DIY Specialist. Expert Interview. 20 January 2021.
- ↑ https://www.framebridge.com/blog/how-to-hang-art-with-a-hanging-wire
- ↑ David Julien. DIY Specialist. Expert Interview. 20 January 2021.
- ↑ https://www.framebridge.com/blog/how-to-hang-art-with-a-hanging-wire
- ↑ David Julien. DIY Specialist. Expert Interview. 20 January 2021.
- ↑ https://www.framebridge.com/blog/how-to-hang-art-with-a-hanging-wire
About This Article