This article was co-authored by wikiHow staff writer, Madeleine Flamiano. Madeleine Flamiano is an Editing Fellow at wikiHow based in Berkeley, California, as well as a Team Organizer, Copy Editor, and Movie Critic for Incluvie. Madeleine has 12 years of experience in literacy advocacy and the creative arts that span tutoring, teaching, writing, public relations, and non-profit support. She has penned seven novels under a pseudonym and loves all escapist genres, from cozy fantasies to hard-boiled sci-fi. Her professional path started at NaNoWriMo, where she scripted and hosted a series on worldbuilding. Madeleine graduated from Mills College with a B.A. in English with a concentration in Literature and a Minor in Philosophy.
There are 18 references cited in this article, which can be found at the bottom of the page.
This article has been viewed 5,091 times.
Learn more...
Commonly grown throughout Europe, blackcurrants are so fun to harvest because you can pull off bunches of them, then turn them into sauces, jams, or beverages. Are you ready to gather all the blackcurrants you can? Here, we’ll explain how to identify which blackcurrants can be pulled off their bushes, what weather is best to pick them, and how to collect clusters of blackcurrants. We’ll also share tips on how to store and serve up your blackcurrants!
Steps
When to Pick Blackcurrants
-
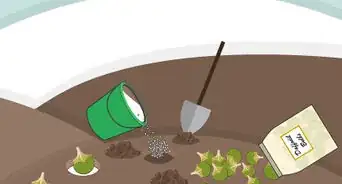
1Wait 2 years after you plant blackcurrant rootstock stems to harvest them. It takes at least 2 years for a blackcurrant bush to fully grow. In its first year, a blackcurrant bush grows into a multi-stemmed bush. In its second year and onward, blackcurrant bushes develop fruiting shoots.[1]
- Rootstock stems are “grated," or specially-designed roots that you plant instead of seeds. Farmers or home growers create rootstock stems by joining two pieces of wood together. A blackcurrant rootstock stem will grow into a bush that produces a lot more fruit.[2]
- Blackcurrant bushes are called “multi-stemmed” because they grow low on the ground and sprout lots of fruiting branches.[3]
-
2Pick blackcurrants from June to August. Blackcurrants ripen by the time summer starts, so you can harvest them during the entire season. During spring, blackcurrants are pruned so only the fruiting shoots remain. Gather your blackcurrants before fall begins and your bush enters its dormant season from October to April.[4]
- Blackcurrants that are ripe in the beginning of June are called “early varieties,” while those that aren’t ready to be picked until August are “late varieties.”
- Some blackcurrants are bred to extend your harvesting season and can be picked all the way up to September.
Advertisement -
3Harvest blackcurrants in dry weather 7 days after they turn glossy and dark purple. While you can pick blackcurrants all summer, they’ll taste best a week after ripening. Collect your blackcurrants when it’s sunny because any kind of moisture can make your blackcurrants mold quickly. The ripest blackcurrants are plump and round, so they’ll shine when the light hits them. They should look black from far away. Inspect them closely and they’ll be a deep purple.[5]
- Search for blackcurrants that are fully dark purple without any patches of light purple or red. Underripe blackcurrants are a pale green, bright red, or partially purple shade.[6]
- If it’s already early summer and you want to pick blackcurrants right away, you can feed your bushes fertilizer. This can speed up the ripening process so you can harvest your blackcurrants as soon as possible.
-
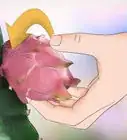
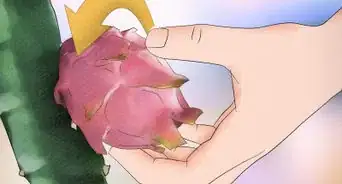
4Tug blackcurrants slightly to check for ripeness. Pull the blackcurrants off their stems in the areas of the bush you’d like to harvest from. Ripe blackcurrants should be full of juice, so they should easily fall into your hand.[7]
- If you have to give another tug and the blackcurrant still stays on its stem, it’s not ready. Give it extra time to harvest and pick it later in the season.
- Since blackcurrants grow in bunches or “trusses,” try checking the ones on the top of each cluster. They usually ripen quicker and can be pulled right off.[8]
- You can also “taste test” the blackcurrants you pull off. Pop one in your mouth and decide if it’s sweet enough. If it is, you’ll harvest the blackcurrants that look just like it.[9]


Picking Blackcurrants
-
1Choose blackcurrants that feel dry and smell fragrant. Ripe, healthy blackcurrants should swell with juice without leaking. Harvest-ready blackcurrants have a deep, distinctive scent that you can detect as soon as you walk near their bushes.[10]
- Ripe blackcurrants smell similar to grapes mixed with cherries and have strong sour notes.
-
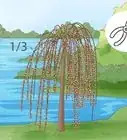
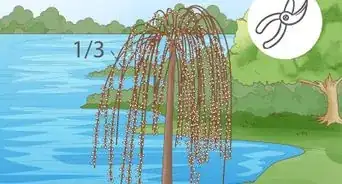
2Trim off branches with bunches of blackcurrants. Use small garden scissors to cut clusters, or “strigs," of blackcurrants off their bushes. Each branch that has fruited on your blackcurrant bush will have multiple “strigs” of blackcurrants. Hold onto a branch to keep it steady. Cut at the base of the branch so you can harvest all the bunches of blackcurrants on it.[11]
- Cutting fruited branches off of your blackcurrant bush makes pruning easier in your plant’s dormant season. You’ll already be removing most of the wood on the bush, freeing up space for new growth.
-
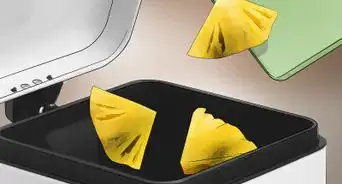
3Lay branches with clusters of blackcurrants on a flat tray. Once you cut off fruited branches, place them down on a tray that has the space to fit all of them. Line the branches next to each other instead of stacking them. That way, you’ll make sure the blackcurrants on them don’t get crushed under the weight of other branches.[12]
- Pick off blackcurrants from their clusters after you’re done harvesting the “strigs.” This saves a lot of time and you won’t have to keep standing out in dry, hot weather.
- You can keep blackcurrants on their “strigs” so they stay fresh longer. They won’t keep ripening, though.[13]
-
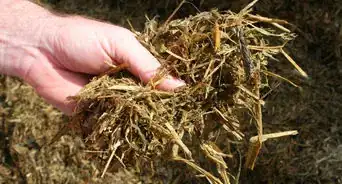
4Remove leaves and blackcurrants damaged by mildew or pests. Blackcurrant bushes are hardy, but they do get attacked by some insects. Aphids leave a sticky residue that attracts other pests, so pull off any leaves that don’t feel smooth. Currant blister aphids cover leaves with red bumps and marks, so quickly pluck those off, too. Toss away any leaves covered with a grey powder because they’ve mildewed and need to be kept away from healthy blackcurrants.[14]
-
5Cut off overgrown, diseased, twisting, or damaged stems after your harvest. Stems that have already fruited will be very productive next season. Prepare for another successful blackcurrant yield by removing all parts of the bush that could attract pests or prevent growth.[15]
- From November to December, plant new blackcurrant bushes to replace any plants that have already fully fruited and are no longer productive.


Storing & Using Blackcurrants
-
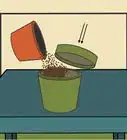
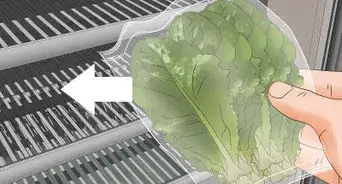
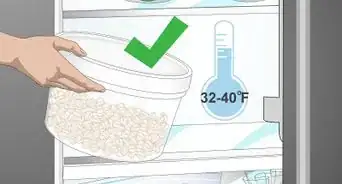
1Place blackcurrants in an airtight container lined with a paper towel. Store them unwashed until you eat them since keeping blackcurrants dry ensures they stay fresh. A paper towel will absorb any extra moisture from the blackcurrants.[16]
- Pack each container with one layer of blackcurrants. Since berries are very fragile, it’s best not to place berries on top of each other and weigh them down.
-
2Keep blackcurrants in the fridge for up to 5 days. After growing and harvesting blackcurrants, you have less than a week to eat them fresh. To keep any bacteria off of them, rinse and dry your blackcurrants when you’re ready to eat them.[17]
- Keep your stored blackcurrants in the middle of the fridge. That will make sure they stay evenly cooled. You can also put them in the crisper. That will keep "offgas" from other foods, like meats, from spoiling your blackcurrants.
- Throw out any mushy or molded blackcurrants so they don’t contaminate the rest.
- Enjoy fresh blackcurrants for a sour snack if you enjoy very tart fruit. They’re high in fiber, vitamin C, and vitamin E, so these little indulgences have a high nutritional value, too.[18]
-
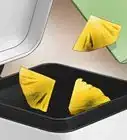
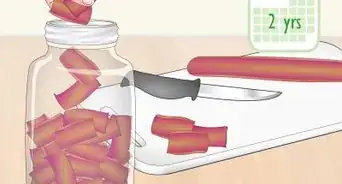
3Store blackcurrants in the freezer for up to 1 year to extend their lifespan. If you want to enjoy your summer harvest later in the year, use the “open freeze” method. Line a tray with parchment, cover it with your blackcurrants, and stick it in the freezer for 2 hours. Check if they’re hard, then pour all your frozen blackcurrants into plastic bags. After labeling and sealing them, store them in the freezer at 0 °F (−18 °C).[19]
- Frozen blackcurrants are great for smoothies, giving them a zesty flavor as well as a boost in vitamins and antioxidants.
- Blackcurrants are also popular berries for jams, sauces, and even ice creams, so keeping a frozen supply gives you a lot of options.
-
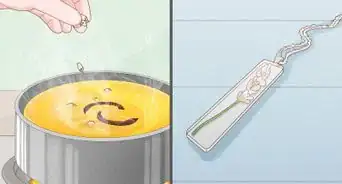
4Can your blackcurrants to use them year-round. Canned blackcurrants are a staple in many European kitchens, offering a tangy ingredient to pour over a breakfast scone or a rich dessert. Keep blackcurrant preserves in your kitchen for everyday use or holiday dishes.


Warnings
- Due to a fungus that blackcurrants spread called "white pine blister rust," which harms white pine trees, certain parts of America have banned the practice of growing and harvesting blackcurrants.
- Most recently, Massachusetts, Maine, New Hampshire, Virginia, and West Virginia have entirely banned production of blackcurrants. Some regions in Michigan and Ohio will only allow you to grow and harvest varieties of blackcurrants that are immune to white pine rust.


References
- ↑ https://aces.nmsu.edu/pubs/_h/H326/welcome.html
- ↑ https://extension.unh.edu/resource/growing-fruit-grafting-fruit-trees-home-orchard-fact-sheet
- ↑ https://www.uky.edu/ccd/sites/www.uky.edu.ccd/files/currants.pdf
- ↑ https://www.chrisbowers.co.uk/article/the-ultimate-guide-to-growing-blackcurrants/
- ↑ https://aces.nmsu.edu/pubs/_h/H326/welcome.html
- ↑ https://www.lakeforest.edu/academics/majors-and-minors/environmental-studies/ribes-americanum-(wild-black-currant)-saxifragaceae
- ↑ https://southcenters.osu.edu/horticulture/fruits/currants-and-gooseberries
- ↑ https://harvesttotable.com/how-to-plant-grow-prune-and-harvest-currants/
- ↑ https://harvesttotable.com/how-to-plant-grow-prune-and-harvest-currants/
- ↑ https://ag.umass.edu/fruit/ne-small-fruit-management-guide/currants-gooseberries
- ↑ https://catalog.extension.oregonstate.edu/em9182/html
- ↑ https://youtu.be/cxiwbiLThRA?t=78
- ↑ https://www.growfruitandveg.co.uk/how-to-grow/growing-blackcurrants
- ↑ https://www.gardenfocused.co.uk/fruitarticles/blackcurrants/blackcurrant-pest.php
- ↑ https://www.growfruitandveg.co.uk/how-to-grow/growing-blackcurrants
- ↑ https://ecologycenter.org/wp-content/uploads/2013/06/Veggie.Storage.pdf
- ↑ https://www.gardenersworld.com/how-to/grow-plants/how-to-grow-blackcurrants/
- ↑ https://www.blackcurrantfoundation.co.uk/why-blackcurrants/
- ↑ https://aces.nmsu.edu/pubs/_e/E321/welcome.html
- ↑ https://www.newscancook.com/dessert/barley-cream-with-blackcurrant-sauce
- ↑ https://whereismyspoon.co/romanian-cheese-doughnuts-papanasi/
About This Article