X
This article was co-authored by wikiHow staff writer, Hunter Rising. Hunter Rising is a wikiHow Staff Writer based in Los Angeles. He has more than three years of experience writing for and working with wikiHow. Hunter holds a BFA in Entertainment Design from the University of Wisconsin - Stout and a Minor in English Writing.
This article has been viewed 36,909 times.
Learn more...
Chaga mushrooms are fungi that grow in Russia, Korea, Canada, northern Europe, and the northern United States. The fungus is medicinal and contains antioxidants and minerals that help regulate the immune system and reduce inflammation. You can find and collect chaga in the wild yourself if you too want to experience the health benefits!
Steps
Part 1
Part 1 of 4:
Locating Chaga
-
1Harvest chaga in the late fall or winter. Wait until temperatures are consistently below 5 °C (41 °F) for at least 3 weeks. At this time, the trees that chaga grow on have gone dormant and the mushroom has the peak amount of nutrients.
- In the summer, the chaga will have the most water content and all of the nutrients will be flushed out until the following fall.
-
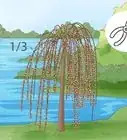
2Look for birch trees in cold northern areas. Identify birch trees by their curly, paper-like bark. Chaga is parasitic and grows exclusively on living trees in birch forests in the northern hemisphere.
- Look for paper birch, yellow birch, cherry birch, or heart-leaved birch when you look for chaga.
Advertisement -
3Find large knobby growths on the trunk that resemble black charcoal. You’ll typically find the chaga shaped like domes or cones, but they grow in all shapes and sizes on the trees. Look for dark black knobs with cracks running through it.
- The exterior of the chaga mushroom is also known as the sclerotium.
- Chaga can grow anywhere on the trunk of the tree, so consider bringing a ladder for out of reach places.
-
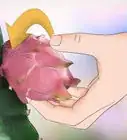
4Cut open the growth with a knife to see if is rust-colored inside. Use a knife to cut off a small portion of the exterior. The inner part of the chaga will be softer than the exterior and have a yellow or brown color if it’s healthy.


Advertisement
Part 2
Part 2 of 4:
Removing Chaga from the Tree
-
1Use a hatchet or a large outdoor knife to harvest chaga. You need a sharp tool to puncture through the hard exterior of the chaga. A small hatchet or a larger machete-type knife will work best to break through the chaga.
- You can purchase a hatchet or outdoor knife at any outdoors specialty stores or online.
-
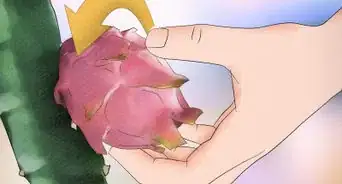
2Collect chaga that has grown larger than a grapefruit. Make sure the chaga is large enough so you don’t damage the tree once you start chopping it. This ensures that you are able to leave enough chaga for the tree to survive and so the chaga can regrow.
- Put your hand on the chaga to see if you feel any tree bark on your fingertips. If you do, it’s best to leave the chaga to grow for a few more years.
-
3Chop the chaga from the side of the growth. Firmly hold the ax in your dominant hand and swing near the outer edge of the chaga. It will take a few strong blows from the ax to remove the chaga. Let the chaga fall to the ground before you put it in a plastic bag.[1]
- Avoid hitting near the base of the tree so you don’t cause any damage.
-
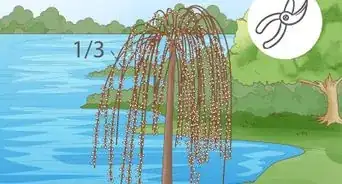
4Leave at least 20 percent of the chaga on the tree. Chaga can regrow after it’s been removed, so make sure to leave a portion of it attached. This helps the tree and chaga survive longer so you can continue to harvest from it!
- If a tree has multiple chaga growths, leave at least 1 of them completely intact.


Advertisement
Part 3
Part 3 of 4:
Drying and Storing Chaga
-
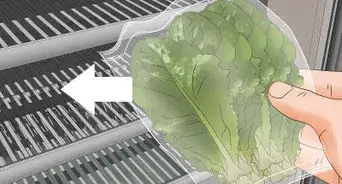
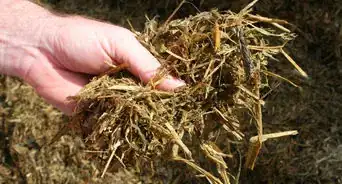
1Remove any tree bark from your chaga. Gently clean the exterior of the chaga with your hands or a soft-bristled brush. Make sure there are no insects or residual tree bark left on the chaga, or else it could develop mold.
-
2Break chunks of chaga into pieces 1 by 1 in (2.5 by 2.5 cm) or smaller in size. Larger pieces of chaga will take longer to dry out and could possibly develop mold. Use a knife to cut the chaga into pieces so they will dry out more efficiently.
- The pieces do not need to be uniform in shape, but they should be relatively similar in size.
- You can cut the pieces thinner if you want them to dry more quickly.
-
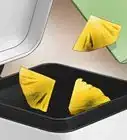
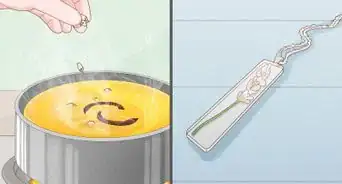
3Place the pieces on a tray on a sunny windowsill to dry them. Try to use a grated tray so air can flow on all sides of the chaga pieces. Leave them on the windowsill for 3 days until they feel hard and dry.
- Do not use the oven to dry out mushrooms.
- If you have access to a dehydrator, set the temperature to 120 °F (49 °C) or lower to dry the mushrooms.
-
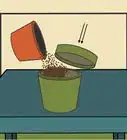
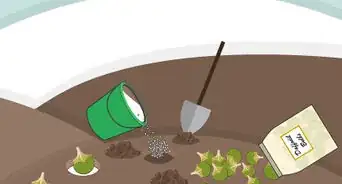
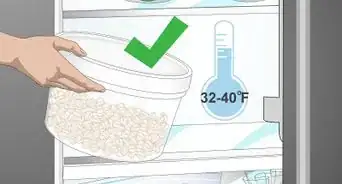
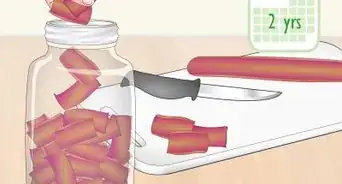
4Store the pieces in an airtight glass jar in a dark place for up to 1 year. Dump all the pieces of the chaga into the jar and keep it in a cupboard or closed pantry. Chaga can be stored throughout the year.[2]
- Most times, 1 grapefruit-sized portion of chaga will be enough for a full year unless you use it multiple times a day.
- The chunks can be ground into a powder with a mortar and pestle after they have been dried.


Advertisement
Part 4
Part 4 of 4:
Making Chaga Tea
-
1Boil water in a medium pot of water and drop a handful of chaga in. Use up to 1 litre (0.26 US gal) of water in a pot. Put 1 handful of dried chaga, or about 10 pieces, into the pot so the nutrients can steep.
-
2Reduce the pot to medium heat and simmer the chaga for 1 hour. The water will become a dark reddish-brown color as it steeps. The longer you let the chaga steep, the more bioactive ingredients will be extracted.
- Cover the pot if you want to contain heat. This will make chaga steep faster.
-
3Strain the tea into a mug. Use a strainer or colander over your mug to catch the chaga as you pour the tea into the mug. Add honey or maple syrup to taste if you want to sweeten the tea.
- You could also remove the chaga pieces with a slotted spoon and place them on a paper towel.
-
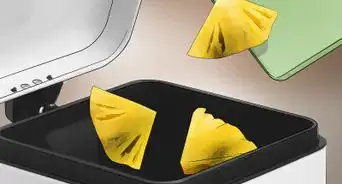
4Place the chaga pieces on a tray to dry out and reuse them. Put the tray in a warm area with good air flow to let them dry. The chaga can be used at least 3 times to make tea before you dispose of it.[3]
- Store used chaga in a separate container or sealed bag so it does not mix with unused chaga.


Advertisement
Warnings
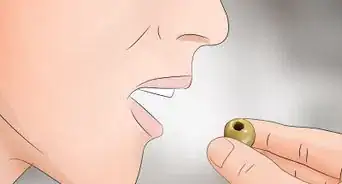
- Chaga can lower blood sugar, so consult with your doctor before taking it if you have diabetes or glucose-related conditions.⧼thumbs_response⧽
Advertisement
Things You’ll Need
Removing Chaga from the Tree
- Hatchet
- Outdoor knife
- Plastic bags
- Ladder (optional)
Drying and Storing Chaga
- Tray
- A sunny, dry place like a windowsill
- Resealable glass jar
- Dehydrator (optional)
- Mortar and pestle (optional)
Chaga Tea
- Stove
- Medium pot
- Mug
- Strainer


References
About This Article

Hunter Rising
wikiHow Staff Writer
This article was co-authored by wikiHow staff writer, Hunter Rising. Hunter Rising is a wikiHow Staff Writer based in Los Angeles. He has more than three years of experience writing for and working with wikiHow. Hunter holds a BFA in Entertainment Design from the University of Wisconsin - Stout and a Minor in English Writing. This article has been viewed 36,909 times.
Co-authors: 2
Updated: December 23, 2020
Views: 36,909
Categories: Harvest and Storage
Advertisement