wikiHow is a “wiki,” similar to Wikipedia, which means that many of our articles are co-written by multiple authors. To create this article, volunteer authors worked to edit and improve it over time.
There are 11 references cited in this article, which can be found at the bottom of the page.
This article has been viewed 6,175 times.
Learn more...
A woody and strong-scented herb, common sage (salvia officinalis) is an immensely popular addition to many herb gardens. It’s known for being both easy to grow in a number of climates and, as part of the mint family, a delicious herb to use in the kitchen. You can easily save both time and money by harvesting home-grown sage directly, and because it’s an evergreen herb in most zones, you’ll be able to harvest all the way into fall! Check out the tips below and learn exactly how to harvest sage - including how to protect the plant from damage and promote further growth down the line.
Steps
Harvesting the Sage
-
1Harvest in the morning, after the dew dries. To get the best harvest you can, wait until the initial moisture on the sage plant is gone - but do it before the midday sun! This is when the oils on the plant’s leaves are most potent, and you’ll get the best flavor out of your harvest.[1]
- Sage is best harvested before the shrub starts to flower. To give your plant some extra attention, deadhead the flowers as they bloom; this clears the way for more healthy leaves.[2]
- Similarly, while sage is typically an evergreen plant that can be harvested for the majority of the year, you’ll get the best flavor from fresh growths in the summer months.[3]
-
2Pinch the sage leaves off with your fingers to harvest smaller amounts. Gathering sage in smaller amounts is an easy task: easily harvest individual leaves by pinching them off between your thumb and forefinger, right above the spot on the stem where two leaves meet. [4]
- Handle your sage plant gently as you harvest to avoid bruising it.
- By pinching off a few leaves at the stem, you’re actually encouraging the sage plant to branch, which will give you a fuller shrub in the future!
Advertisement -
3Use scissors to harvest larger amounts of sage. If just a few leaves won’t cut it and you need a larger helping of sage, then gather up big bunches by cutting the top 6 inches (15 cm) of stem off of young shoots. To do this, use either a clean pair of scissors or pruners.[5]
-
4Harvest only what you’re using that day, if possible. Since the flavor and scent of an herb begins to deteriorate immediately after it is harvested, you’ll find it easier to pick individual leaves of sage on an as-needed basis.[6] However, when you need a bigger harvest, your sage can be preserved and stored in several ways, including hang-drying and freezing.
- It is possible to harvest both young and mature sage leaves, but keep in mind that the younger leaves will have a better flavor and aroma when used in cooking.
-
5Only harvest up to a third of the sage shrub at any one time. Sage is a perennial herb; this means that if you take too much from your sage plant at once, it won’t have enough time to regrow before the winter months. Give your plant some breathing room after taking a harvest![7]
-
6Harvest lightly the first year after planting. Another way to show your sage plant some extra care (and guarantee it a long life) is to limit what you harvest for the first year of the plant’s life. Take as little as you can during this time, and give your sage plant the time it needs to grow fully and give you a more plentiful harvest in the coming years.[8]
-
7Do two larger harvests per season to encourage growth. The harvesting season for sage plants spans from spring to early fall, and you can use scissors or pruners to harvest up to a third of the plant each time you do this. Even if you stick to our earlier recommendation and normally take as much sage as you need for that day, make a point to do a couple of larger pruning sessions: one in the spring, and another in the summer.[9]
- Periodic larger harvests of your sage will ensure a more abundant, healthy shrub in the future.
-
8Cut back the sage stems at the end of each season. While sage plants are evergreen and grow for longer than other plants, it’s still best to adhere to a seasonal harvesting schedule. At the end of harvesting season (typically late September or early October), give your sage one more pruning, trimming away the older growths on the top thirds of the stems and removing no more than half of the shrub altogether.[10]
- Stop harvesting the shrub during mid-fall so that it has a chance to prepare for the winter months.
- Begin harvesting from the plant again in the spring, once leaf production has started again.
-
9Use the cuttings to get more sage plants. You don’t have to buy more sage; rather, you can grow it from the cuttings that you harvest. To do this, cut off a stem about 3 inches (7.6 cm) from the top, stripping the lowest pair of leaves from the stem. Apply a rooting hormone to the cut end, plant the cutting in a pot filled with potting soil, and place it in a spot where it can get plenty of sunlight.[11]
- Rooting hormone comes in either liquid or powder form, and it’s essentially a compound of chemicals (commonly made with talc powder, or water-soluble salts) that encourages the speedy growth of roots when applied to a plant stem. Common brands you can buy for your garden include Hormex, Hormodin, and Dip ‘n Grow.[12]
- Once planted, the stem will take root and begin to grow within six weeks.
- If you do this in the fall, wait until the following spring to move the new sage shrub into your garden.


Drying and Storing the Sage
-
1Rinse and dry off the collected sage. Before you begin to dry out the sage, make sure that your leaves are clean by rinsing them under running water and removing any dead or damaged parts that you see in the process. Then, dry them with paper towels to remove excess moisture.[13]
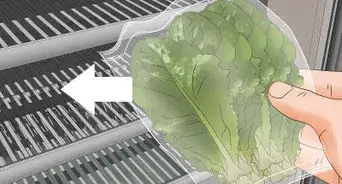
- If you don’t have the means or the time to begin using the sage right away, place the cut stems in a glass with an inch of water and cover with a loose plastic bag.
- So long as you change the water in the glass each day, sage cuttings can last for up to a week before they need to be used or discarded.[14]
-
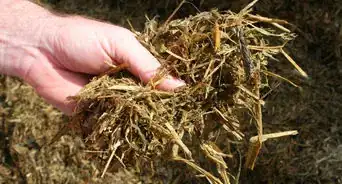
2Dry your sage by hanging. This is the first of a couple commonly used sage-drying techniques for you to choose from! Tie up the stems of your sage in bunches using twine or a rubber band, placing the tie closer to the cut ends of the stems, and hang them with the leafy ends down until they are fully dried. Make sure the space you hang them in is well-ventilated and warm, but out of the sun. Depending on their condition, a shed, garage, or attic could be the ideal spot to do this.[15]
- Before you hang your sage bundles, place each one inside a small paper bag leafy-ends first, and cut out the bottom of the bag or cut holes in the sides to keep the sage ventilated. This keeps your sage from collecting dust or getting contaminated while it hangs.[16]
- Avoid hanging it above a stove, as odors coming from it can damage the integrity of your sage.
- While effective, this method of drying normally takes 2-3 weeks, up to a month, to complete.
-
3Dry your sage in the oven. This is a good method to use if you have individual leaves instead of bundles. Place the sage leaves on a cookie sheet, arranging them so that they don’t overlap, and slide the tray into the oven. Set your oven at its lowest heat possible, and leave the door to the oven open slightly so that the interior temperature stays around 90–110 °F (32–43 °C).[17]
- Do not leave the oven door open if you have a gas oven; open every 5 minutes to vent the heat instead.
- Check up on your sage frequently, and expect the drying process to take roughly 3-4 hours.
- Only do this if you can keep a close eye on the sage and the temperature within the oven, as too much heat will cause the sage leaves to lose their flavor.
-
4Store the sage in an airtight container. Once your sage is fully dried, it will easily crumble for storage. Place your dried herbs in an airtight and vapor-proof container, and store them somewhere cool, dark, and dry. Cupboards and pantries are ideal storage spots for this.[18]
- Appropriate containers for storing dried sage include jars, ziplock bags, or tupperware containers.
- Fully dried sage can be stored in this way for up to a year.
- While crushed sage can be easier to store, whole dried leaves can keep their flavor for even longer.
-
5Freeze your fresh sage for later use. If you need to save pantry space or don’t want to dry your sage, store it in the freezer instead. Chop up all of the sage leaves and place them in an ice cube tray filled with water, before putting the tray back in the freezer.[19]
- When the sage-filled ice cubes have fully frozen, remove them from the trays and each one in plastic bags, which should also be stored in the freezer.
- From there, grab sage cubes for use in the kitchen as you need them.


References
- ↑ https://ohioline.osu.edu/factsheet/hyg-5520
- ↑ https://web.extension.illinois.edu/herbs/tips.cfm
- ↑ https://www.rhs.org.uk/herbs/sage/grow-your-own
- ↑ https://www.thekitchn.com/everything-you-need-to-know-about-growing-sage-221035
- ↑ https://www.youtube.com/watch?v=rm24CgBeD1Q&t=82s
- ↑ https://ohioline.osu.edu/factsheet/hyg-5520
- ↑ https://web.extension.illinois.edu/herbs/tips.cfm
- ↑ https://www.gardenfocused.co.uk/herbs/sage.php
- ↑ https://www.thekitchn.com/everything-you-need-to-know-about-growing-sage-221035
- ↑ https://www.gardenfocused.co.uk/herbs/sage.php
- ↑ https://www.southernliving.com/garden/tips-for-growing-sages
- ↑ https://www.canr.msu.edu/news/rooting_hormones_improve_uniformity_among_vegetative_cuttings
- ↑ https://web.extension.illinois.edu/herbs/tips.cfm
- ↑ https://ohioline.osu.edu/factsheet/hyg-5520
- ↑ https://www.four-h.purdue.edu/foods/Drying%20herbs%20frame1.htm
- ↑ https://web.extension.illinois.edu/herbs/tips.cfm
- ↑ https://extension.psu.edu/drying-herbs
- ↑ https://extension.psu.edu/drying-herbs
- ↑ https://web.extension.illinois.edu/herbs/tips.cfm