This article was co-authored by David Pew. David Pew is a Professional Tailor and the Owner of Sew Generously based in Seattle, Washington. With over a decade of experience, David specializes in bespoke tailoring and alterations. He uses his experiences, skills, and eye for detail to produce the highest quality of products.
This article has been viewed 13,678 times.
Hemming knit fabrics can be a little tricky. Knits are often stretchy, which can make them prone to puckering and uneven edges while sewing. Pins and needles can also easily poke holes in them. To ensure that your hem looks neat and professional, choose the best stitch type and needle for hemming your project. Then, use some special sewing techniques to keep the hem straight as you sew.
Steps
Choosing a Hem Type
-
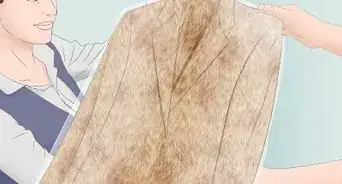
1Consider leaving a raw edge. You may be able to skip hemming altogether in some cases. However, keep in mind that this does not work for all knit fabrics, and some people simply dislike the look of an unhemmed garment. For example, if you are making a jersey knit dress or skirt, then you can often get away with skipping the hem.[1]
- To see if your fabric will hold up against a hem-free finish, try gently stretching the raw edge of the fabric to see if it frays or unravels when you do so. If it does, then skipping the hem may not be a great idea for your fabric. If it holds up, then you can probably skip the hem.
-
2Create a simple straight stitch hem. The straight stitch is a common one for hemming fabrics. If you just want a simple, non-decorative stitch, then this is perfect. Set your machine to the straight stitch setting and sew along the folded hem about ¼” (0.6 cm) from the raw edge.[2]Advertisement
-
3Try a zig zag hem. The zig zag stitch is a functional and decorative stitch that can add some flair to your knit fabric hem. If you want the hem to be a little interesting looking, then try using the zig zag setting on your sewing machine when you sew the hem.[3]
- Sew the hem about ¼” (0.6 cm) from the raw edge of the folded fabric.
-
4Do a rolled hem. A rolled hem is also popular for hemming knits and other delicate fabrics. To do a rolled hem, you will need to use a serger. Your serger should have a rolled hem setting that you can switch on and then sew along the raw edge of your knit fabric to create the rolled hem.[4]
- If you do not have a serger, then you can also try sewing a rolled hem by hand. However, keep in mind that this can take a long time if the hem is long.
-
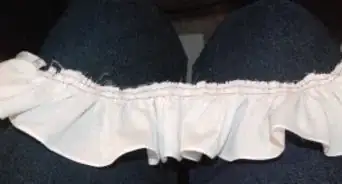
5Go with a lettuce hem. You can also try a lettuce hem, which is a variation of the rolled hem. The lettuce hem is a ruffled hem along the raw edge of the fabric and it looks nice as a hem for skirts and other items that you want to have a frilly finish. You can do a lettuce hem the same way you do a rolled hem, but you will need to stretch the fabric slightly as you sew.[5]
- Gently stretch the edges of the fabric as you sew. Do not stretch to the point of extreme tension, just stretch the fabric slightly to create the ruffling effect.
- You will need a serger to do a lettuce hem as well.


Selecting the Best Needle
-
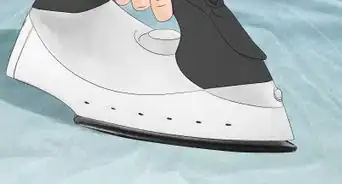
1Use a universal needle. You can use a universal needle to sew a hem for a knit fabric. Universal needles are designed to work well with a variety of different fabrics, including knits. Most sewing machines come with these needles already installed. If you don’t want to bother with a special needle, then just use a universal needle.[6]
- You can use any stitch with a universal needle.
-
2Go with a ballpoint needle. Like ballpoint pins, a ballpoint needle goes in between knit stitches rather than through them. This type of needle is perfect for sewing knit fabrics and it will help to prevent holes in the fabric.[7]
- You can use this needle with the same types of stitches you would use with the universal needle.
-
3Try a double needle. Double, or twin, needles are just what they sound like. These are needles that have two sharp ends instead of one. They move in tandem to sew a double seam along the edges of fabrics. If you want to create a double seam for your knit project, then you might consider using a double needle.[8]
- Use the straight stitch setting with a double needle.


Keeping the Hem Straight While You Sew
-
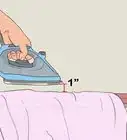
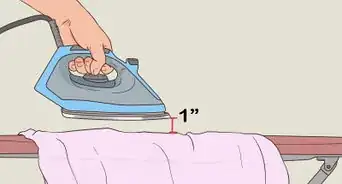
1Press the hem first. Taking a few minutes to iron the hem flat before you sew can help to improve the look of your finished project and make sewing the hem easier. Fold over your hem fabric and iron it flat.[9]
- You may also consider pressing your hem after you finish sewing it. This can be especially helpful if you accidentally stretch out a portion of the fabric and want to shrink it slightly.
-
2Use interfacing. Interfacing is not required for hemming knit fabrics, but it can help to create a more structured hem.[10] It can also help to ensure that your hem is straight by providing a guide for you to sew over.[11]
- To use interfacing, get some interfacing tape in the size of your choice. For example, if you want a ½” (1.3 cm) hem, then you could get ½” (1.3 cm) interfacing tape.
- Then, cut he interfacing to the length needed for your hem and lay it down on the wrong side of the fabric so that it is about ¼” (0.6 cm) from the raw edge.
- Fold the fabric and interfacing tape over.
- Sew just along the edge of the interfacing tape to create the hem.
-
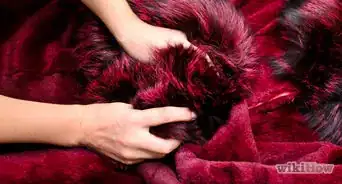
3Use ballpoint pins to hold the hem in place while you sew. Pins are essential for most sewing projects, and sewing with jersey is no exception. However, regular pins may poke holes in your fabric. To avoid this, you can use ballpoint pins. Pin your hem to hold it in place and to keep the edges even as you sew.[12]
- Ballpoint pins have rounded tips instead of the pointed tips that regular pins have, so they go in between the stitches of knits rather than poking holes in them.
-
4Hold the fabric without stretching it. As you sew your hem, be careful not to stretch it. Stretching the fabric may result in puckering or an uneven hem. Keep the fabric straight, but do not pull on it as you sew.[13]
- To avoid unintentional pulling, hold the fabric in your lap or place it on the table as you sew. Do not allow it to hang off the table and touch the floor because this will cause the fabric to stretch.


Expert Q&A
-
QuestionHow do you hem a prom dress fast?
 Kpoene Kofi-BruceKpoene Kofi-Bruce is a tailor, couture wedding gown designer, and the Creative Director of Mignonette Bridal and Ette the Wedding Tailor in Chicago, Illinois. With nearly two decades of experience as a wedding gown designer, small business owner, and vintage sewing enthusiast, Kpoene specializes in wedding gown design and the social history of wedding dresses. She received a BA in Creative Writing from Middlebury College and studied the business of fashion at the Fashion Institute of Technology. She is also a graduate of the Goldman Sachs 10KSB program and the Chicago Fashion Incubator and has written about wedding fashion for Jezebel, Catalyst, the Sun Times, and XO Jane.
Couture Bridal DesignerHave the wearer stand on a tall box, platform, or table wearing the shoes they plan to wear with the prom dress. Have them look straight ahead as you pin. Going layer by layer, pin horizontally around the hem where the fabric touches the floor (or where the client wants the dress to sit). Double-check with a ruler or measuring tape and the end to ensure it is even.
Things You'll Need
- Sewing machine
- Thread
- Sewing machine needle
- Interfacing (optional)
- Ballpoint pins


References
- ↑ https://oliverands.com/community/blog/2017/03/how-to-hem-everything-knit-fabrics.html
- ↑ https://oliverands.com/community/blog/2017/03/how-to-hem-everything-knit-fabrics.html
- ↑ https://oliverands.com/community/blog/2017/03/how-to-hem-everything-knit-fabrics.html
- ↑ https://oliverands.com/community/blog/2017/03/how-to-hem-everything-knit-fabrics.html
- ↑ https://oliverands.com/community/blog/2017/03/how-to-hem-everything-knit-fabrics.html
- ↑ https://www.seamwork.com/issues/2015/06/knits-without-a-serger
- ↑ https://www.seamwork.com/issues/2015/06/knits-without-a-serger
- ↑ http://www.made-by-rae.com/2012/02/hemming-knits-6-ways-to-beat-those-pesky-puckers/
- ↑ http://www.made-by-rae.com/2012/02/hemming-knits-6-ways-to-beat-those-pesky-puckers/
- ↑ David Pew. Professional Tailor. Expert Interview. 5 January 2021.
- ↑ http://www.made-by-rae.com/2012/02/hemming-knits-6-ways-to-beat-those-pesky-puckers/
- ↑ https://www.seamwork.com/issues/2015/06/knits-without-a-serger
- ↑ https://www.seamwork.com/issues/2015/06/knits-without-a-serger
About This Article