X
This article was co-authored by wikiHow staff writer, Travis Boylls. Travis Boylls is a Technology Writer and Editor for wikiHow. Travis has experience writing technology-related articles, providing software customer service, and in graphic design. He specializes in Windows, macOS, Android, iOS, and Linux platforms. He studied graphic design at Pikes Peak Community College.
This article has been viewed 29,092 times.
Learn more...
Do you want to add an image within a shape in Adobe Illustrator? It can be a really cool effect to have an image inside of a shape or even text. You can easily do this by using a clipping mask. This wikiHow teaches you how to insert an image into a shape in Illustrator.
Steps
-
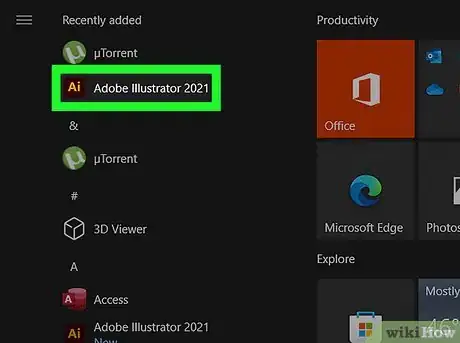
1Open or create a new file in Adobe Illustrator. Adobe Illustrator has a icon that resembles a square with a yellow "Ai" in the middle. Click the Adobe Illustrator icon on your desktop, Windows Start menu, or Applications folder (on Mac) to open Adobe Illustrator. Then click New on the title page to create a new file and select the properties of your document. Click Open to open an existing file and select the fie you want to open.
- You can open or create a new file at any time in Adobe Illustrator by clicking File followed by New or Open.
-
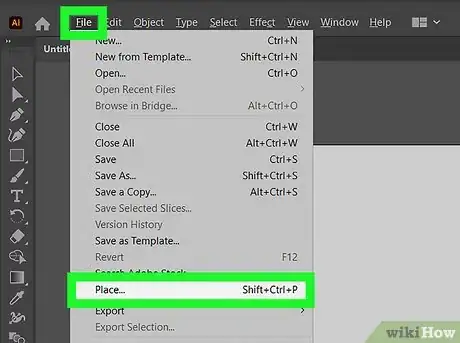
2Place an image into your Illustrator file. This is the image that will be inserted into a shape. You can use any image file type. Use the following steps to place an image:
- Click File in the menu bar at the top.
- Click Place.
- Select an image.
- Click Place.
- Click and drag the image to move it to where you want it to go.
Advertisement -
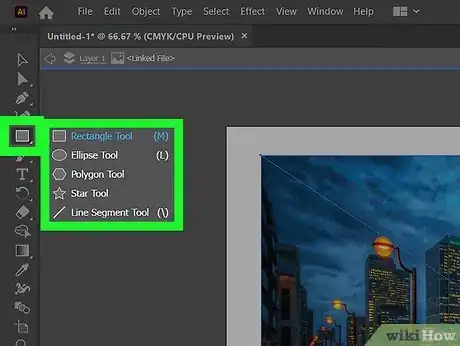
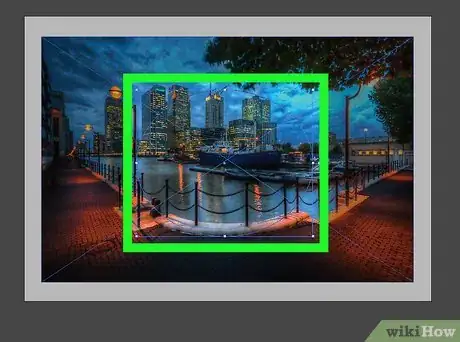
3Create a shape over the image. This shape will be used to apply a clipping mask to the image. You can create a shape using the one of the shape tools in the toolbar, which is to the left by default. You can also use the Pencil tool, Pen tool, or Brush tool to draw a shape freehand. Alternatively, you can use the text tool to place an image inside text. Be sure to use a nice, thick font.
- To select a shape tool, click and hold the rectangle tool, which has an icon that resembles an rectangle in the toolbar. This displays a sub-menu with additional shape tools. Click the shape tool you want to use. Click and drag over the image to create a shape. Hold Shift while clicking and dragging to keep the shape proportional.
- The shape must be on top of the image in order to create a clipping mask. If the image is on top of the shape, click the image with selection tool to select it. Then click Object in the menu bar at the top. Click Arrange followed by Send to Back to move the image behind the shape.
-
4Select the shape and copy it. To do so, click the icon that resembles a black mouse cursor in the toolbar to the left, or press "V" on the keyboard to select the selection tool. Then click the shape. Press Ctrl + C (or Command + C on Mac) to copy the shape.
- Make sure you don't copy the image along with the shape.
-
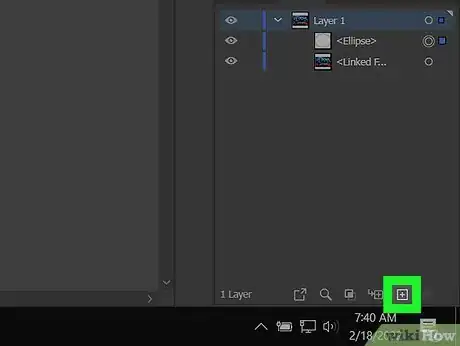
5Create a new layer. To do so, open the Layers panel to the right. It has an icon that resembles a square on top of another square. Then click the icon that resembles a sheet of paper at the bottom of the Layers panel to create a new layer above the current layer with the shape and image.
- If you do not see the Layers panel, click Window in the menu bar at the top and then click "Layers" to display the Layers panel.
-
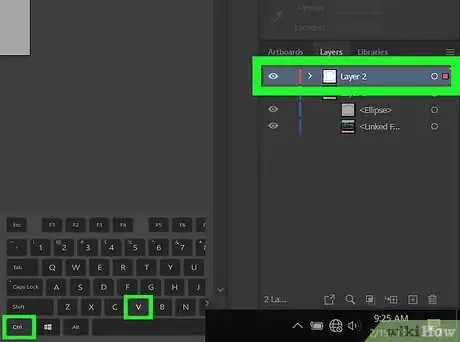
6Paste the shape in the layer in the exact same place. This copy will be used to add a border around the shape once a clipping mask has been applied. You want to paste the layer into the new layer in the exact same location. To do so, make sure the new layer is selected in the Layers panel. Then press Ctrl + Shirt + V (or Command + Shift + V on Mac) to paste the shape into the new layer.
-
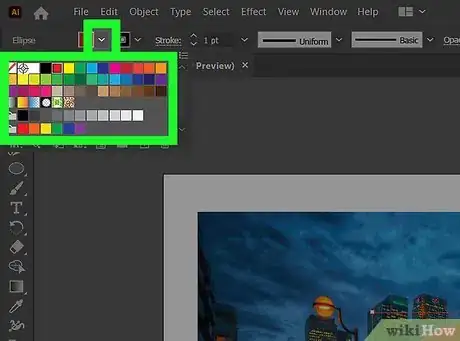
7Add a stroke around the shape in the top layer. To do so, make sure the top layer is select. The click the shape in the top layer using the selection tool. Use the box that resembles a colored border at the top of the screen or in the toolbar to the left. Then select a color. This adds a border around the shape.
- Additionally, you can use the drop-down menus next to "Stroke" in the panel at the top fo the screen to adjust the border size and style.
-
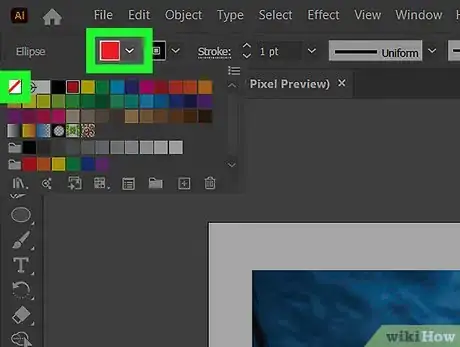
8Turn off the fill color for the shape in the top layer. To do so, click the shape in the top layer to select it. Then click the colored box at the top of the screen or at the bottom of the toolbar to the left. Then click the white box with a red line through it. This turns off the fill color.
- If you turn off the bottom layer by clicking the eyeball icon next to it in the Layers panel, you should see an outline of the shape with no color inside the outline.
-
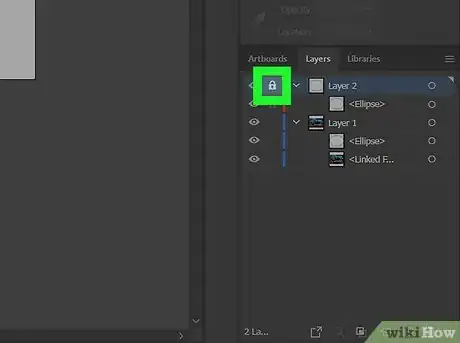
9Lock the top layer. To do so, click the blank box next to the eyeball icon next to the top layer in the Layers panel. You should see an icon that resembles a padlock in the box. This indicates the layer is locked and prevents you from accidently altering the top layer.
-
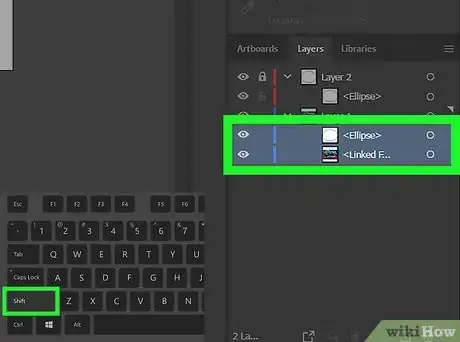
10Select the image and shape in the bottom layer. To do so, make sure the layer with the image and the bottom shape is selected. Then hold "Shift" and click the image, followed by the shape. This select both objects.
- Alternatively, you can you click and drag over the shape and image with the selection tool to select both.
-
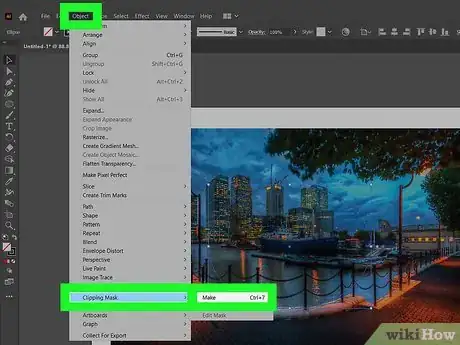
11Apply a clipping mask. This will crop all parts of the image outside the shape. The shape in the top layer will provide a border around the image inside the shape. Make sure both the shape and the image are selected in the bottom layer and use the following steps to apply a clipping mask:[1]
- Click Object in the menu bar at the top.
- Click Clipping Mask.
- Click Make.
Advertisement
References
About This Article
Advertisement
