X
wikiHow is a “wiki,” similar to Wikipedia, which means that many of our articles are co-written by multiple authors. To create this article, 15 people, some anonymous, worked to edit and improve it over time.
This article has been viewed 419,541 times.
Learn more...
Quicker and less expensive to install than just about any other type of heating, electric baseboard heating might be the right choice for a variety of heating needs. While 100% efficient, the cost for KW/h of electricity in your area, electric heat is often the most expensive way to heat a space.
Steps
-
1Determine room size in square feet by multiplying length by width in feet.
-
2Determine window type and number. Older single pane windows transmit (lose) heat more quickly than newer double or triple glazed windows which are far better at isolating different air temperatures on either side.Advertisement
-
3Determine number of walls of the space that are exterior walls.
-
4Determine if the exterior walls and space directly above and below the room are insulated. A space below an attic with insulated floors or located above a basement are considered insulated.
-
5Determine if any doors open to the outdoors from this room.
-
6Calculate a baseline for total watts of electric heat required to heat the space. Most spaces require 10 watts per square foot of space for homes built since the 1970s. A 12 foot (3.7 m) by 12 foot (3.7 m) room has 144 sq/ft. Assuming a ceiling height less than 8 feet (2.4 m), this room should be heated comfortably with 1500 watts of heat. 1500 watts of heat is a total of 6 feet (1.8 m) of heat, assuming "standard density" baseboard heaters are selected for installation. Standard density heat is rated at 250 watts per foot. There is one other type of heat called "high density" (HD). HD heat has more than the 250 watts per foot that the standard density heat has, but does not heat quicker nor is operated for any less. HD merely provides more heat with a smaller footprint.
-
7Determine how much (if any) more watts of heat over the baseline watts to install. All of the considerations above (windows type and number, insulation, etc.) will come into play when purchasing heaters. The baseline wattage should be increased by up to 100% if the room suffers from all of the considerations. It is important to note that adding additional heaters will not increase the cost of operation. Additional heaters allow the room to maintain desired temperature during the colder days, as opposed to having the minimum heat (or baseline) installed. If only the baseline calculated amount of heat were installed, it would not be able to replace the heat as quickly as it was lost due to lack of insulation, single pane windows, etc. A room that ideally requires 1500 watts of heat might need as much as 3000 watts if it suffers from all the issues listed above. This applies to ALL types of heat (and cooling in the summer for that matter), regardless of fuel type or technology. Insulation is inexpensive over the long run.
-
8Decide if / or how to break up the heaters. The heat can be installed one of two ways. In the example room, install (1) 1500 watt heater or install 2 or more heaters totaling 1500 watts. The latter method can be employed for rooms at the corners of a building - having 2 exterior walls. Typically, heaters are installed below windows, where most of the heat loss occurs. Adding more watts of heat will allow the room to reach the desired temperature faster than if no additional watts of heat were installed.
-
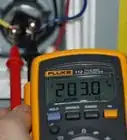
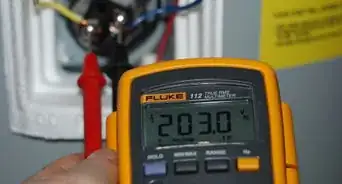
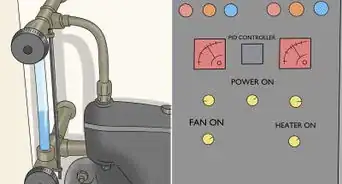
9Determine size and number of circuits required to serve the heating load. Installing 240 volt heaters is best as wire sizes and number of circuits are significantly reduced. The National Electrical Code allows a 15 amp circuit to carry up to 12 amps, and a 20 amp circuit may carry up to 16 amps. The total watts allowed to be connected can be determined simply by multiplying volts by amps only because this is a purely resistive AC circuit (AC wattage calculations are much more complex for inductive and capacitive reactant circuits that exist in appliances and electronics). The 15 amp circuit is 240 x 12 = 2880 watts. The 20 amp circuit is 240 x 16 = 3840 watts. This is a maximum of 14 and 19 feet of 240 volt, standard density heat, respectively.
-
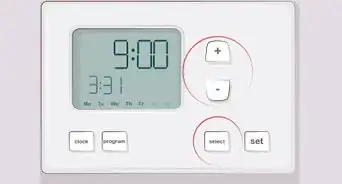
10Determine a location for the thermostat. The thermostat should be located on an interior wall. It should never be located above a heater or other heat source, or in a dead air space such as behind a door.
-
11Trace a switch box on the wall at 60 inches (152.4 cm) up from the floor for the thermostat where there are no framing members, etc. Cut the wall open with knife or hand saw.
-
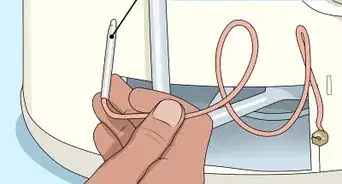
12Provide a 2 wire circuit (#14 for 15 amp circuit or #12 for 20 amp circuit) of NM type (Romex) or similar cable from the electrical panel to the thermostat location. This may require fishing or snaking of the cable between the points, and will probably be most time consuming. For this reason, many times a single heater sized to heat the entire space is often selected so that fishing or snaking is minimized. Indicate this cable as the "LINE" so it can be determined as such after it has been installed in the box for the thermostat.
-
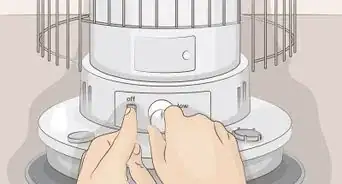
13Unpack the heater(s). Examine the heater(s) and remove BOTH front covers from both ends of each heater. Place the heater(s) against the wall at the desired location.
-
14The two ends are wiring compartments. Because they are provided, no box(es) need be installed in the wall. Simply create a small hole in the wall for the cable from which to emerge and pass through appropriate connectors at the back of one of the compartments to allow the cables to enter. Connections are to be made in the compartments. This is detailed below.
-
15Provide another 2 wire cable the same size as the one installed earlier between the panel and thermostat, between the thermostat and the baseboard heater. Indicate this cable as the "LOAD" so it can be determined as such after it has been installed in the box for the thermostat.
-
16Install an additional 2 wire cable between the first heater and next heater. Continue to daisy-chain between successive heaters as needed.
-
17Install the appropriate cable connector in the desired end of the heater(s).
-
18Strip 8 inches (20.3 cm) of jacket from the cable(s) and install into the connector. Push the cable into the connector until 1⁄2 inch (1.3 cm) of the jacket is inside the wiring compartment.
-
19Remove the wirenut from the heater wires in the compartment that the cables entered, and separate the wires.
-
20Connect the black wires of the cables you installed together if two cables were installed.
-
21Connect the white wires of the cables you installed together if two cables were installed.
-
22Connect the bare wires of the cables you installed together if two cables were installed.
-
23Connect the bare wire(s) to the green screw of the heater or, if provided, to the green or bare wire that is connected to the heater case by crimp or screw.
-
24Connect one of the loose heater wires (does not matter which) to the black wire(s).
-
25Connect the remaining loose heater wire to the white wire(s).
-
26Make sure the wirenut in the wiring compartment at the opposite end of the heater has the wires tightly connected together.
-
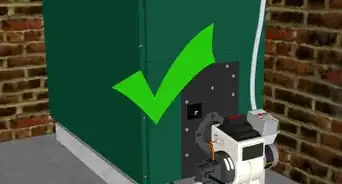
27Secure the heater to the wall.
-
28Secure the wiring compartment covers.
-
29Repeat for each heater.
-
30Wire the thermostat. Connect ALL the bare and any green wires together with a wirenut. Install a short piece (8") of bare wire between the bare and green wires to the green screw on the thermostat if it is not already connected.
-
31The thermostat has (4) wires or terminals. Carefully inspect the thermostat for "LINE" and/or "LOAD" markings.
-
32Connect LINE side to the black and white wires of the cable that was indicated as "feed" earlier. Each of the black and white wires from the panel must connect to one LINE wire or terminal. Under no circumstances should the black and white wire from the panel be connected together.
-
33Connect the remaining cable to the LOAD side of the thermostat. Connect it in the same manner as the LINE side.
-
34Coil the wires, never fold, into the back of the box and secure the thermostat.
-Step-1.jpg)
-Step-2.jpg)
-Step-3.jpg)
-Step-4.jpg)
-Step-5.jpg)
-Step-6.jpg)
-Step-7.jpg)
-Step-8.jpg)
-Step-9.jpg)
-Step-10.jpg)
-Step-11.jpg)
-Step-12.jpg)
-Step-13.jpg)
-Step-14.jpg)
-Step-15.jpg)
-Step-16.jpg)
-Step-17.jpg)
-Step-18.jpg)
-Step-19.jpg)
-Step-20.jpg)
-Step-21.jpg)
-Step-22.jpg)
-Step-23.jpg)
-Step-24.jpg)
-Step-25.jpg)
-Step-26.jpg)
-Step-27.jpg)
-Step-28.jpg)
-Step-29.jpg)
-Step-30.jpg)
-Step-31.jpg)
-Step-32.jpg)
-Step-33.jpg)
-Step-34.jpg)
Advertisement
Community Q&A
-
QuestionCan I install the heaters directly on the carpet, or do they have to be installed a distance above and secured to the wall?
 Debra BishCommunity AnswerThe casing is normally mounted along the wall above the floor, and the heater pipe is installed inside a few inches above the floor level. The heat shield (casing) keeps the heat adequately away from the carpeting. (You should read and follow all manufacturer's installation instructions and guidelines though.)
 -
QuestionIs a double pole breaker always used for a baseboard heater?
 Community AnswerIt really depends on the baseboard heater you intend to install. Baseboard heaters are typically designed for either 120V or 208/240V applications. You need a double-pole if you have a 208/240V heater and a single-pole if you have a 120V heater. On a typical residential wiring (14 AWG), a 240V circuit allows you to connect heaters up to 2880W (240W*15A*.8) while you can only connect up to 1440W (120V*15A*0.8) on 120V. If you have a 120V heater with wattage under 1440W, you can keep a single-pole breaker. You can install 208/240V heater on a 120V circuit, but it will only produce approximately 1/4 of the heat. Connecting a 120V heater on 240V will trip the high-limit switch and cause a fire.
 -
QuestionCan I put furniture in front of a baseboard heater?Debra BishCommunity AnswerYou can, but if it's a large piece of furniture, such as a couch, you should pull it away from the heater about 4-6 inches so that the heat can flow into the room properly.
Advertisement
Warnings
- These circuits typically operate at 240 volts. This is a deadly voltage.⧼thumbs_response⧽
- The first time the heaters are powered, the room windows should be opened, and door(s) to the rest of the building, closed. The heaters will burn off a small amount of protective oils and may even have a very small amount of visible smoke. This is completely normal and will not happen again if allowed to burn off completely (5 minutes).⧼thumbs_response⧽
Advertisement
Things You'll Need
- Deep electrical box (or 4 inch square box and a single device ring) for each thermostat.
- 12 or 14 gauge 2 wire and ground cable (often called "12/2 or 14/2 with Ground" romex)
- Snake or fish tape
- Electric baseboard heaters
- 2 Pole line voltage thermostat
- Cable connectors
- Wirenuts


About This Article
Advertisement