This article was co-authored by Mark Spelman. Mark Spelman is a General Contractor based in Austin, Texas. With over 30 years of construction experience, Mark specializes in constructing interiors, project management, and project estimation. He has been a construction professional since 1987.
wikiHow marks an article as reader-approved once it receives enough positive feedback. In this case, 89% of readers who voted found the article helpful, earning it our reader-approved status.
This article has been viewed 873,260 times.
Baseboards cover the joints between the walls and the floor and add an essential finishing touch to a room. An adventurous homeowner can learn to cut and install baseboards for their own home, making them a perfect DIY project. To remove old baseboards and install new ones, learning how to measure and which cuts to make, read the following instructions.
Steps
Removing Old Baseboard Trim
-
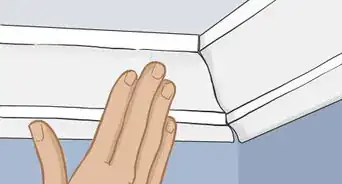
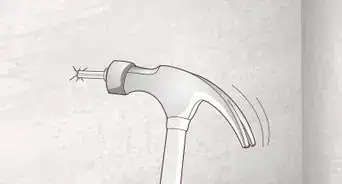
1Use a utility knife to cut through caulking or paint along the top edge of the trim. If you don’t do this, you’re likely to chip the surrounding paint or drywall.
-
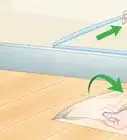
2Use a pry bar to loosen the trim from the wall. Do this gently to avoid damaging the wall and floor. If necessary, use another object like a screwdriver or a grouping of shims to help the process along.Advertisement
-
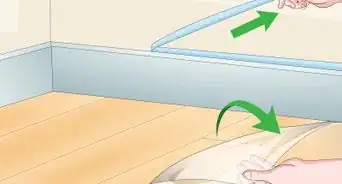
3Pull the trim away. Most of the nails should come with it, but if necessary, remove any still sticking into the wall. Scrape and sand away any glue or caulking that may obstruct the new baseboard installation.
Measuring and Cutting Baseboard Trim
-
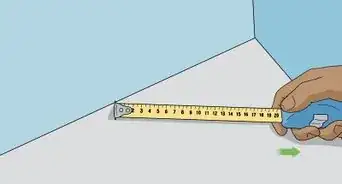
1Measure the perimeter of the room(s). Measure the dimensions of each straight wall, rounding up slightly. Especially for beginners, give yourself leeway and cut slightly more than is necessary for a tight fit. Remember, it's always possible to cut off, but not always possible to add back on.
- Measure each wall at least twice to get the most accurate measurements possible.
- When measuring outside corners, be sure to add additional room to your measurements to allow for outside corners. You'll want at least the width of your baseboard in extra room, possibly a bit more.
-
2Select and purchase your materials. Buy more trim than your measurements call for to allow for scrap ends and for the inevitable mistake or two in measuring and cutting. Some people use a 10% excess estimate, but usually just buying an extra stock length or two will do. If possible, buy the baseboards and bring them inside one week before installation to allow them to acclimate to their new environment.[1]
- There are typically three components to most baseboard installations, depending on the type of project. Moving from top to bottom, they include:
- The cap molding. These moldings fit on top of the baseboards to add a detailed and ornamental flourish. They are typically only needed if you have wainscot paneling.
- The baseboard. Usually at least 3.5–6 inches (8.9–15.2 cm) high, they are predominantly flat and form the bulk of the baseboard.
- The shoe molding. Another ornamental detail at the bottom, between the baseboard and the floor, they complete the look. Shoe molding is typically used when you are retrofitting or putting down new flooring.
- There are typically three components to most baseboard installations, depending on the type of project. Moving from top to bottom, they include:
-
3Establish level on your floor. You want to make sure your floors are level, or the floor could peek out of your baseboard at certain points and look off. Use a 4-foot level to establish whether the floor is level.
- If the floor is not level, use the level to find the lowest point in the room. Tack a scrap piece of baseboard to the wall at the lowest point. Make horizontal marks every couple of inches in either direction starting at the top of the baseboard, being sure to stay level with this line. Once a few horizontal marks are established, snap a chalk line over the horizontal marks. This will show where the top of the baseboards will stand when they are installed.[2]
-
4Scribe the baseboards. If you are putting in shoe molding, you should make sure that the top of the baseboards are completely level with your chalk line. To do this, you'll want to scribe them. Tack a piece of baseboard to an inside corner with one or two nails after leveling it. Keep the bottom of the baseboard slightly above the floor. Use a compass to measure the distance between the chalk line (on the bottom) and the top corner of your tacked baseboard.
- Keeping your compass spread rigid, hold the point-side of the compass on the floor and the pencil-side on the baseboard. Move the pencil across the entire distance of the baseboard to trace an outline.
- Use a table saw or a jigsaw to cut along the scribed line on the baseboard. If you have a circular saw, set a slight (2° - 5°) bevel on the cut. This will make scribe-fitting much easier in the end.
- With a block plane, plane down the beveled edge of the baseboard. Then dry-fit the baseboard back onto the floor and make sure it lines up evenly with the chalk line on your wall.
-
5Start by measuring and cutting your outside corners. Cutting miter joints is critical wherever two pieces of trim meet around an outside corner. A power miter saw is the ideal tool for these due to ease of use and efficiency. If your corner forms a 90º angle, cut each piece at a 45º angle and match them to form an outside corner. When in doubt, make the cuts a little longer than you need; you can always shorten it if necessary.
Alternative tools:
Miter box and hand saw: a cheap but effective option. Clamp the wood securely to the box. Cheaper models only allow cuts at common angles.
Circular saw and speed square: Fast but inaccurate. Not recommended for baseboard. -
6Decide whether to miter or cope your inside corners. For inside corners, the process of mitering is the same as it is for outside corners, except that the angles are reversed. But not all carpenters want to miter inside corners, because the corners are rarely perfectly square and the resulting joint can be sloppy.[3] If you're looking for a tighter fit or you're installing baseboards which won't take paint or additional caulking, learn how to cut a traditional coped joint.
- The process is actually fairly simple. Start with a 45° inside cut on the baseboard you want to cope. The other end of the baseboard won't need to be cut at all; the coped joint will simply cover up the remaining piece of baseboard.
- Use a coping saw to cut away the angled profile made by your initial 45° cut. The goal here is to leave the paint line intact but cut at a 45° back angle to clear away wood behind the paint line. Go slowly so that you can follow the profile accurately.
- Sand away any excess rough patches or debris to smooth out the coped seam.
Alternative tools:
Miter saw: coping with a miter saw is fast but difficult. Practice on scrap wood first, and clean up the rough cut with a file.
Dremel: a little more difficult to use than a coping saw, but up to the job. Use a carbide cutting or shaping wheel attachment.[4] -
7Deal with any other miscellaneous pieces. In theory, most projects involve rooms that have three or four walls and corners that are perfectly square. In practice, this is rarely the case. Here are some important niche cases for you to consider when cutting baseboard:
- Odd-corner pieces. Where you encounter corners that don’t form ninety-degree angles, use scrap material for trial-and-error fitting until you find the correct angle cut. Then, use that setting on your saw to cut your trim.
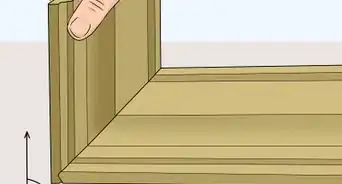
- Mid-wall pieces. It’s likely that you will have to use more than one piece of baseboard to cover very long walls. Instead of simply butting flat ends up against one another, which may separate with time as the wood shrinks, cut both pieces at overlapping 45-degree angles (to fit together like so // ) so that the wood shrinkage will be less visible.
- End pieces. If the baseboard butts into something and doesn’t need to continue around any corners (ex. it runs into a door casing), simply cut it and scoot it up against the object.
-
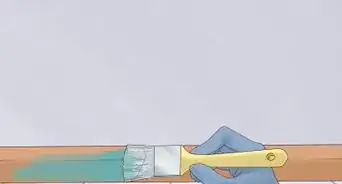
8Sand and prime the baseboards. Once you've scribed and cut your baseboard angles, you may want to sand and prime. If you’ve chosen primed materials, doing your sanding before installation will save you a lot of time on your hands and knees. If you’ve selected bare wood materials, stain or paint them with a primer, allow to dry, and then sand before installing.
Installing the Baseboard and Finishing Up
-
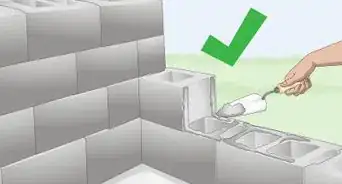
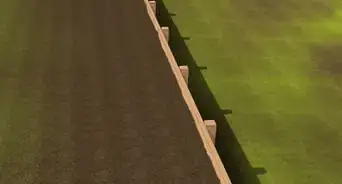
1Nail the baseboards in place with finishing nails. Use a stud finder to locate wall studs to nail into; alternatively, knock on the wall to differentiate the hollow areas from the studs. Sink two nails into every stud below the surface with a downward angle on a nail set, or by using a nail gun. Fill all the nail holes with putty, allow to dry, and sand.
- On outside corners, apply a thin bead of wood glue or adhesive to mitered edges to ensure a better bond.
- On inside corners, adhesive is not necessary if you've properly coped your baseboards.
-
2Install shoe molding and cap molding if necessary. Tack the shoe molding down into the floor with pin nails. If you have concrete floors, you will need to tack it into the baseboard. Tack the cap molding into studs wherever possible.
-
3Apply caulking to sections of molding in wet places. Caulk not only along the top edge, but over and corner edges and nail holes. Doing this in the bathroom is a must. If you fear spilling or dripping, you might also consider caulking the baseboards directly below the kitchen sink.
-
4Touch up the trim with Spackle. Cover all the nail holes as well as any scuffs or dings with a bit of Spackle using your finger. The Spackle should dry up very quickly.
-
5Tape the wall and floor above and below the trim (optional). This will allow you to paint the trim quickly without going over the edges. Use something that pulls off easily and doesn’t leave residue, such as blue painter's tape. You can also take your chances and paint freehand.
-
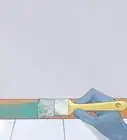
6Apply your finish coat. Trim is usually finished with a gloss or semi-gloss paint or varnish. This is exacting and slow work, so be sure to have a good kneeling pad on hand. If your baseboards are already painted, you only need to worry about this step if you want to apply varnish. No matter what you are using, always apply two coats of it.
Expert Q&A
Did you know you can get expert answers for this article?
Unlock expert answers by supporting wikiHow
-
QuestionWhat is the approximate labor cost for installing 25 linear feet of baseboard?
 Mark SpelmanMark Spelman is a General Contractor based in Austin, Texas. With over 30 years of construction experience, Mark specializes in constructing interiors, project management, and project estimation. He has been a construction professional since 1987.
Construction ProfessionalSince this is a small volume, you can not price it per foot. You should figure out an hourly rate for the job instead.
Support wikiHow by unlocking this expert answer.
-
QuestionHow should the baseboard be cut when it butts up to a brick hearth?Mark SpelmanMark Spelman is a General Contractor based in Austin, Texas. With over 30 years of construction experience, Mark specializes in constructing interiors, project management, and project estimation. He has been a construction professional since 1987.
Construction ProfessionalIn this instance, you will need to cut out the profile of the wall or scribe it.Support wikiHow by unlocking this expert answer.


References
- ↑ http://www.thisoldhouse.com/toh/how-to/overview/0,,216118,00.html
- ↑ http://www.thisoldhouse.com/toh/how-to/step/0,,216118_147971,00.html
- ↑ http://www.familyhandyman.com/carpentry/trim-carpentry/how-to-cope-joints/view-all
- ↑ https://www.dremel.com/en-us/videosandhowto/projects/Pages/detail.aspx?pcpid=16#.VzKxC2aGYwA
About This Article

Before you install new baseboards, remove any existing trim, then measure the perimeter of the room. Start by measuring and cutting your outside corners into miter joints, or 45° angles that will match up to form a 90° angle. For inside corners, you can either miter them or cut one board to a 45° angle and use that to cover the other board. Use finishing nails to secure the baseboards to the studs around the room. Keep reading for tips on installing shoe and cap molding from our contracting reviewer!