This article was co-authored by Saul Jaeger, MS. Saul Jaeger is a Police Officer and Captain of the Mountain View, California Police Department (MVPD). Saul has over 17 years of experience as a patrol officer, field training officer, traffic officer, detective, hostage negotiator, and as the traffic unit’s sergeant and Public Information Officer for the MVPD. At the MVPD, in addition to commanding the Field Operations Division, Saul has also led the Communications Center (dispatch) and the Crisis Negotiation Team. He earned an MS in Emergency Services Management from the California State University, Long Beach in 2008 and a BS in Administration of Justice from the University of Phoenix in 2006. He also earned a Corporate Innovation LEAD Certificate from the Stanford University Graduate School of Business in 2018.
There are 11 references cited in this article, which can be found at the bottom of the page.
This article has been viewed 28,167 times.
Security cameras are a great way of keeping an eye on things when you’re not physically around. However, you may think you wouldn’t know the first thing about installing security cameras if you’ve never done it before. Fortunately, once you know the basics of selecting the right equipment, choosing the best location, and actually mounting them, installing security cameras is a breeze!
Steps
Selecting the Right Equipment
-
1Go with wireless cameras for an easy installation process.[1] Battery-powered cameras that use WiFi to transmit their footage are the easiest to install, since there’s much less equipment and wiring to deal with. This is also the best option if you only need 1 or 2 cameras instead of a larger system.[2]
- The footage from these cameras is also wirelessly stored, usually in some kind of cloud. This means you don’t have to worry about setting up a DVR storage device.
- The major downside of wireless cameras is that they require consistently strong WiFi in order to work properly. Because they’re battery-operated, their batteries also need to be replaced from time to time.
-
2Opt for wired cameras for reliable connections and power. Although they’re a bit more complicated to install, cameras that use wiring to attach to a power source and to their storage device are more reliable than wireless cameras. These are best for creating a security camera system somewhere with good wiring infrastructure, such as a home or office building.[3]
- Note that wired cameras tend to be more expensive than wireless cameras, given the extra equipment. However, with DVR storage, you’re also able to avoid any subscription fees that may be required for storing footage wirelessly in a cloud.
- Because they need to be installed near an outlet or other power source, wired cameras aren’t as versatile as wireless cameras when it comes to where they can be installed.
Advertisement -
3Get a camera system with alerts so you can be notified of any issues. If you don’t plan to have someone constantly monitoring the video feed from your cameras, receiving notifications when the camera detects motion is the only way to know about security events as they’re happening. These alerts can usually be sent to both you and to a professional monitoring service.[4]
- This service will contact you regarding the security event and will alert law enforcement if necessary.
- Most camera systems that include notifications will also be accessible via a smartphone app that you can use to monitor the video feed from anywhere.
-
4Be sure to go with night-vision cameras if they’ll be used in the dark. Otherwise, if the camera is pointed toward a location without any lighting, it won’t be able to pick up any activity that goes on there. This is especially important if you plan to install your security cameras outdoors.[5]
- Note that cameras with night vision may be rendered ineffective by bright lights, so be sure not to install them near a street lamp or other source of light.
-
5Choose cameras with wide fields of view for greater security. The larger the field of view, the more your camera will be able to pick up. For best results, go with a camera with either a 180-degree lens or with pan and tilt functionality.[6]
-
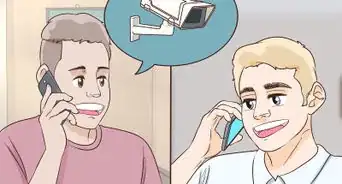
6Use online reviews and recommendations to judge camera quality. There are plenty of websites dedicated to comparing and reviewing different security cameras that you can use to compare different available cameras and determine which is the best. Search “security camera review” to find these sites. If you have a specific camera model in mind, search for the name of that camera plus “review” in order to find more relevant results.[7]
- For best results, read 2-3 different review sites to see if a particular camera model is consistently rated well. If its ratings are the same across multiple sites, it’s probably a consistently high-quality camera.
- If you personally know anybody who has bought a security camera, ask them for their recommendation as well.
-
7Avoiding opting for the cheapest camera just to save money. Usually, the quality of a security camera is reflected in its price. If it’s a relatively inexpensive model, this most likely means that it’s not as high-quality or as effective as other security cameras.[8]
- That being said, don’t simply buy the most expensive camera you can find. Base your judgment on what features the camera has and on how others have reviewed it.


Choosing Where to Install Your Cameras
-
1Place cameras by doors to your house if your main concern is security. Most burglars attempt to enter houses through either the front door or a side entrance, so these are the best spots to place cameras to catch or deter potential home invaders. Place the cameras so that they are high above the doors facing outwards in order to see would-be burglars’ faces.[9]
- Roughly 34% of burglars attempt to enter homes through the front door, so if you only have 1 camera, your best bet is to place it at the main entrance of your house.
-
2Position cameras above the garage or driveway to watch your car. Have the camera face your car, whether you keep it in the garage or in the driveway. Placing a camera in your garage will also cover another potential entrance to the inside of your house, giving you even greater security.[10]
- If you keep a lot of valuable equipment or items in your garage, be sure to place a camera inside the garage even if you don’t keep your car in it.
-
3Put cameras in common gathering areas to monitor people in your home. Place cameras over the living room, kitchen, dining room, and anywhere else that people tend to congregate when inside the house. This is especially useful for keeping an eye on children, babysitters, or guests in your home while you’re away.[11]
- Prioritize any rooms that have large windows that face outside, since these may also be used by potential burglars to break into your home.
-
4Install a camera near your pet’s sleeping area to keep an eye on them. This is really only necessary if you have a pet that spends a lot of time somewhere other than the common gathering areas in your home. If you don’t have a pet, feel free to skip this step.[12]
-
5Avoid putting cameras in bedrooms or bathrooms. Although you may feel the best way to keep your children safe is to be able to watch them in their rooms, areas like bedrooms and bathrooms have a warranted expectation of privacy that security cameras would undermine. If you’re particularly concerned about your children’s safety, consider alternatives to security cameras such as baby monitors and glass break sensors.[13]
- If you’re worried about the health of a senior, consider investing in a personal medical alert system instead of a security camera. This will allow the senior to directly contact emergency services if they’re needed.
Warning: Note that you should also refrain from installing security cameras anywhere that might infringe on your neighbors’ privacy. You may run into legal trouble by recording your neighbors without their knowledge or consent.


Mounting and Wiring Your Camera
-
1Opt for a high vantage point wherever possible to protect the camera. Place the camera about 9 to 10 feet (2.7 to 3.0 m) off the ground in order to prevent people from being able to tamper with it. However, don’t put the camera too high or else you may not be able to adequately see people with it.[14]
- Wherever you opt to mount the camera, be sure it’s in a location where you can access it to make repairs later on.
-
2Make sure your planned camera location is near an outlet if it’s wired. You’ll need to be able to run the power cable from the camera to a nearby outlet or other source of power. Measure the power cable that comes with the camera to know how near to an outlet the camera needs to be placed.[15]
- For example, if the power cable measures about 6 feet (1.8 m), then the camera will need to be mounted somewhere within about 5.5 feet (1.7 m) of a power outlet.
- Look around for outlets in locations you may not expect. For example, if you’re trying to install a camera in the garage, there may be an accessible power outlet on the ceiling.
-
3Use screws or an adhesive pad to mount your camera to the wall. Use a screwdriver or drill to attach the camera mount to the wall with the screws that came with it. If the camera came with an adhesive pad instead of screws, simply remove the plastic covering from the adhesive pad and place it on the wall. Hold it there for at least 30 seconds before removing your hand.[16]
- If you’re using screws to attach the mount to the wall, screw them into the stud behind the drywall for best results.
- If you’re installing a small hidden camera somewhere other than on the wall, feel free to skip this step.
-
4Attach your camera to an outlet or power source, if needed. Run the power cable from the video camera to the outlet you identified earlier. If you plan to keep your camera hidden from view, be sure to hide the power cable as well.[17]
- For example, run the cable behind a tall bookshelf or long poster if your camera is install indoors. If it’s outdoors, consider drilling a hole into the wall and running your power cable through this hole to a power source.
-
5Run video cables from your camera to the storage device, if applicable. If you bought a wired camera, it should have come with cables that are labeled “To Camera” and “To DVR” on either side. Plug these cables into your camera and DVR device by inserting the opposite ends of the cables into the devices indicated by their respective labels.[18]
-
6Repeat this process for any other cameras you plan to install. If you’re installing multiple cameras, be sure to angle them so that they all cover different areas of your home or business. This will minimize the amount of overlap between different camera feeds and make your home or business as safe as possible.[19]


References
- ↑ Saul Jaeger, MS. Police Captain, Mountain View Police Department. Expert Interview. 21 February 2020.
- ↑ https://www.newegg.com/insider/how-to-choose-best-surveillance-camera-home/
- ↑ https://www.newegg.com/insider/how-to-choose-best-surveillance-camera-home/
- ↑ https://www.cnet.com/topics/security-cameras/buying-guide/
- ↑ https://www.safewise.com/resources/home-security-cameras/
- ↑ https://www.cnet.com/topics/security-cameras/buying-guide/
- ↑ https://www.consumerreports.org/cro/home-security-cameras/buying-guide/index.htm
- ↑ https://www.businessinsider.com/best-security-camera-home
- ↑ https://www.safety.com/security-camera-installation/
- ↑ https://www.safety.com/security-camera-installation/
- ↑ https://www.safety.com/security-camera-installation/
- ↑ https://www.safety.com/security-camera-installation/
- ↑ https://www.safety.com/security-camera-installation/
- ↑ https://www.youtube.com/watch?v=kjypG0ww-4Y&feature=youtu.be&t=78#t=1m10s
- ↑ https://www.youtube.com/watch?v=kjypG0ww-4Y&feature=youtu.be&t=78#t=1m25s
- ↑ https://www.youtube.com/watch?v=-t0ZeZ4ebhQ#t=3m30s
- ↑ https://www.safety.com/security-camera-installation/
- ↑ https://www.youtube.com/watch?v=-t0ZeZ4ebhQ#t=4m
- ↑ https://www.safety.com/security-camera-installation/
About This Article