This article was co-authored by wikiHow staff writer, Nicole Levine, MFA. Nicole Levine is a Technology Writer and Editor for wikiHow. She has more than 20 years of experience creating technical documentation and leading support teams at major web hosting and software companies. Nicole also holds an MFA in Creative Writing from Portland State University and teaches composition, fiction-writing, and zine-making at various institutions.
This article has been viewed 28,058 times.
Learn more...
Want to add a custom skin to the Steam app? You can find and download tons of free Steam skins online, including anime skins and skins that match your Windows or macOS theme. When you find a skin you like, it just takes a few clicks to install it in your Steam skins folder and completely change the look of Steam. We'll show you how!
Steps
Windows
-
1Find skins to download. You can find lots of free Steam skins online. One popular download site is https://steamskins.org.
-
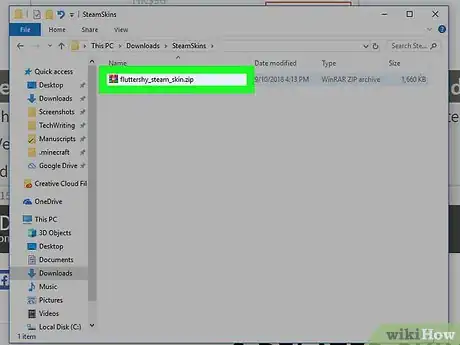
2Download the skin to your computer. Skins are usually compressed into .Zip or .Rar archives.
- Depending on your browser, you may have to select a download location. Select the Downloads folder and click Save.
Advertisement -
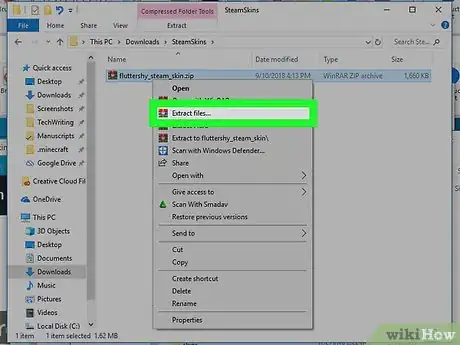
3Right-click the file you downloaded. You may have to open the Downloads folder if it’s not already open. A context menu will appear.
-
4Click Extract all….
-
5Select the Steam skins folder. This is usuallyC:/Program Files (x86)/Steam/skins. If you installed Steam in a different directory, click the Browse… button and select the “skins” folder in that directory now.
-
6Click Extract. The files will extract to the skins folder.
-
7Open Steam. You’ll usually find it under All Apps in the Start menu. If prompted to log in or input a Steam Guard code, follow the on-screen instructions to do so.
-
8Click the Steam menu. It’s at the top-left corner of Steam.
-
9Click Settings. It’s near the bottom of the menu.
-
10Click Interface. It’s in the left column.
-
11Click the down-arrow next to “default skin.” It’s near the center of the right panel.
-
12Select your new skin. All skins you’ve extracted to the skins folder will appear in this drop-down menu.
-
13Click OK. A confirmation message will appear at the center of the screen, asking you to restart the app.
-
14Click RESTART STEAM. The applications will shut down and restart with the new skin applied.
macOS
-
1Find skins to download. You can find lots of free Steam skins online. One popular download site is https://steamskins.org.
-
2Download the skin to your computer. Skins are usually compressed into .Zip or .Rar archives.
- Depending on your browser, you may have to select a download location. Select the Downloads folder and click Save.
-
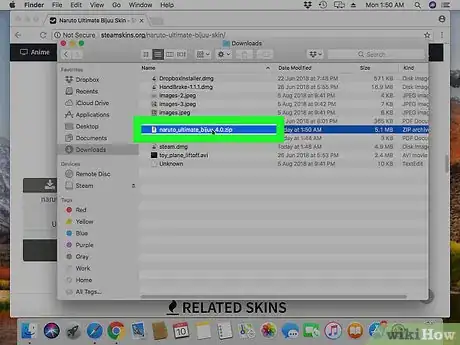
3Double-click the file you downloaded. You should find it in the Downloads folder. This extracts a new folder containing the skin files.
-
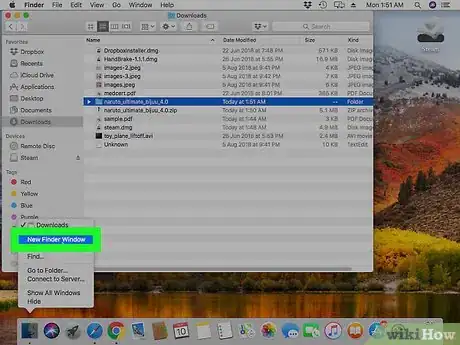
4Open a Finder window. You can do this by clicking the two-toned Mac logo in the Dock.
-
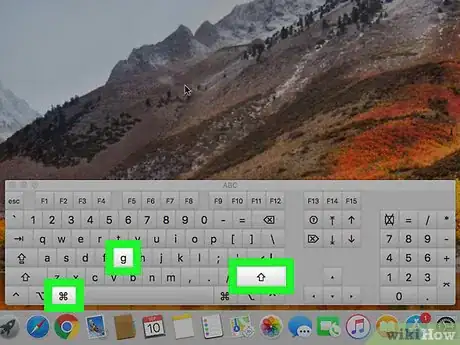
5Press ⌘ Cmd+⇧ Shift+G. A dialog will appear.[1]
-
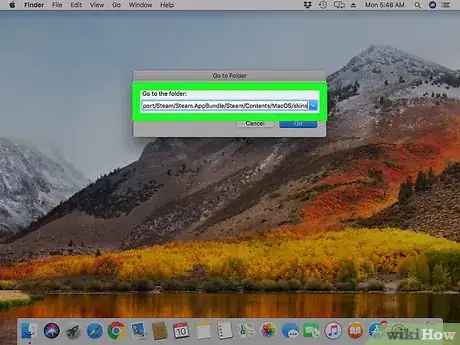
6Type ~/Library/Application Support/Steam/Steam.AppBundle/Steam/Contents/MacOS/skins and press ⏎ Return. This opens the skins folder.
-
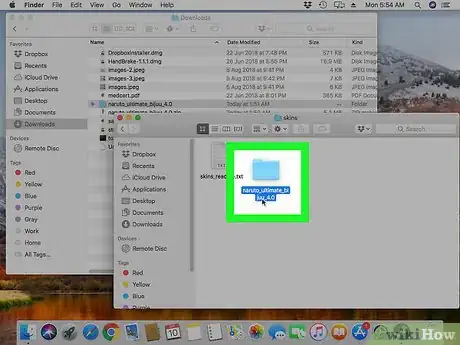
7Drag the extracted folder to the skins folder in Finder. Now that the skin files are in place, you can easily change the skin in the Steam app.
-
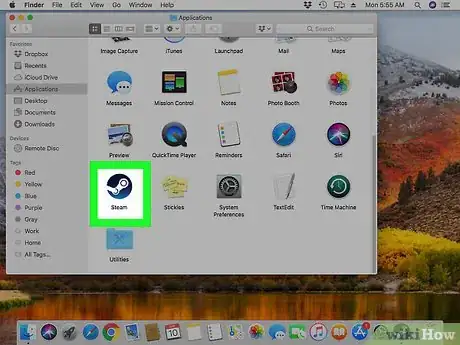
8Open Steam. It’s in the Applications folder and on the Launchpad. If prompted to log in or input a Steam Guard code, follow the on-screen instructions to do so.
-
9Click the Steam menu. It’s at the top-left corner of the screen.
-
10Click Preferences.
-
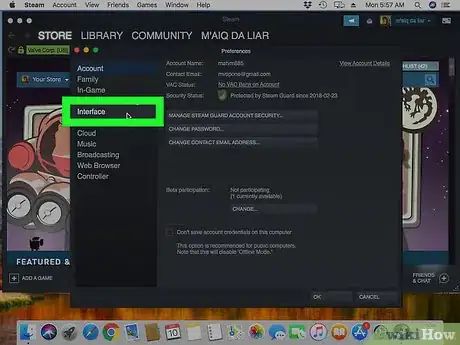
11Click Interface. It’s in the left column.
-
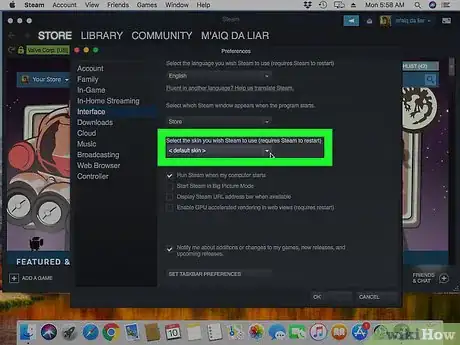
12Click the down-arrow next to “default skin.” It’s near the center of the right panel.
-
13Select your new skin. All skins you’ve extracted to the skins folder will appear in this drop-down menu.
-
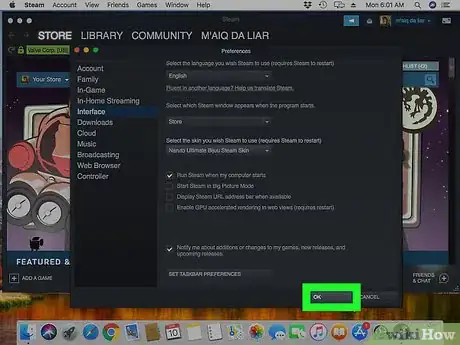
14Click OK. A confirmation message will appear at the center of the screen, asking you to restart the app.
-
15Click RESTART STEAM. The applications will shut down and restart with the new skin applied.


